Additional Functions
This document describes additional functionality available in the HYPR SDK.
This guide assumes you have already completed the Quick Start. Please ensure you have done so before continuing.
SDK for Android
ResetApp
This will deregister all the authenticators, delete the users and the App profiles, and create an empty App profile.
In the example below, first check to make sure that the HYPR Initialization is complete. Create a HyprApiActionData object and set the action to ResetApp. Then add that object to the Intent and launch the activity with the result code HYPR_ACT_RESET_APP_REQ_CODE.
The results are returned in the onActivityResult method. The result code is HYPR_ACT_RESET_APP_REQ_CODE.
void resetApp(Activity activity) {
    if (App.isHyprInitComplete()) {
        Intent intent = new Intent(activity, HyprActionActivity.class);
        HyprApiActionData apiActionData = new HyprApiActionData(HyprApiAction.ResetApp);
        intent.putExtra(HyprActivityResultData.INTENT_KEY_ACTION_DATA, apiActionData);
        activity.startActivityForResult(intent, HYPR_ACT_RESET_APP_REQ_CODE);
    }
}

// The result is returned here
@Override
public void onActivityResult(int requestCode,
                             int resultCode,
                             Intent data) {
    if (resultCode == HYPR_ACT_RES_CODE_SUCCESS) {
        if (requestCode == HYPR_ACT_RESET_APP_REQ_CODE) {
            // App Reset was successful
        }
    } else {
        if (requestCode == HYPR_ACT_RESET_APP_REQ_CODE) {
            // App Reset was not successful
        }
    }
}
Enabling Screenshots on the Android App
For security reasons, screenshots of the HYPR Authenticator screens are disabled. To enable them, add the following line to the <resources> section of overrides.xml in /<module_name>/src/main/res/values:
<?xml version="1.0" encoding="utf-8"?>
<resources>
    ...
    <string name="hypr_common_screenshot_override" translatable="false">true</string>
    ...
</resources>
For more information, see the Error Handling / Debugging.
Custom HTTP Headers
To send custom HTTP headers during HYPR operations such as registration, authentication, deregistration, etc., you will need to set the HTTP headers before performing the HYPR operation.
In the example below, the first check is to make sure that the HYPR Initialization is complete.
Create a map of your key/value pairs that you want sent in the header. Then pass that map into the setRpSendHeaders method.
Then perform the HYPR operation.
The results of the operation are returned in the onActivityResult method. At that point, you can retrieve the received headers as shown below:
void startRegistrationWithHeaders(Activity activity,
                                  String appProfileDbId) {
    if (App.isHyprInitComplete()) {
        try {
            // Create the map of key/value pairs that you want sent in the header.
            Map<String, String> sendHeaders = new HashMap<>();
            sendHeaders.put("Key1", "Value1");
            // Set the headers in the AppProfile that you are using.
            HyprAppProfileData hyprAppProfileData = App.getHyprDbAdapter().getAppProfileByDbId(MainActivity.this, appProfileDbId);
            hyprAppProfileData.setRpSendHeaders(activity, sendHeaders);

            // Normal start to a HYPR Operation.
            HyprApiActionAdapter.registerAuthenticatorsForAppProfile(activity, appProfileDbId);

        } catch (HyprException exception) {

            exception.printStackTrace();
        }
    }
}


@Override
protected void onActivityResult(int requestCode,
                                int resultCode,
                                   Intent data) {
    if (resultCode == HYPR_ACT_RES_CODE_SUCCESS) {
        // successful operation
        // retrieve the received headers
        try {
            // You will need to keep track of the appProfileDbId that you used
            // in the startRegistrationsWithHeaders method so that you can
            // retrieve the HyprAppProfileData which contains the
            // received headers.
            HyprAppProfileData hyprAppProfileData = App.getHyprDbAdapter().getAppProfileByDbId(MainActivity.this, appProfileDbId);
            Map<String, String> receivedHeaders = hyprAppProfileData.getRpReceiveHeaders();
            // Once the headers are retrieved then you will need to reset them.
            // You can reset the send/receive headers individually or all at once.
            // The are the options:
            hyprAppProfileData.resetRpSendHeaders(MainActivity.this);
            hyprAppProfileData.resetRpReceiveHeaders(MainActivity.this);
            hyprAppProfileData.resetRpAllHeaders(MainActivity.this);

        } catch (HyprException exception) {
            exception.printStackTrace();
        }

    } else {
        // operation failed
    }
}
SSL Pinning
To facilitate SSL Pinning, you must enable SSL Pinning and provide the SSL PIN in the CustomHyprDbAdapter that was created during the Quick Start. The changes below should be added.
// SSL Additions
appProfile().setSslOn(context, true);
appProfile().setSslPins(context, <List of SSL PINs>);
The complete class with those additions is shown here:
public class CustomHyprDbAdapter extends HyprDbAdapter {
    /**
     * Called after a new App Profile is created.
     * Put any DB customizations here for the new App Profile.
     *
     * @param context    current context
     * @param appProfile appProfile object that was just created
     */
    @Override
    public void onNewAppProfileCreated(@NonNull final Context context,
                                       @NonNull HyprAppProfileData appProfile) {
        // SSL Additions
        appProfile().setSslOn(context, true);
        appProfile().setSslPins(context, <List of SSL PINs>);
    }
}
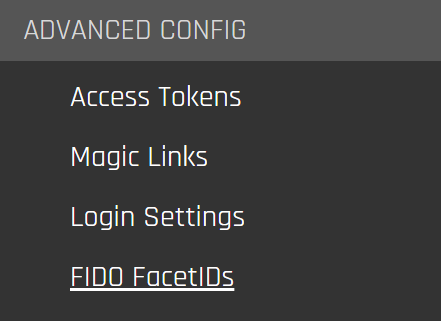
Obtaining the Android facetID
If the FIDO registration payload contains a value for the appID field (i.e., "[{\"header\":{\"op\":\"Reg\",\"appID\":\"<server URL>/HYPR/rest/conformance/facets, ...]";), the server requires the Android facetID for enrollment to work. To obtain the facetID, you must enable logging. Follow the instructions from the Error Handling / Debugging page to enable logging and search for facetId: in logcat.
-
Choose the desired App in the CC left navigation menu. Under Advanced Config, click FIDO FacetIDs.
-
Click Add to TCIs.

-
Add and label a Trusted Client Identifier (TCI).
Gathering Device and App Information
getDeviceManufacturer returns the device manufacturer.
public String getDeviceManufacturer() {
    return Build.MANUFACTURER;
  }
getDeviceModel returns the device model.
public String getDeviceModel() {
    return Build.MODEL;
  }
getOsVersion returns the mobile device operating system (Android 10, for example).
public String getOsVersion() {
    return "Android " + Build.VERSION.RELEASE;
  }
getPackageName returns the bundle identifier for the app.
public String getPackageName() {
    return getApplicationContext().getPackageName();
  }
getAppVersion shows the current version of the app.
public String getAppVersion() {
    String version = "";
    try {
      version = getApplicationContext().getPackageManager().getPackageInfo(getPackageName(), 0).versionName;
    } catch (PackageManager.NameNotFoundException e) {
      e.printStackTrace();
    }
    return version;
  }
getUniqueAppId reveals the random UUID generated to identify the device upon installation.
// This should be called when launching the app for the very first time
	public void createUniqueAppId() {
		String uniqueAppID = UUID.randomUUID().toString();
    // Save Unique ID in shared prefs or somewhere else
  }

	public String getUniqueAppId() {
    // Return Unique ID from where it was stored
  }
getIpAddress returns the device's private IP address.
public String getIpAddress() {
    final String[] ipAddress = {""};

    try {
      Thread thread = new Thread(new Runnable(){
        public void run() {
          try {
            ipAddress[0] = InetAddress.getLocalHost().getHostAddress();

          } catch (UnknownHostException e) {
            e.printStackTrace();
          }
        }
      });
      thread.start();
      thread.join();

    } catch (InterruptedException e) {
      e.printStackTrace();
    }

    return ipAddress[0];
  }
Geolocation
Retrieve the device's current location in latitude and longitude coordinates. To use geolocation functionality, follow these steps:
- Add the following dependency to your project:
dependencies {
  implementation 'com.google.android.gms:play-services-location:17.0.0'
}
- Add the following permissions to
AndroidManifest.xml:
<uses-permission android:name="android.permission.ACCESS_COARSE_LOCATION"/>
<uses-permission android:name="android.permission.ACCESS_FINE_LOCATION"/>
- Once those are added, use this code to obtain the device's current location:
public String getLocationJson() {
    Location location = getLastLocation();
    if (location != null) {
      return "{\"latitude\":\"" + location.getLatitude() + "\", \"longitude\":\"" + location.getLongitude() + "\"}";
    }
    return "";
  }

  @SuppressLint("MissingPermission")
    private Location getLastLocation() {
    if (checkPermissions()) {
      if (isLocationEnabled()) {
        LocationManager manager = (LocationManager) getSystemService(Context.LOCATION_SERVICE);

        if (manager != null) {
          manager.requestSingleUpdate(LocationManager.GPS_PROVIDER, new LocationListener() {
            @Override
              public void onLocationChanged(Location location) {

            }

            @Override
              public void onStatusChanged(String provider, int status, Bundle extras) {

            }

            @Override
              public void onProviderEnabled(String provider) {

            }

            @Override
              public void onProviderDisabled(String provider) {

            }
          }, null);
          return manager.getLastKnownLocation(LocationManager.GPS_PROVIDER);
        }

      } else {
        Toast.makeText(getBaseContext(), "Turn on location", Toast.LENGTH_LONG).show();
        Intent intent = new Intent(Settings.ACTION_LOCATION_SOURCE_SETTINGS);
        startActivity(intent);
      }
    } else {
      requestPermissions();
    }
    return null;
  }

  private boolean checkPermissions() {
    if (ActivityCompat.checkSelfPermission(this, Manifest.permission.ACCESS_COARSE_LOCATION) == PackageManager.PERMISSION_GRANTED &&
        ActivityCompat.checkSelfPermission(this, Manifest.permission.ACCESS_FINE_LOCATION) == PackageManager.PERMISSION_GRANTED) {
      return true;
    }
    return false;
  }

  private void requestPermissions() {
    ActivityCompat.requestPermissions(
      this,
      new String[]{Manifest.permission.ACCESS_COARSE_LOCATION, Manifest.permission.ACCESS_FINE_LOCATION},
      PERMISSION_ID
    );
  }

  private boolean isLocationEnabled() {
    LocationManager locationManager = (LocationManager) getSystemService(Context.LOCATION_SERVICE);
    if (locationManager != null) {
      return locationManager.isProviderEnabled(LocationManager.GPS_PROVIDER) || locationManager.isProviderEnabled(
        LocationManager.NETWORK_PROVIDER
      );
    } else {
      return false;
    }
  }

  @Override
    public void onRequestPermissionsResult(int requestCode, String[] permissions, int[] grantResults) {
    super.onRequestPermissionsResult(requestCode, permissions, grantResults);
    if (requestCode == PERMISSION_ID) {
      if (grantResults.length > 0 && grantResults[0] == PackageManager.PERMISSION_GRANTED) {
        getLastLocation();
      }
    }
  }
SDK for iOS
Reset an App
Fully delete the App profile and all the users registered under the App profile. This will remove all features associated with the Application Profile, including (but not limited to) policies, users, devices, tokens, and associated endpoints.
HYPRUserAgent.resetUserAgent(with: .full) { (error) in
  if let error = error {
    // Handle the error
  }
  // Full Reset was completed
}
Locally delete the App profile and all the users registered under the App profile. The device is cleared of all locally stored registrations associated with the App Profile. The App and any other associated data in the CC are unaffected.
HYPRUserAgent.resetUserAgent(with: .local) { (error) in
  if let error = error {
    // Handle the error
  }
  // Local Reset was complete
}
Custom HTTPS Headers
Customize the information sent in a network request by adding custom HTTPS headers. Custom headers can be added to registration, authentication, and deregistration requests. To send and receive headers, create an object that conforms to the HYPRCustomHeadersAdapter protocol and set that object as the CustomHeadersDelegate via HYPRUserAgent.setCustomHeadersDelegate(<delegate object here>).
Sending Custom Headers
Add custom headers to your requests:
customHeaders(forUserInfo userInfo: [String : String] = [:]) -> [AnyHashable : Any]?
Receiving Custom Headers
Process custom headers from the response:
processCustomHeaders(fromUserInfo userInfo: [String : String] = [:])
Integration
-
Within the
AppDelegatemethod, enable custom headers for theHYPRUserAgent.HYPRUserAgent.setCustomHeadersDelegate(self) -
Create the function to set custom headers for networking requests.
func customHeaders(forUserInfo userInfo: [String : String] = [:]) -> [AnyHashable : Any]? {

        guard let operation = userInfo[kHYPRCustomHeadersAdapterOperation], let phase = userInfo[kHYPRCustomHeadersAdapterPhase] else {
            print("invalid userInfo sent for custom headers")
            return nil;
        }

        switch operation {
        case kHYPRCustomHeadersAdapterOperationRegistration:
            switch phase {
            case kHYPRCustomHeadersAdapterPhaseInit:
                return <your custom headers which is a [String:String] dictionary>
            case kHYPRCustomHeadersAdapterPhaseComplete:
                return <your custom headers which is a [String:String] dictionary>
            default:
                print("invalid phase sent for custom headers")
            }
} -
Create the function to process custom headers for networking responses.
func processCustomHeaders(fromUserInfo userInfo: [String : String] = [:]) {
        print("Headers Received: \(userInfo)")
        return;
    }
Example
Below is a code example where AppDelegate conforms to the HYPRCustomHeadersAdapter protocol. The function customHeaders is used for adding a custom header; processCustomHeaders is used for processing headers from the response.
@UIApplicationMain
class AppDelegate: UIResponder, UIApplicationDelegate, HYPRCustomHeadersAdapter {
  internal func application(_ application: UIApplication, didFinishLaunchingWithOptions launchOptions: [UIApplication.LaunchOptionsKey: Any]?) -> Bool {
    // Other code is here
    HYPRUserAgent.setCustomHeadersDelegate(self)
  }

  func customHeaders(forUserInfo userInfo: [String : String] = [:]) -> [AnyHashable : Any]? {

        guard let operation = userInfo[kHYPRCustomHeadersAdapterOperation], let phase = userInfo[kHYPRCustomHeadersAdapterPhase] else {
            print("invalid userInfo sent for custom headers")
            return nil;
        }

        switch operation {
        case kHYPRCustomHeadersAdapterOperationRegistration:
            switch phase {
            case kHYPRCustomHeadersAdapterPhaseInit:
                return <your custom headers which is a [String:String] dictionary>
            case kHYPRCustomHeadersAdapterPhaseComplete:
                return <your custom headers which is a [String:String] dictionary>
            default:
                print("invalid phase sent for custom headers")
            }
        case kHYPRCustomHeadersAdapterOperationAuthentication:
            switch phase {
            case kHYPRCustomHeadersAdapterPhaseInit:
                return <your custom headers which is a [String:String] dictionary>
            case kHYPRCustomHeadersAdapterPhaseComplete:
                return <your custom headers which is a [String:String] dictionary>
            default:
                print("invalid phase sent for custom headers")
            }
        case kHYPRCustomHeadersAdapterOperationDeregister:
            switch phase {
            case kHYPRCustomHeadersAdapterPhaseInit:
                return <your custom headers which is a [String:String] dictionary>
            default:
                print("invalid phase sent for custom headers")
            }
        case kHYPRCustomHeadersAdapterOperationOOBSetup:
            switch phase {
            case kHYPRCustomHeadersAdapterPhaseInit:
                return <your custom headers which is a [String:String] dictionary>
            default:
                print("invalid phase sent for custom headers")
            }
        case kHYPRCustomHeadersAdapterOperationOOBRegistration:
            switch phase {
            case kHYPRCustomHeadersAdapterPhaseInit:
                return <your custom headers which is a [String:String] dictionary>
            default:
                print("invalid phase sent for custom headers")
            }
        case kHYPRCustomHeadersAdapterOperationOOBAuthorization:
            switch phase {
            case kHYPRCustomHeadersAdapterPhaseInit:
                return <your custom headers which is a [String:String] dictionary>
            case kHYPRCustomHeadersAdapterPhaseComplete:
                return <your custom headers which is a [String:String] dictionary>
            default:
                print("invalid phase sent for custom headers")
            }
        default:
            print("invalid operation sent for custom headers")
        }
        return nil;
    }

    // For receiving HTTP Headers in HYPR SDK calls
    func processCustomHeaders(fromUserInfo userInfo: [String : String] = [:]) {
        print("Headers Received: \(userInfo)")
        return;
    }
}
Enabling SSL Pinning
By default, HYPR SDK for iOS will enforce SSL pinning. Once SSL pinning is enforced, HYPRSSLPinCredential must be supplied to HYPRUserAgentProfileConfiguration. HYPRSSLPinCredential is made up of credential content (expected to be a base64-encoded string of a SHA256 hash of a DER-encoded public key) and algorithm (key algorithm with expected values: RSA_2048, RSA_4096, ECDSA_SECP_256_R1, ECDSA_SECP_384_R1. See HYPRKeyAlgorithmType). Otherwise, SSL pinning can be disabled by setting it to false.
Here is an example using AppDelegate.swift or AppDelegate.m:
func application(_ application: UIApplication, didFinishLaunchingWithOptions launchOptions: [UIApplicationLaunchOptionsKey: Any]?) -> Bool {
  HYPRUserAgent.setSSLPinningEnabled(true)
  let sslPinCredential = HYPRSSLPinCredential(content: "base64-encoded string of a SHA256 hash of a DER-encoded public key", algorithm: kHYPRKeyAlgorithmRsa2048)

  let config = HYPRUserAgentProfileConfiguration(rpAppId: "HYPRDefaultApplication",
                                                           rpServerUrl: "Place the RP URL here: i.e. https://9999-pov.hypr.com",
                                                           deviceType: "WEB or WORKSTATION"
                                                           rpSSLPinCredentials: sslPinCredential,
                                                           additionalData: nil,
                                                           authenticatorViewConfigurations: nil)
}
- (BOOL)application:(UIApplication *)application didFinishLaunchingWithOptions:(NSDictionary *)launchOptions {
  [HYPRUserAgent setSSLPinningEnabled:YES];
  HYPRSSLPinCredential *sslPinCredential = [[HYPRSSLPinCredential alloc] initWithContent:@"base64-encoded string of a SHA256 hash of a DER-encoded public key" algorithm:kHYPRKeyAlgorithmRsa2048];
  HYPRUserAgentProfileConfiguration *config = [[HYPRUserAgentProfileConfiguration alloc] initWithRpAppId:@"HYPRDefaultApplication"                                  rpServerUrl:@"Place the RP URL here: i.e. https://9999-pov.hypr.com"              rpSSLPinCredentials:sslPinCredential                                            additionalData:nil                                                                authenticatorViewConfigurations:nil];
}
Gathering Device and App Information
-
The
hyprDeviceIdentifiermethod returns the permanently stored universally unique identifier (UUID) used to identify the mobile deviceimport HyprCore
func deviceId() -> String {
return HYPRUserAgent.hyprDeviceIdentifier()
} -
The
mobileOSmethod returns the mobile device operating system; e.g., iOS 13.3.1func mobileOS() -> String {
return "iOS \(UIDevice.current.systemVersion)"
} -
The
appVersionmethod returns the version of the applicationfunc appVersion() -> String?{
let bundle = Bundle(for: AppDelegate.self)
return bundle.infoDictionary?["CFBundleShortVersionString"] as? String
} -
deviceModelreturns the iPhone Model Identifier; for example, iPhone 8 Plus will return iPhone 10.2func deviceModel() -> String {
var systemInfo = utsname()
uname(&systemInfo)
let machineMirror = Mirror(reflecting: systemInfo.machine)
return machineMirror.children.reduce("") { identifier, element in
guard let value = element.value as? Int8, value != 0 else { return identifier }
return identifier + String(UnicodeScalar(UInt8(value)))
}
} -
appIdentifierreturns the Bundle Identifier for the Appfunc appIdentifier() -> String? {
return Bundle(for: AppDelegate.self).bundleIdentifier
}