Okta: Manual Integration Using SAML
| Product: | HYPR Control Center, Okta |
| Applicable Version(s): | HYPR v1 or 2, On-premises |
This article provides a step-by-step introduction for configuring Okta to work with HYPR. In this guide HYPR will be setup as both a Security Assertion Markup Language (SAML) service provider (SP) and a SAML Identity Provider (IdP) for Okta.
The HYPR SAML-SP configuration is configured to allow users to authenticate with Okta into the HYPR Registration Portal.
The HYPR SAML-IdP configuration allows HYPR to act as a passwordless frontend for Okta. Users can authenticate with HYPR to get access directly into their Okta portal.
HYPR SP Configuration
-
Login to your Okta administration portal.
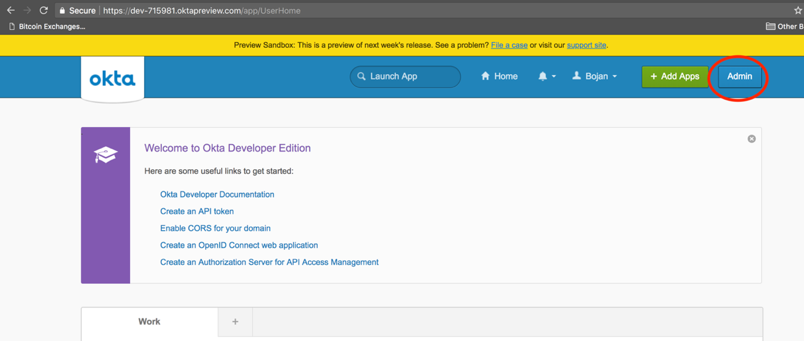
-
Click Applications on the top menu, then click Add Application.

-
On the Add Application screen, select Create New Application.
-
In the dialog that pops up, drop down Platform and select Web; choose SAML 2.0 as the Sign on method. Click Create.
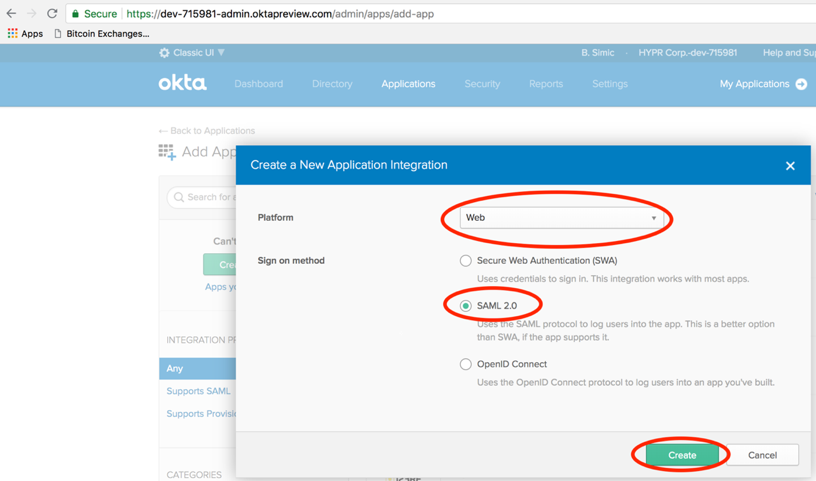
-
The Create SAML Integration dialog displays with General Settings selected by default. Name your app, and optionally provide an App logo, which will display as an icon in the user's portal. When you are finished, click Next.
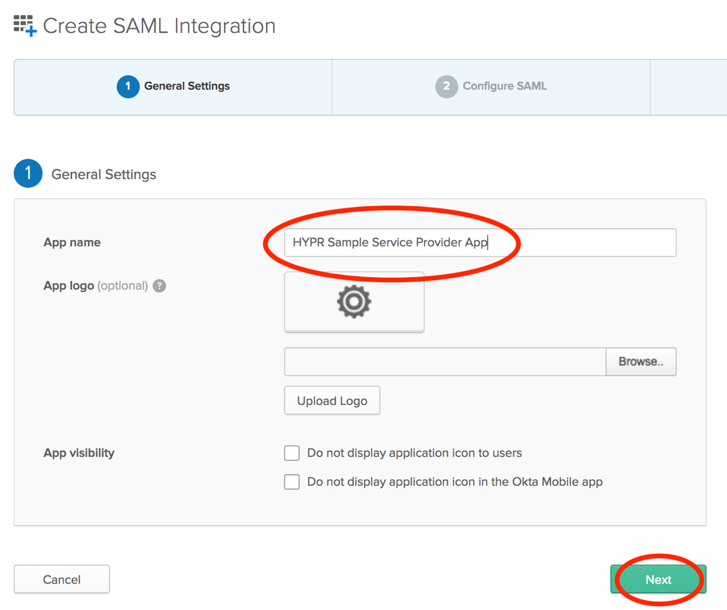
-
On the Configure SAML tab, enter the HYPR Single Sign On URL. This will be your HYPR environment URL with
/hyprsp/saml/SSOat the end. An example of this ishttps://example.hypr.com/hyprsp/saml/SSO. This is the URL that consumes SAML messages on the HYPR Service Provider. Provide the Audience URI/SP Entity ID. For HYPR this will behttp://mock-sp. Leave all other options with their default settings. Click Next.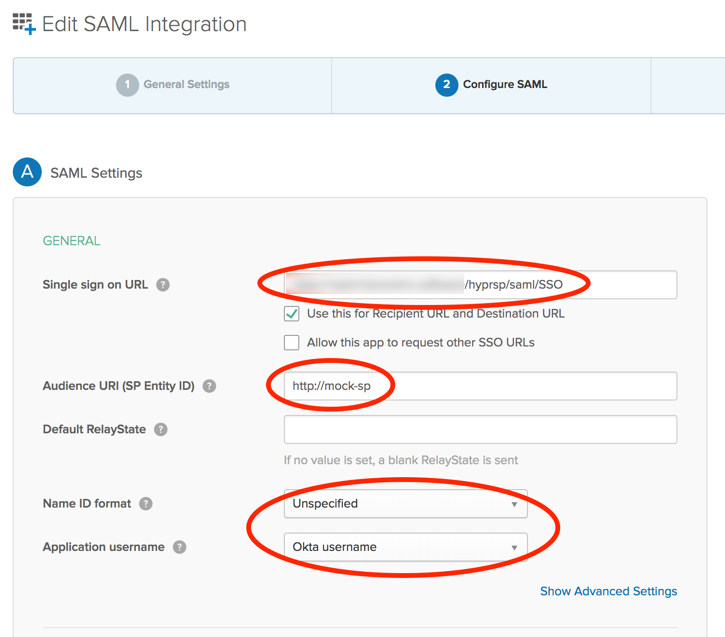
-
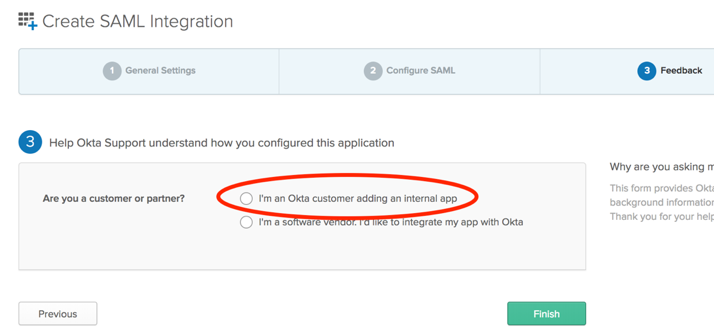
Are you a customer or partner? Select I'm an Okta customer adding an internal app. Click Finish.
-
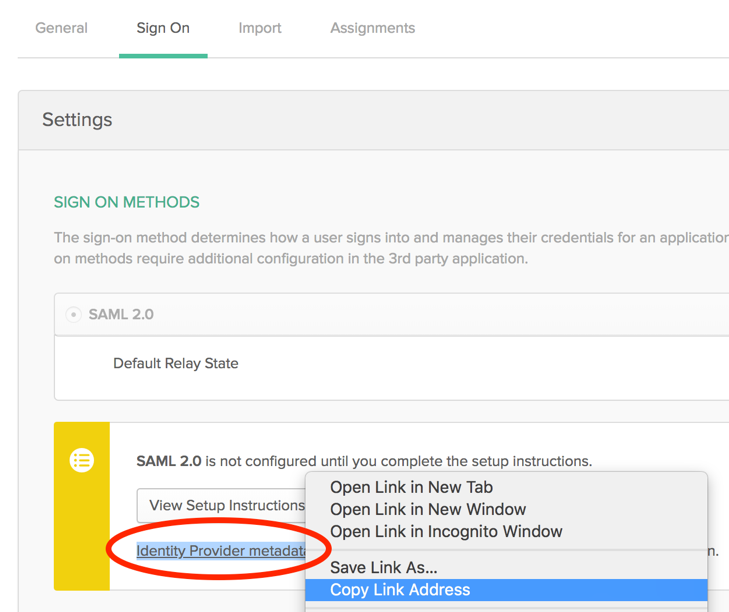
Copy your Identity Provider metadata URL, and provide this to the HYPR team.
-
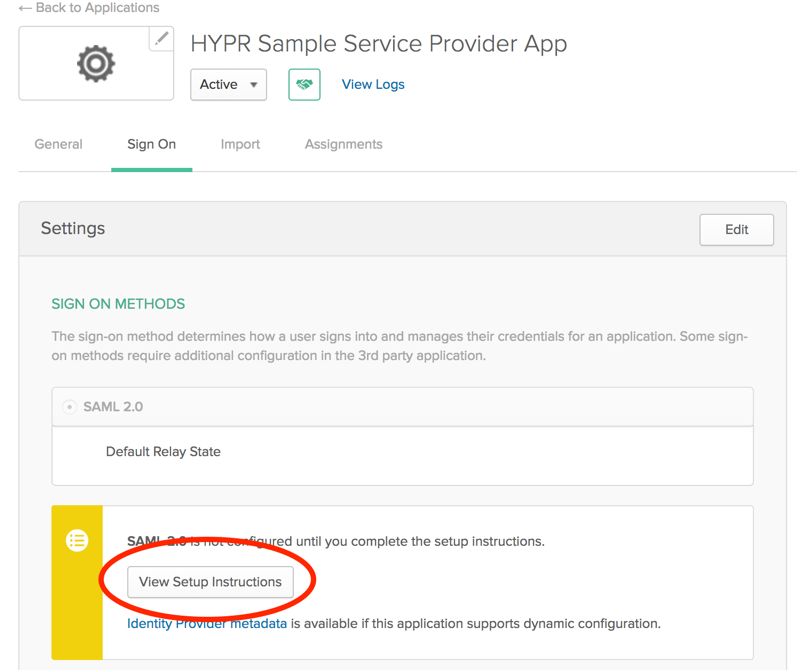
Click View Setup Instructions on the next page.
-
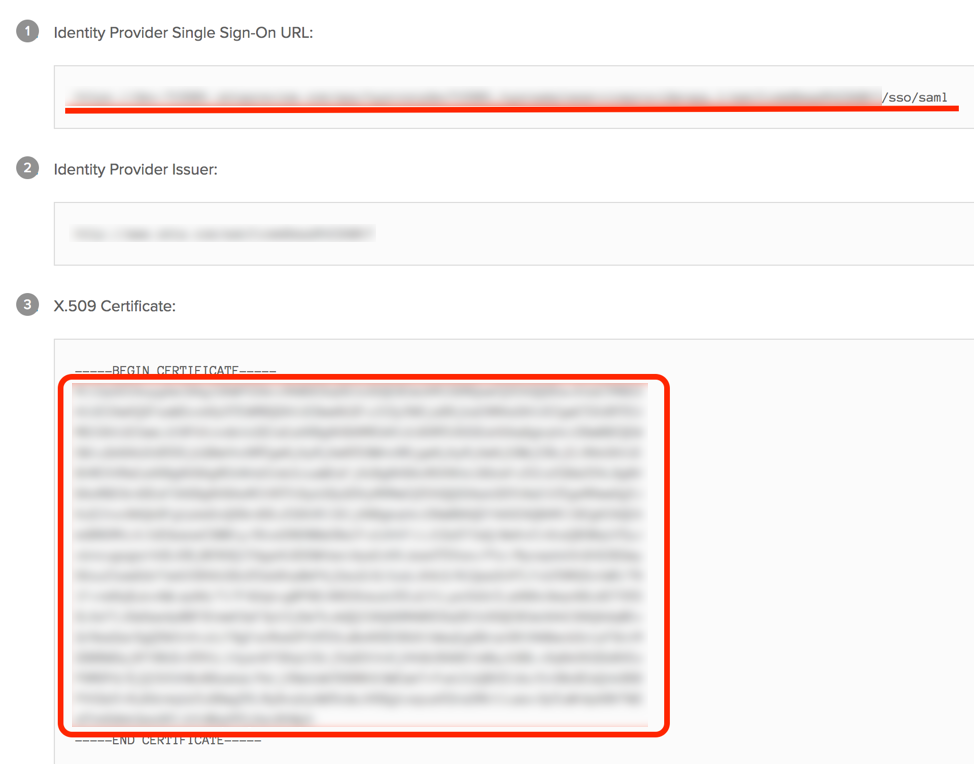
Copy the Identity Provider Single Sign-On URL and the X.509 Certificate and paste it into your HYPR SP configuration file. This file is provided by the HYPR deployment team. Your HYPR team can finish the HYPR SAML configuration with this information.
HYPR Identity Provider (IdP) Configuration
-
Login to your Okta Service Portal.
-
Open the Security drop-down menu and choose Identity Providers.

-
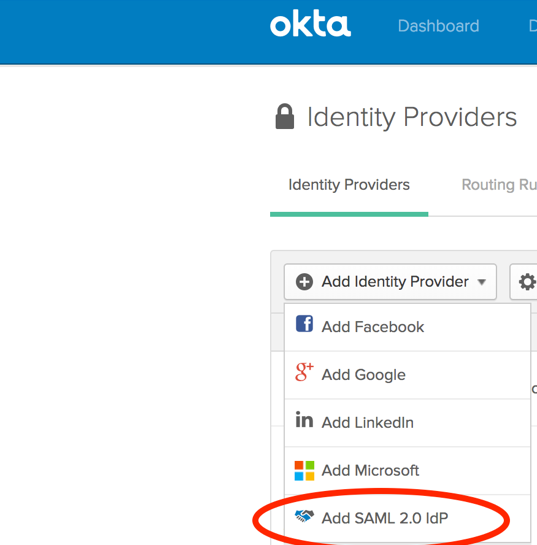
Open Add Identity Provider and select Add SAML 2.0 IdP.
-
In General Settings section, add a Name. It can be any value, and is used following creation to identify the IdP.

-
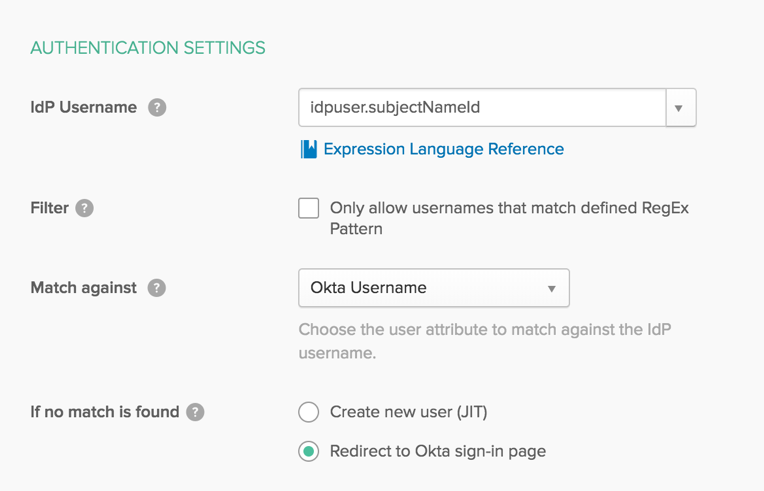
Under Authentication Settings, complete the fields as follows:
- IdP Username:
idpuser.subjectNameid - Match against: Okta Username
- If no match is found: Redirect to the Okta login page
- IdP Username:
This video provides an overview of the HYPR and Okta integration: