Enterprise Passkey Transport: Windows WiFi
This document describes how to register and authenticate using Windows WiFi as a transport for the HYPR Passwordless client.
Windows WiFi as a transport method works with the HYPR Passwordless client for Windows using the HYPR Enterprise Passkey.
For more information on Entra ID Enterprise Passkey, see Integrations.
To enable WiFi for HYPR Passwordless, see Generic Enterprise Passkey Settings.
Devices paired using WiFi are able to use this connection to authenticate in Offline Mode.
Registration
Registration with Entra Provisioning Disabled
With the addition of Windows WiFi pairing, a different set of dialogs comes into play if you use Windows WiFi to connect to your network. The pairing process may refer to Windows flows for connecting your device to your computer via WiFi; we have included this flow here for reference.
Following are the steps presented by the HYPR Passwordless client when using Bluetooth to register a security key for the first time without Entra Provisioning enabled.
-
Login to Windows as an Entra cloud-only or hybrid account (i.e.,
carol.shaw@highlands_azure.com). -
Launch the HYPR Passwordless client.
-
Click Start Pairing.

-
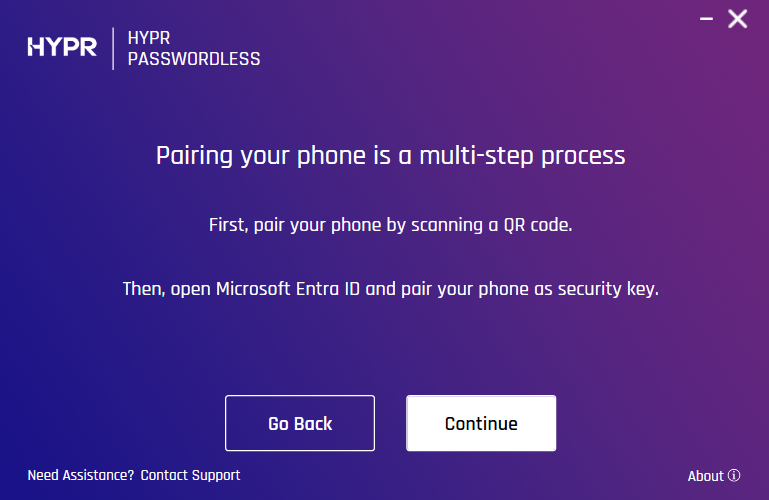
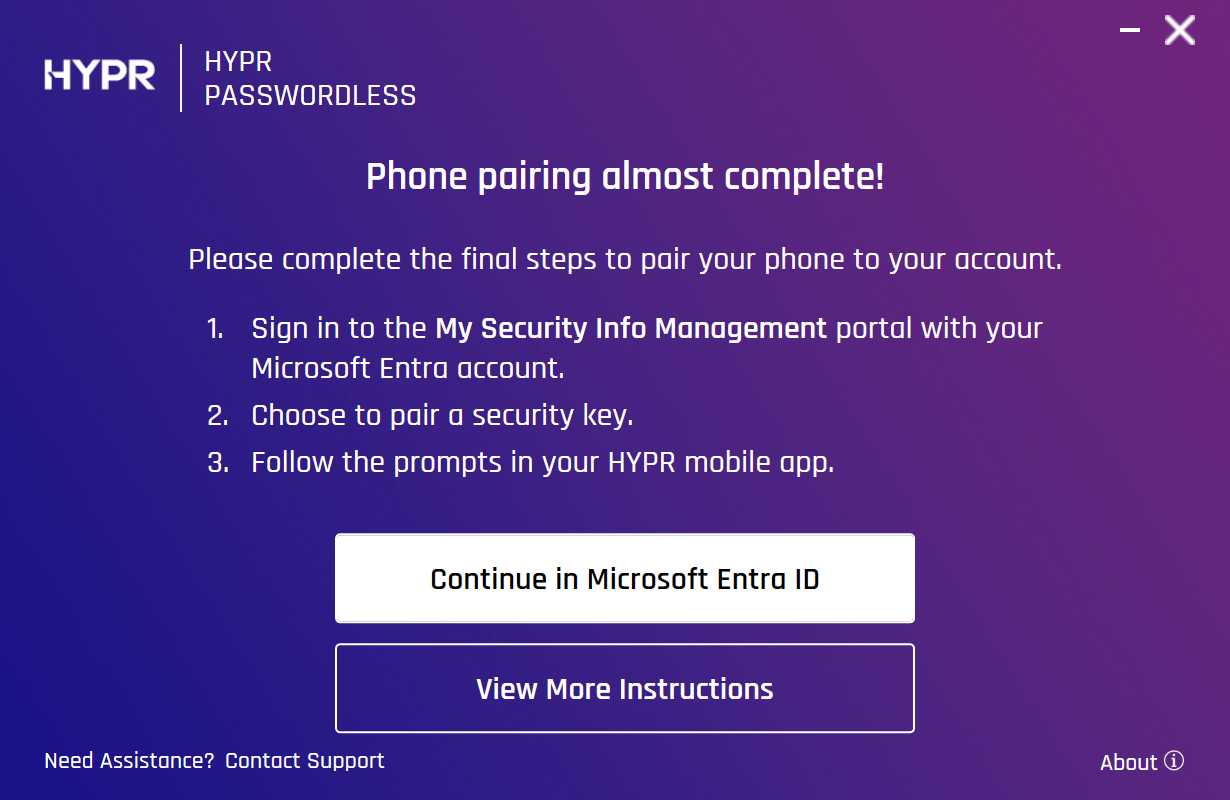
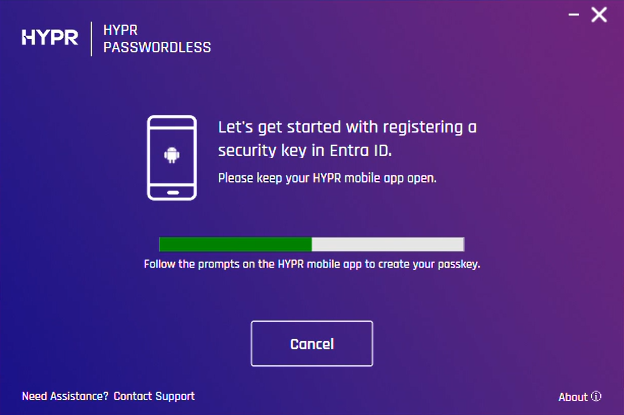
The HYPR Passwordless client reminds you to open Microsoft Entra AD and pair your phone as a security key after pairing with HYPR. Click Continue.
-
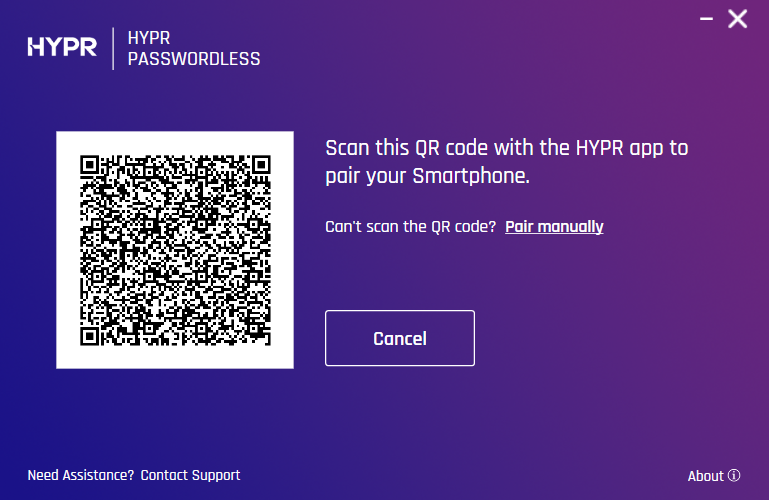
Scan the QR code on the screen. You will be prompted to authenticate on your device.
-
Once you are paired successfully, click Continue.

-
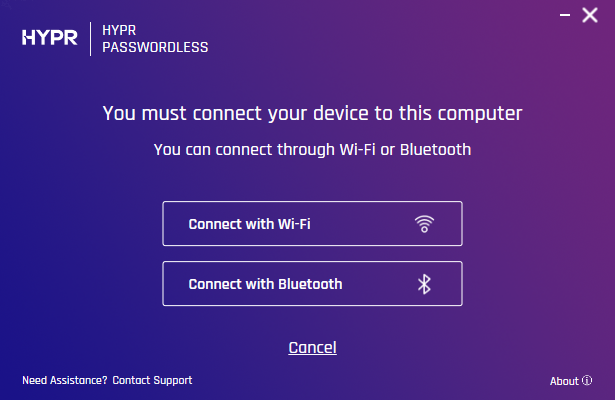
Choose the method by which you will connect this machine to the HYPR Mobile App device. In this scenario, choose Conect with Bluetooth.
-
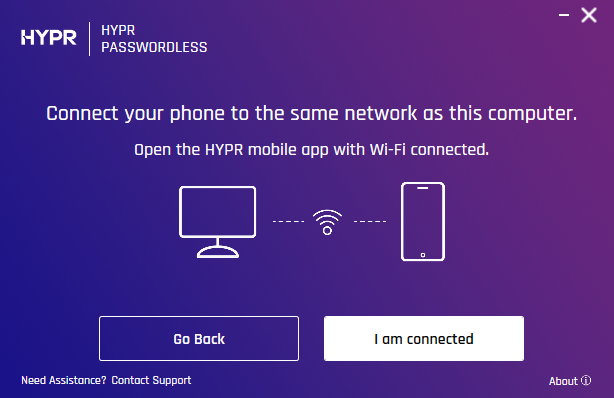
Verify your connection is paired and the HYPR Mobile App is open. The web connection confirmation dialog remains unchanged, verifying that you are connected to the same wireless network as the workstation.
-
A prompt appears to remind you to continue the process in Entra. Click Continue in AD to open https://mysignins.microsoft.com/security-info (see Pairing with Entra, below). Clicking View More Instructions opens this article.
-
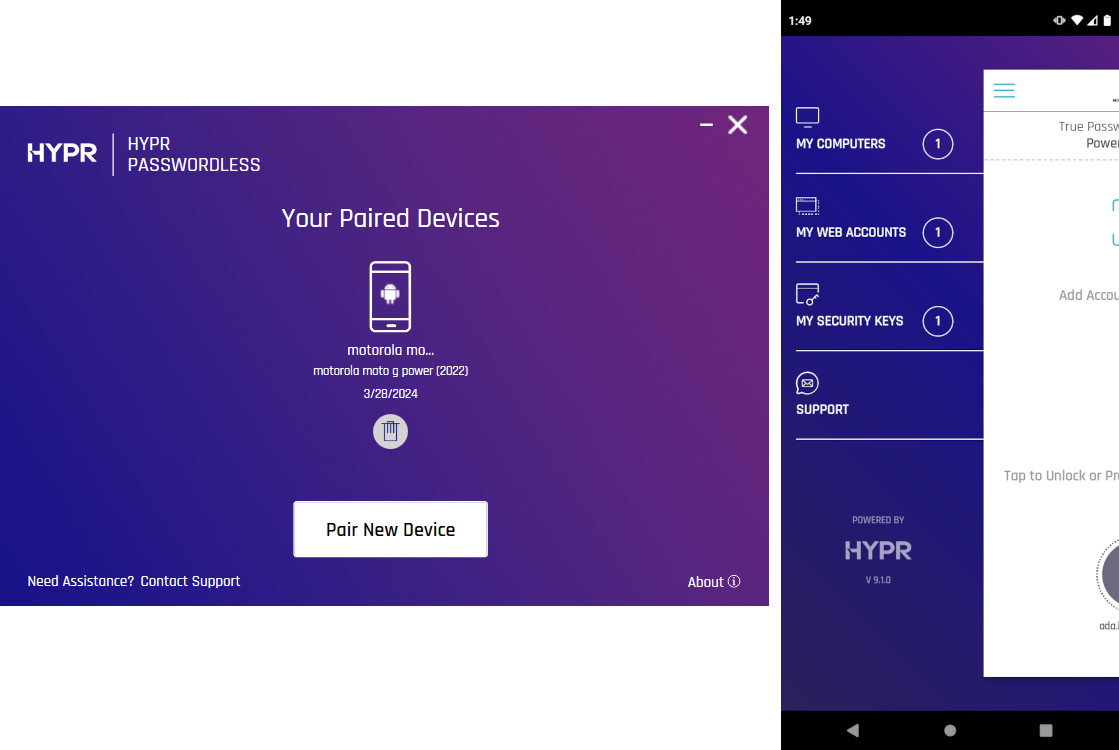
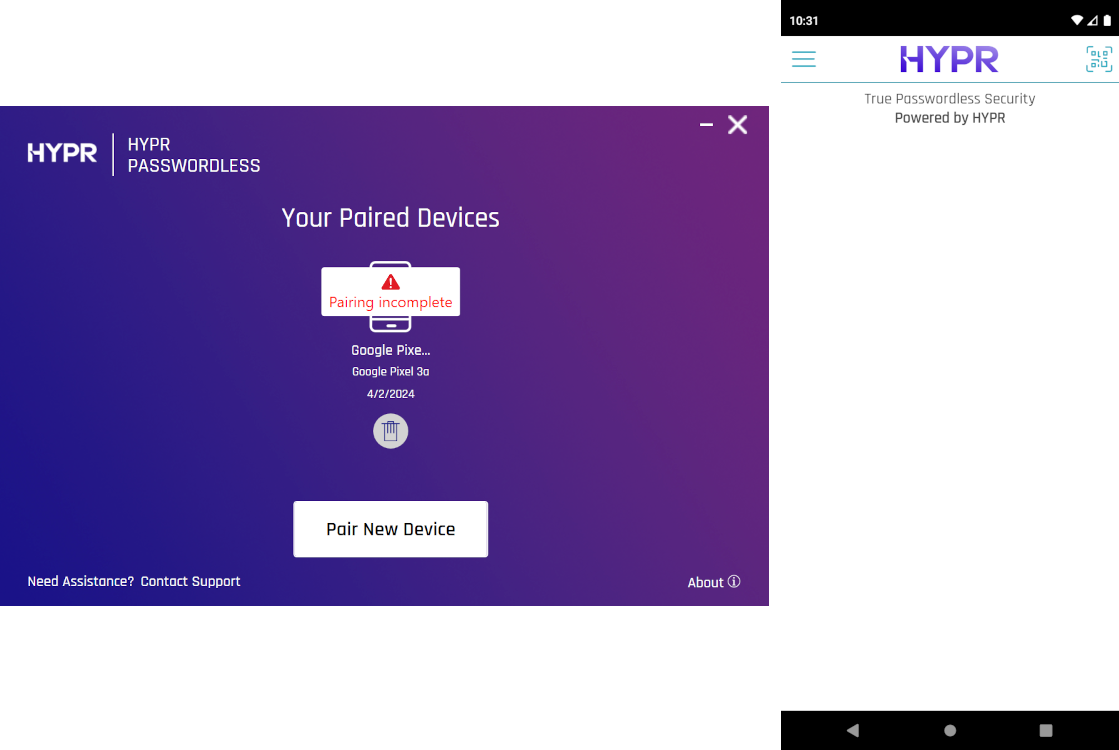
HYPR Passwordless client returns to the main screen , now displaying your paired device. The device's HYPR Mobile App menu now includes a section for My Security Keys. Open it. Here you will see the same Entra cloud-only account with which you logged into Windows.
-
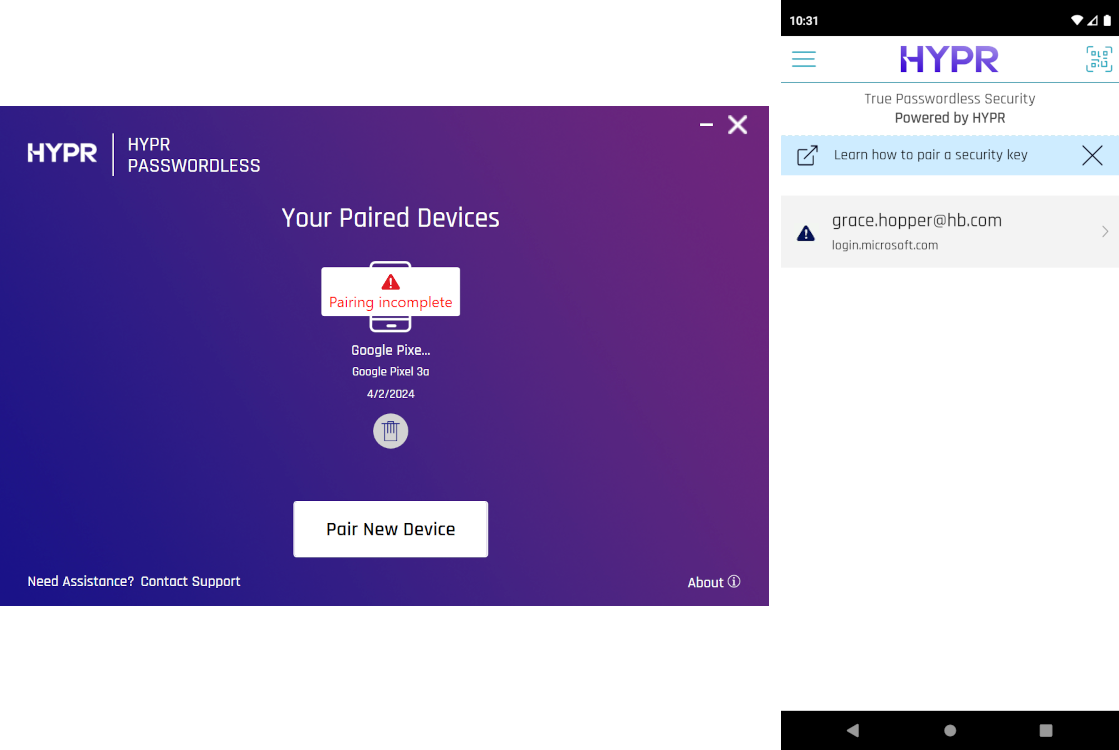
A warning icon next to the HYPR Mobile App entry indicates the user has not yet completed the pairing or, after a pairing has already been successful, this might indicate a problem in Entra. Until pairing is completed, a Pairing incomplete warning will display in the HYPR Passwordless client for the mobile device, and the account shown in the HYPR Mobile App will bear a Pairing incomplete icon. The indicates the user is Paired with HYPR but not Paired with Entra. Clicking the warning will re-open the Phone pairing almost complete! dialog.
Cache ReturnsHYPR Passwordless client may not display a completed pairing right away. It may be necessary to close and restart the HYPR Passwordless client for the warnings to disappear.
-
On the HYPR Mobile App, tap the arrow next to the
userIdfor instructions on how to finish the pairing.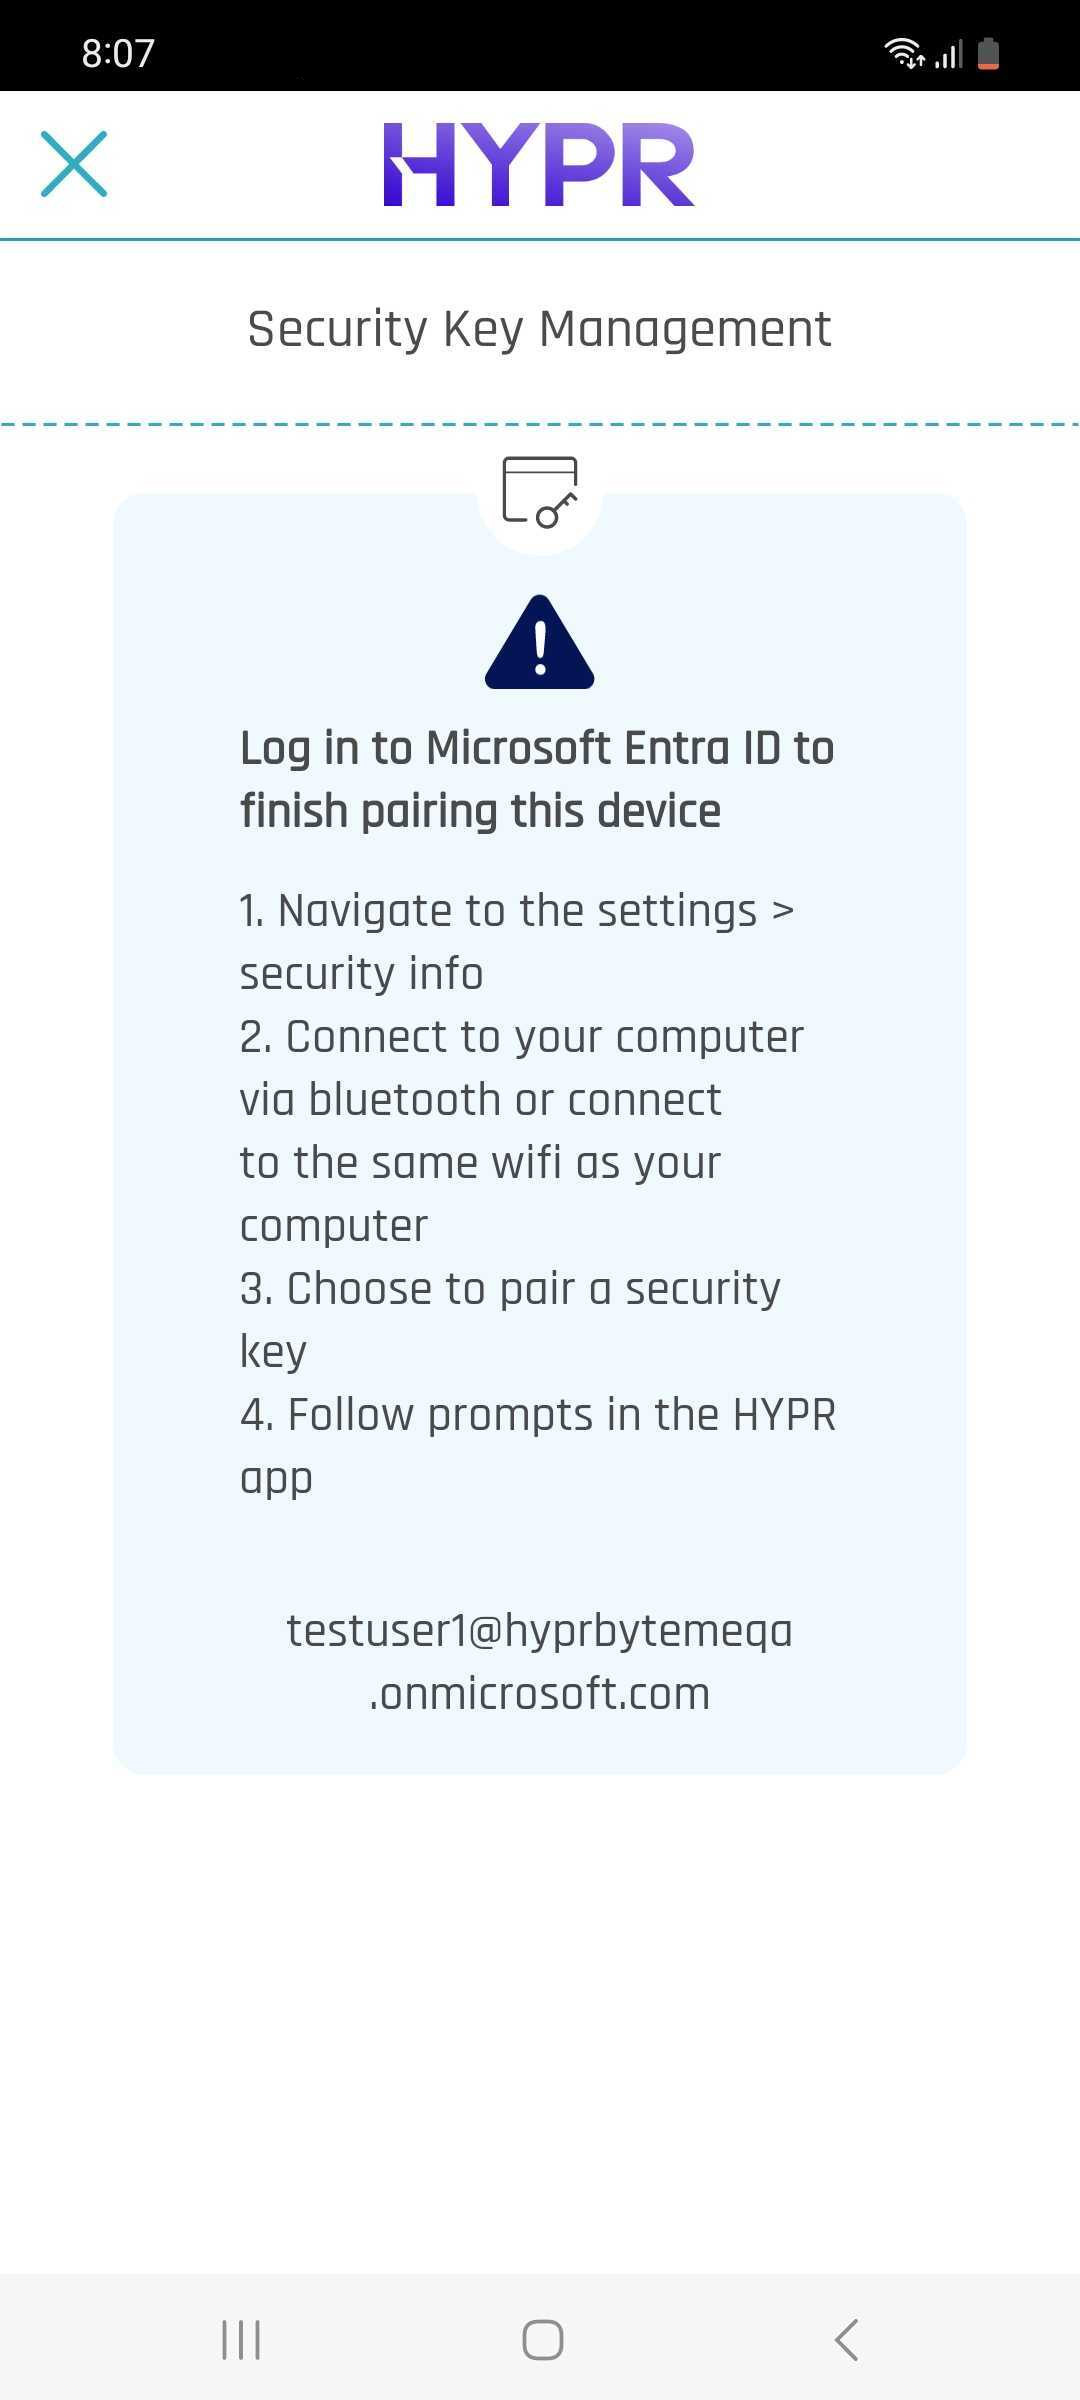
The user will now appear in the integration under User Management's Paired with HYPR tab. Continue to Pairing with Entra to complete your passkey registration.
See Integration User Management in the main Integrations article for how to navigate User Management.
In the middle of pairing? Jump back to continue.
Registration with Entra Provisioning Enabled
Following are the steps for using Windows WiFi to register a security key for the first time when Entra Provisioning is Enabled. With Entra Provisioning enabled, the user no longer needs to browse to the Entra server to pair with Entra after pairing with HYPR; HYPR handles this for them.
-
Login to Windows with your integration login (i.e.,
carol.shaw@highlands_azure.com). -
Launch the HYPR Passwordless client.
-
Click Start Pairing.
-
Scan the QR code on the screen. You will be prompted to authenticate on your device.
-
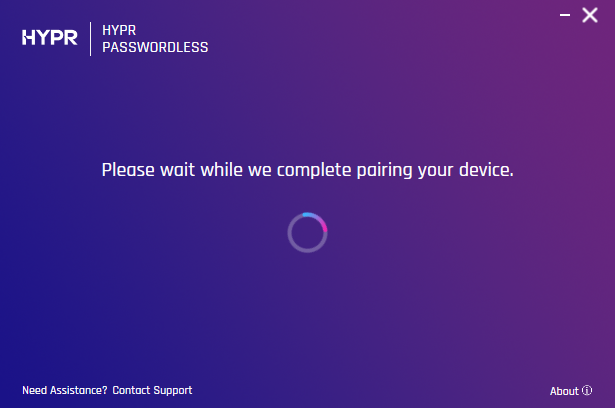
Be patient as the HYPR Passwordless client pairs your devices.
-
Be patient while the pairing is established.
-
Once you are paired successfully, click Continue.
-
Choose the method by which you will connect this machine to the HYPR Mobile App device. In this scenario, choose Connect with Wi-Fi.
-
Verify your connection is paired and the HYPR Mobile App is open. The web connection confirmation dialog remains unchanged, verifying that you are connected to the same wireless network as the workstation.
-
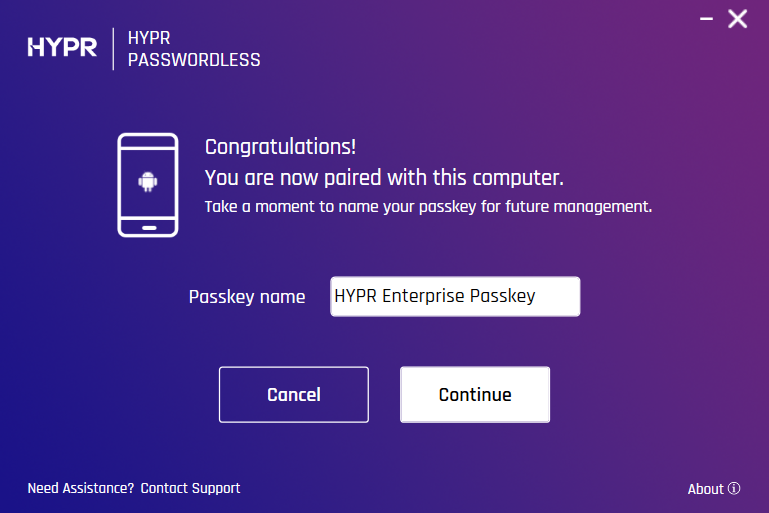
If you want to give the pairing a name, type one here. Then click Continue.
-
HYPR Passwordless client returns to the main screen, now displaying your paired device. The device's HYPR Mobile App menu now includes a section for My Security Keys. Open it. Here you will see the same Entra cloud-only account with which you logged into Windows.
Though a trip to the Entra server is no longer necessary, conditions may still cause the following warnings to appear.
A warning icon next to the HYPR Mobile App entry indicates the user has not yet completed the pairing or, after a pairing has already been successful, this might indicate a problem in Entra. Until pairing is completed, a Pairing incomplete warning will display in the HYPR Passwordless client for the mobile device, and the account shown in the HYPR Mobile App will bear a Pairing incomplete icon. The indicates the user is Paired with HYPR but not Paired with Entra. Clicking the warning will re-open the Phone pairing almost complete! dialog.
HYPR Passwordless client may not display a completed pairing right away. It may be necessary to close and restart the HYPR Passwordless client for the warnings to disappear. In a hybrid pairing, HYPR Mobile App's My Security Keys page does not show a security key for this pairing.
The user will now appear in the integration under User Management's Paired with HYPR tab. Continue to Pairing with Entra to complete your passkey registration.
See Integration User Management in the main Integrations article for how to navigate User Management.
In the middle of pairing? Jump back to continue.