Access Tokens
Access Tokens appear in more than one place in Control Center:
- In Standard Mode: Access Tokens in the main left navigation
- In Advanced Mode: Advanced Config Menu for the Application selected under Choose an App
Create and manage API tokens and Workstation Installation tokens.
The HYPR Control Center exposes an extensive set of APIs which use access tokens as an authentication and authorization mechanism. API access tokens can be created and revoked by Control Center admin users as described below. Tokens have an expiration period (TTL) of 30 days. The expiration date is reset to the current date+TTL each time you use the token, so if you don't use the token for more than 30 days it will expire and you'll need to generate a new one.
Workstation Installation tokens are used during the installation process for the HYPR Passwordless client.
Every token is bound to a specific RP Application. Any operation within the RP Application and the scope of the token (API or Workstation Installation) is allowed in the presence of a valid token.
API Tokens
The Control Center exposes a set of APIs you can use to perform user management tasks programmatically rather than through the UI. For example, you could create a script that deletes workstation users through an API request rather than through the Control Center. Please see the API documentation for more information.
The APIs use access tokens as an authorization mechanism for your API requests. As an administrator, you’ll need to create an access token through the Control Center then include the token in every API request you submit.
API access tokens can be used in the following cases:
-
API requests for the Workstation user APIs, which require a token of type
access-tokenDefaultApp. To create this type of access token, select HYPR Default Workstation Application (HYPRDefaultWorkstationApplication) as the Application during token creation. -
API requests for the Control Center Admin APIs , which require a token of type
CCAdminAccessToken. To create this type of access token, select Control Center Admin (controlCenterAdmin) as the Application during token creation. -
API requests for Integrations you’ve created through the Integrations section in the Control Center, for example an Okta integration. For this type of access token, the Application you select during token creation is the name you gave the integration when you created it.
Workstation Installation Tokens
Whenever you install the HYPR Passwordless client, either for yourself or for other users, you must provide a Workstation Installation token (also called an endpoint security token). See the HYPR Passwordless client Installation instructions for more information. However, this token is given to you by HYPR after you sign up for the service and should not be changed. You use the same token for all installs. Typically you don’t need to create a token manually for this purpose. However, HYPR Support may occasionally ask you to create one.
Create an Access Token
You can create both types of token in the Access Tokens section in the Control Center.
Standard Mode
-
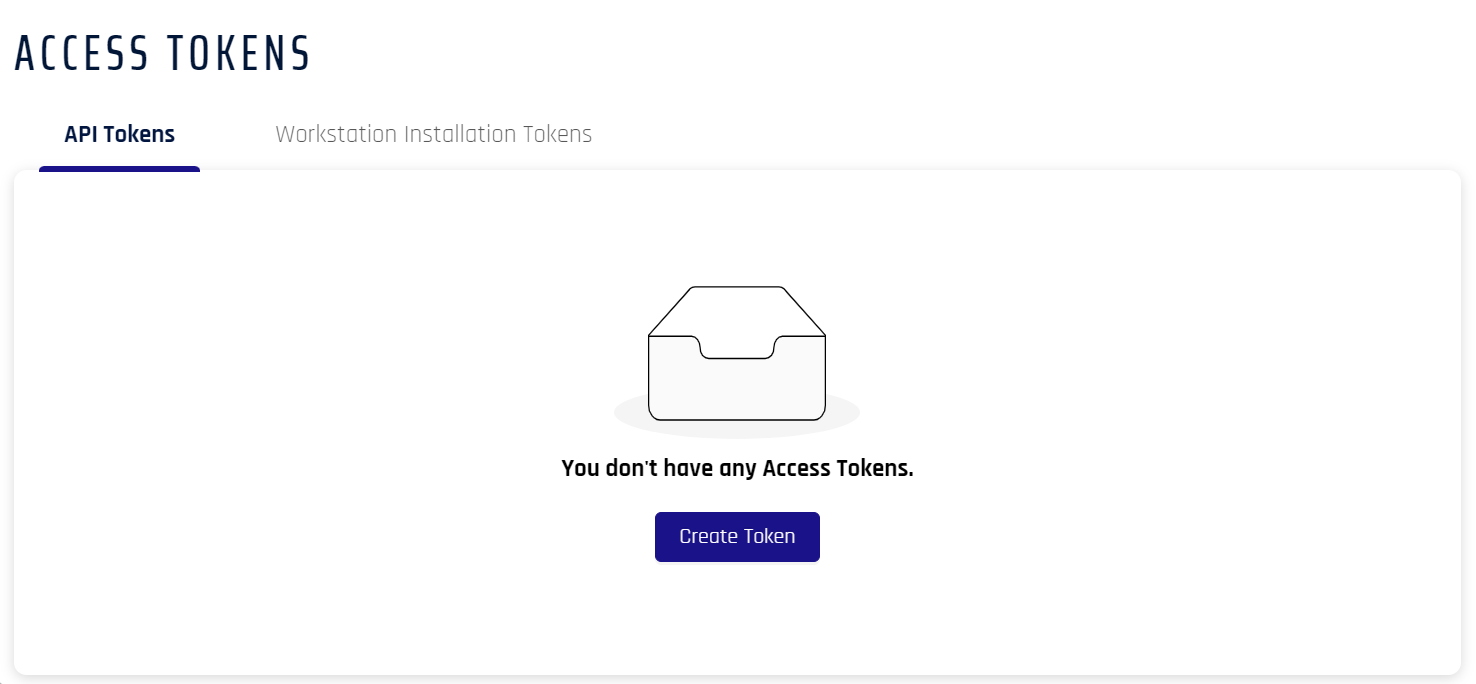
Click Access Tokens in the Control Center left navigation pane.
-
Click Create Token. If no tokens are listed, this button will be in the center of the pane. If tokens are already present in the list, it will appear in the upper right, above the list.
-
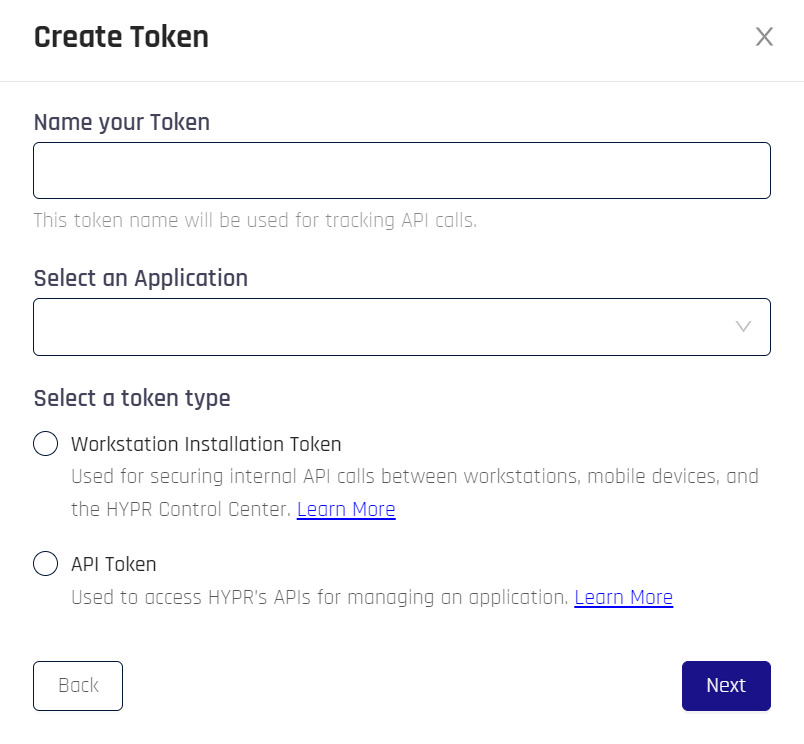
Type a display name for the new token in the Name your Token field. Choose a name that will help you identify the token's purpose. It can be any combination of characters and can include spaces.
-
Select an Application for which you need the token.
-
Select a token type. Click Next when finished.
API Tokens OnlyHYPR Default Web Application (
HYPRDefaultApplication) may appear in the list of choices. This Application is created by HYPR to support your instance of HYPR. You typically would not need to create an access token for the HYPR Default Web Application. If you decide to, HYPR Default Web Application only accepts API tokens, not Workstation Installation tokens. -
-
If you made a Workstation Token, skip this step. Assign properties to the token.
-
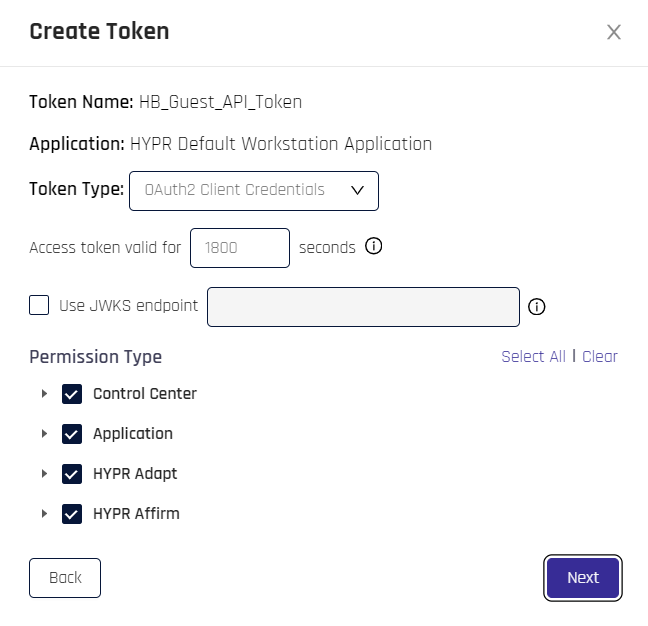
Token Name: The name assigned to the token in the previous step.
-
Application: The RP Application assigned to the token in the previous step.
-
Token Type: Choose a value from the drop-down to continue.
-
Bearer Token: A token used to access API collections, as with the HYPR Passwordless API. If this type of token is selected, continue to the next step to assign permissions.
-
OAuth2 Client Credentials: Using this option requires a few extra choices:
-
Set the time in seconds that the Access Token will be valid
-
If you are using JSON Web Key Sets (JWKSs), check the box next to Use JWKS endpoint and add a valid URL to connect HYPR to the endpoint
JWKS Endpoint BehaviorIf the JWKS Endpoint is used:
-
The API client creates the key pair and keeps the private key (HYPR never sees it)
-
It shares its public key via the JWKS endpoint
-
HYPR calls the JWKS endpoint via HTTP GET
-
In the JWKS response, HYPR matches the
kidattribute in the JWKS response withe thekeyIdin the JWT header to locate the public key -
It then uses the public key to verify the Jave web token (JWT) signature
-
-
-
-
Permission Type: Permissions are grouped into catergories; choose the permissions you wish the token to allow. Click Select all for full permissions; click Clear to start over.
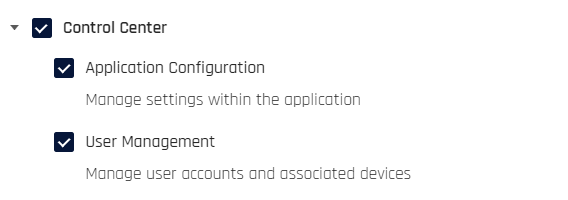
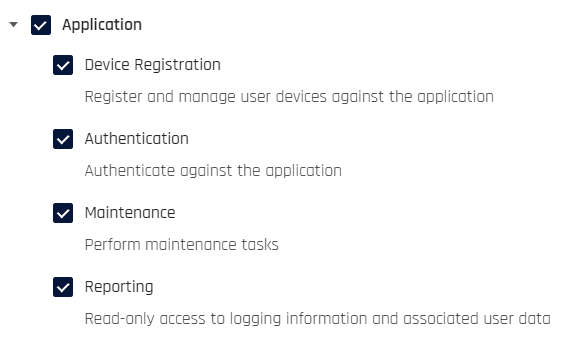
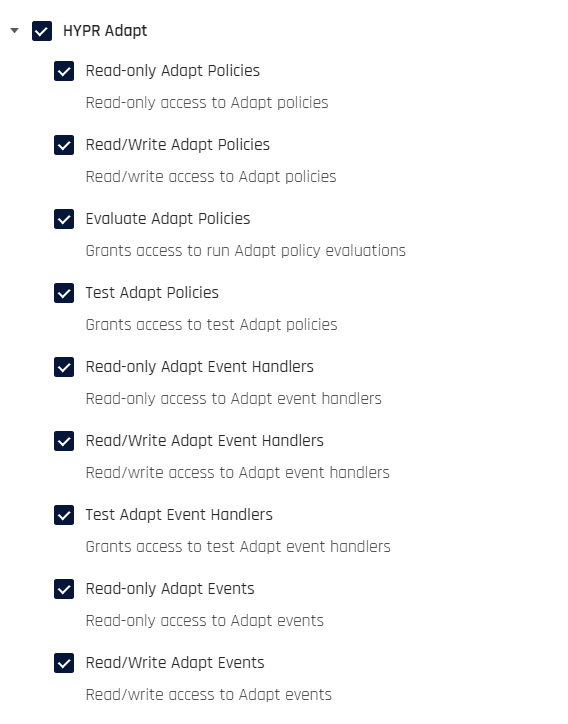
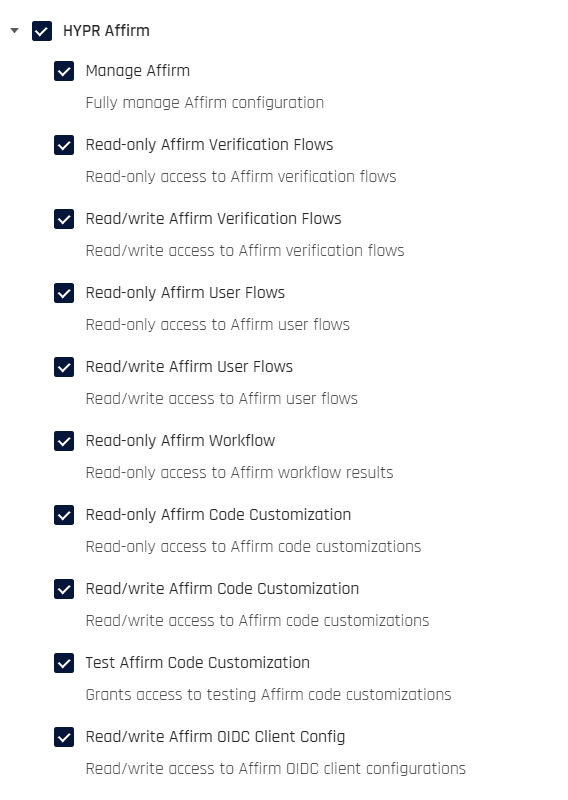
Once you have assigned Permission Types, click Next.
-
-
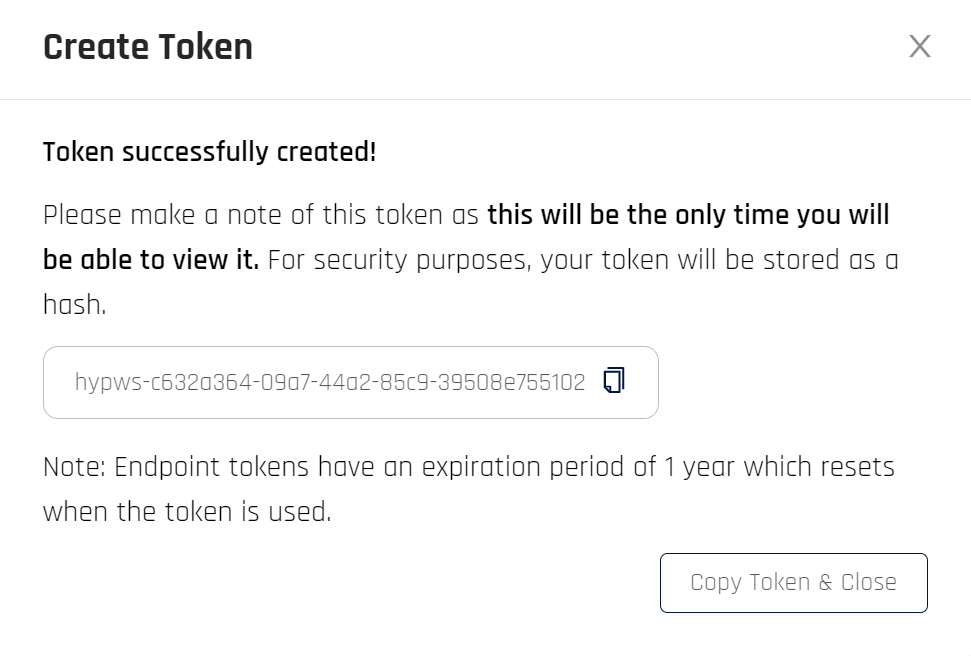
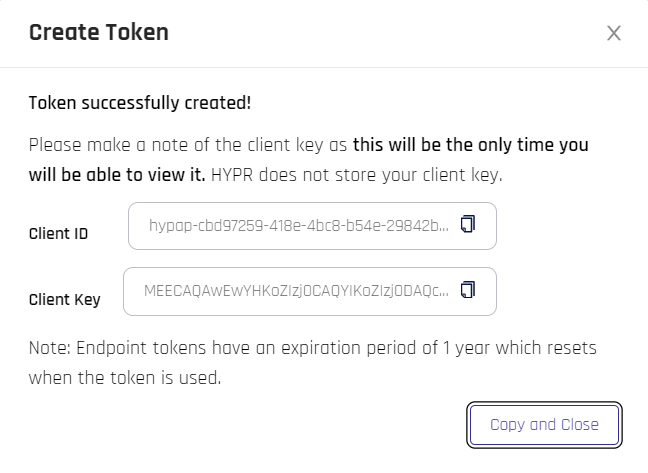
This step provides the option to capture the Bearer Token or gather the Client ID and Secret from an OAuth token. copy the information presented to a safe location. This is a one-time action; the results are never displayed again beyond this dialog.
-
Bearer token: You have the option to copy the token; clicking Copy Token & Close will transfer the token to the clipboard and close the dialog
-
Oauth token: Copy the Client ID and Client Key values and store them somewhere safe. clicking Copy and Close will transfer both values, labeled, to the clipboard, then close the dialog
-
-
The following table displays. It shows the same information for both types of token.
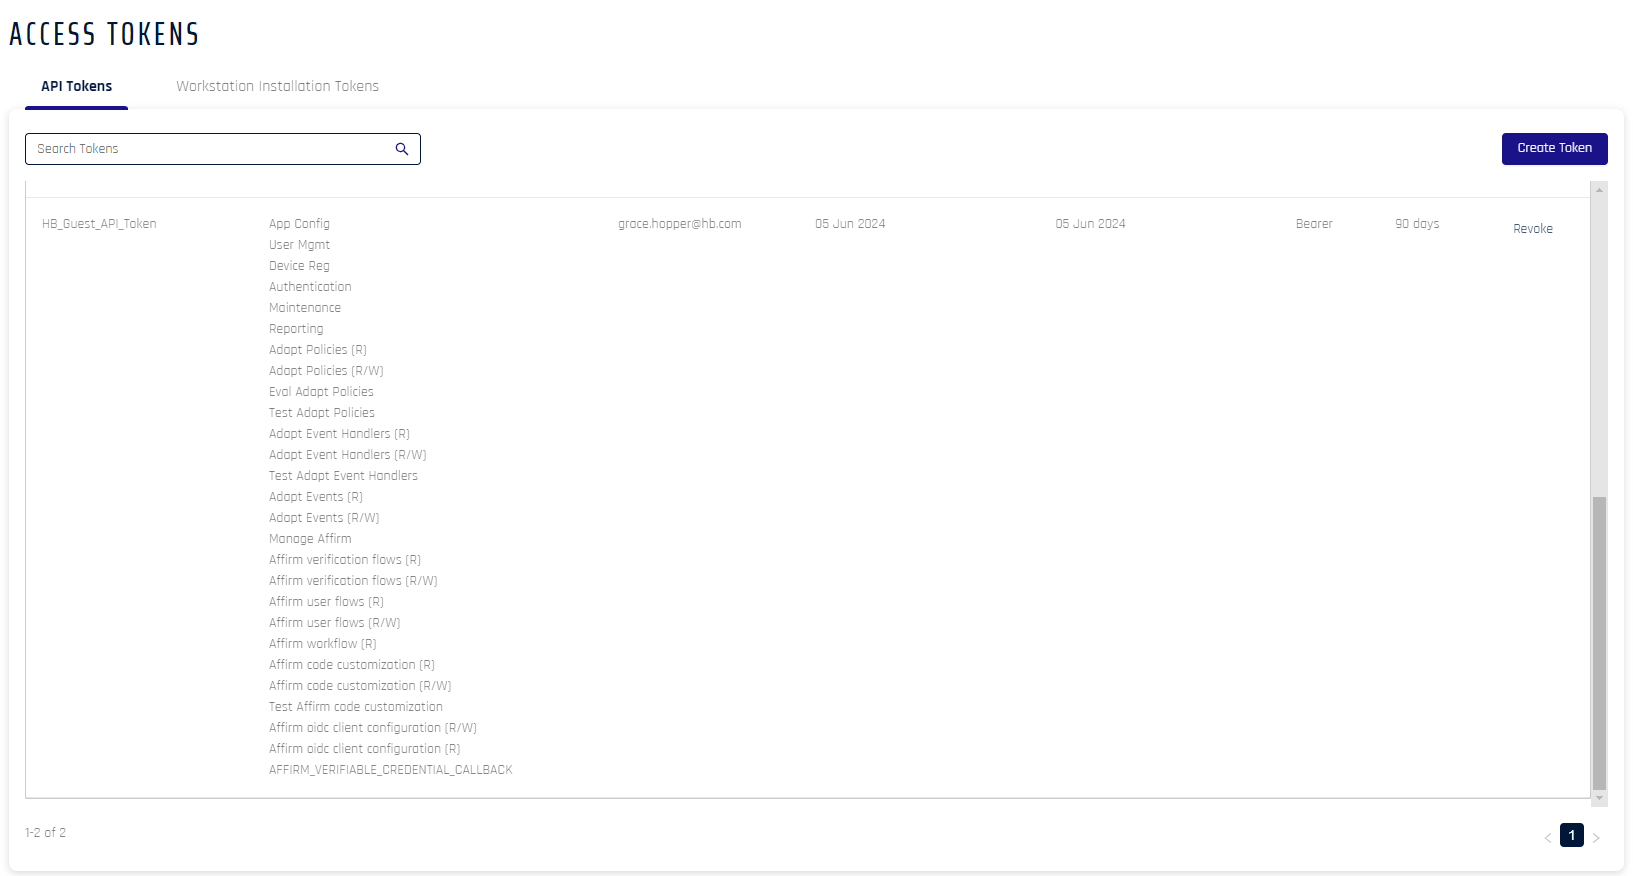
Field Name Description Token Name of the token Permissions Access to functions within Control Center.
Possible Values: App Config | User Mgmt | Authentication | Device Reg | ReportingCreated By Creator of the token Created On Date of creation Last Used Last used by the clients for registration/authentication and de-registration Type The type of token
Possible Values: API | Workstation InstallationExpires Time left before the token expires (hover for the time). This value resets to 30 days after each use; if not used within 30 days of the last use, it will expire, a new token will need to be issued, and all commands using the expired token will need to be updated with the new one. Actions The only available action as of this version is to Revoke the token
If you have chosen to create OAuth token credentials, continue to Exchanging OAuth Credentials to Obtain a Token.
Advanced Mode
-
In the selected RP Application left menu, open Access Tokens.
-
Click Create Token.

-
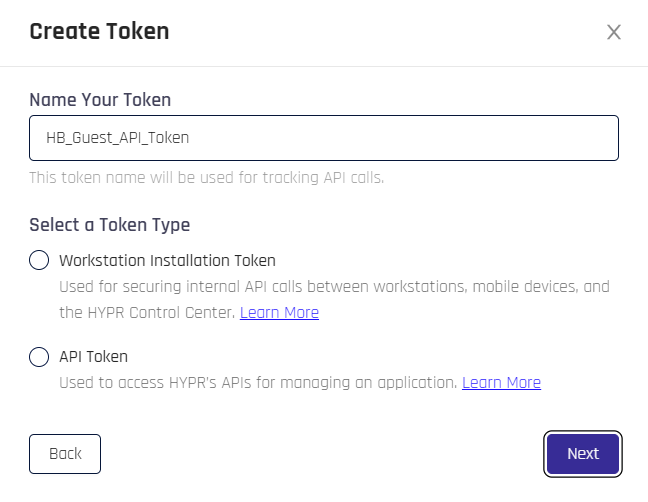
The Create Token dialog opens. Name the token, then Select a Token Type:
-
Workstation Installation Token
-
API Token
When finished, click Next.
-
-
If you made a Workstation Token, skip this step. Assign properties to the token.

-
Token Name: The name assigned to the token in the previous step.
-
Application: The currently selected RP Application.
-
Token Type: Choose a value from the drop-down to continue.
-
Bearer Token: A token used to access API collections, as with the HYPR Passwordless API. If this type of token is selected, continue to the next step to assign permissions.
-
OAuth2 Client Credentials: Using this option requires a few extra choices:
-
Set the time in seconds that the Access Token will be valid
-
If you are using JSON Web Key Sets (JWKSs), check the box next to Use JWKS endpoint and add a valid URL to connect HYPR to a server which provides a set of cryptographic keys in JSON format for verifying JSON Web Tokens (JWTs).
JWKS Endpoint BehaviorIf the JWKS Endpoint is used:
-
The API client creates the key pair and keeps the private key (HYPR never sees it)
-
It shares its public key via the JWKS endpoint
-
HYPR calls the JWKS endpoint via HTTP GET
-
In the JWKS response, HYPR matches the
kidattribute in the JWKS response withe thekeyIdin the JWT header to locate the public key -
It then uses the public key to verify the Jave web token (JWT) signature
-
-
-
-
Permission Type: Permissions are grouped into catergories; choose the permissions you wish the token to allow. Click Select all for full permissions; click Clear to start over.


Once you have assigned Permission Types, click Next.
-
-
This step provides the option to capture the Bearer Token or gather the Client ID and Secret from an OAuth token. copy the information presented to a safe location. This is a one-time action; the results are never displayed again beyond this dialog.
-
Bearer token: You have the option to copy the token; clicking Copy Token & Close will transfer the token to the clipboard and close the dialog

-
Oauth token: Copy the Client ID and Client Key values and store them somewhere safe. clicking Copy and Close will transfer both values, labeled, to the clipboard, then close the dialog

-
-
The following table displays. Click the appropriate tab to see information for each type of token.

Field Name Description Token Name of the token Permissions Access to functions within Control Center.
Possible Values: App Config | User Mgmt | Authentication | Device Reg | ReportingCreated By Creator of the token Created On Date of creation Last Used Last used by the clients for registration/authentication and de-registration Type The type of token
Possible Values: Bearer | OAuthExpires Time left before the token expires. This value resets to 30 days after each use; if not used within 30 days of the last use, it will expire and a new token will need to be issued Actions The only available action as of this version is to Revoke the token
Double VisionThese tokens can also be managed from the Control Center Standard Mode Access Tokens list.
If you have chosen to create OAuth token credentials, continue to Exchanging OAuth Credentials to Obtain a Token.
Exchanging OAuth Credentials to Obtain a Token
This process assumes you have already created OAuth credentials as described under Create an Access Token.
HYPR has provided a signing tool for your convenience. You may use any JWT signing program to accomplish this process, as long as it conforms to convention.
-
Download jwtsignlib.zip and unzip it. It will contain the following files:
-
JWTCreator.java
-
nimbus-jose-jwt-9.38-rc3.jar
-
-
Run the following command to generate the assertion, substituting the
client_idandclient_private_keyvalues obtained in Create an Access Token:java -cp "*" JWTCreator.java "<client id>" "<client private key>" -
The resulting JWT will be created in the same folder where
JWTCreator.javais stored. The contents will be similar to the following example. For reference, see Microsoft identity platform application authentication certificate credentials.{
"alg": "RS256",
"typ": "JWT",
}
.
{
"aud": "https: //login.microsoftonline.com/contoso.onmicrosoft.com/oauth2/v2.0/token",
"exp": 1484553341,
"iss": "97f6a5b7-d745-40b6-94fe-5f77d35c6e45",
"jti": "22b3cb26-e046-42df-9c96-657bd72c1c81",
"nbf": 1484592741,
"sub": "97f6a5b7-d745-40b6-94fe-5f77d35c6e45"
}
.
"eyJhbGciOiJFUzI1NiJ9.eyJzdWIiOiJoeXBh{...}7GFa8A" -
Copy the
client_assertion(the long string at the end; in this example,eyJhbG...7GFa8A) and use it to issue a cURL command using the following format:Property Value client_id The value created in Create an Access Token; in our example, it is hypap-c6de0d3c-bb80-4e4b-a1d1-d2eba23aa94b.client_assertion_type urn:ietf:params:oauth:client-assertion-type:jwt-bearerclient_assertion The value taken from the cURL command, above; in our example, it is eyJhbG...7GFa8A.grant_type client_credentials
Sample cURL Commandcurl --location 'https://highlandsbank.hypr.com/rp/token/endpoint/exchange/clientcredentials' \
--header 'Content-Type: application/x-www-form-urlencoded' \
--data-urlencode 'client_id=hypap-c6de0d3c-bb80-4e4b-a1d1-d2eba23aa94b' \
--data-urlencode 'client_assertion_type=urn:ietf:params:oauth:client-assertion-type:jwt-bearer' \
--data-urlencode 'client_assertion=eyJhbGciOiJFUzI1NiJ9.eyJzdWIiOiJoeXBhcC1jNmRlOWQzYy1iYjgwLTTlNGItYTEwMS1kMmViYTIzYWE5NGIiLCJhdWQiOiJodHRwczovL2h5cHIuY29tIiwibmJmIjoxNzE4NjQzODkwLCJpc3MiOiJpeXByLmNvbSIsImV4cCI6MTcxODY0NzQ5MCwiaWF0IjoxNzE4NjQzODkwLCJqdGkiOiJiYmQ4MDMxMS1iYjkzLTQxN2QtYjM2OS0zMXY1MDE3ZjAxMTEifQ.W42CJbZpaH9S3EogzRyZsHsZs64L6dUqml0pJ7BO6PgS7GZ7JE24nGGPNQs3zvVigRmdzsNjX50UdYzF7GFa8A
' \
--data-urlencode 'grant_type=client_credentials' -
Copy the
access_tokenvalue from the response to a safe location, and use it to connect to the HYPR Passwordless API. Success and failure examples are shown here.-
Success:
{
  "token_type": "Bearer",
  "expires_in": 3599,  // seconds
  "access_token": "eyJ0eXAiOiJKV1QiLCJhbRciOiJSUzI1NiI",
  "scope":"hypr:adapt:readPolicy hypr:cc:applications"
}
Property Value token_type The type of token. In this case, it will always be Bearer.expires_in The number of seconds before this token expires, as determined by the value of Expires during Create an Access Token. An expired token will receive a 401/403 response. access_token The access token value. Copy and save it for later use. scope A list of affected functions in HYPR.
-
Failure:
{
  "error": "invalid_scope",
  "error_description": "AADSTS70011: The provided value for the input parameter 'scope' is not valid. The scope https://foo.microsoft.com/.default is not valid.\r\nTrace ID: 255d1aef-8e98-452f-ac51-23d051240864\r\nCorrelation ID: fb3d2015-bc17-4cb9-bb85-30c5cf1aaaa7\r\nTimestamp: 2024-01-09 02:02:12Z",
}
-
Use the Access Token
An access token is provided on every request to the HYPR API HTTP endpoint. The request will fail if the token is missing or does not have permissions for the requested operation. The request will also fail if the token has expired, been revoked, or is invalid.
The access token must be sent in the Authorization header using the Bearer schema.
Here is an example of how to pass an access token using the cURL command. In the following example, the access token is 7c839b65-9d28-4037-afc6-993fc5595cbf.
curl https://staging1.gethypr.com/cc/api/stats/authenticator/logins \
  -H 'Authorization: Bearer 7c839b65-9d28-4037-afc6-993fc5595cbf'
Revoking an Access Token
When you revoke an API access token, you’ll no longer be able to submit API calls for the entity to which the token applies (for example, an integration). In most cases, you won’t need to revoke access tokens. In some cases, HYPR Support may ask you to perform this task.
Avoid revoking a Workstation Installation token unless HYPR Support recommends it. This token is used during the installation process for the HYPR Passwordless client. Although installations you’ve performed already won’t be affected if you revoke the token (the HYPR Passwordless client will run as usual for everybody), you won’t be able to install the HYPR Passwordless client for any new users. See the HYPR Passwordless Installation instructions for details.
To revoke an access token, complete these steps:
Standard Mode
-
Open Access Tokens in the Control Center left navigation pane.
-
Locate the access token you want to revoke.
-
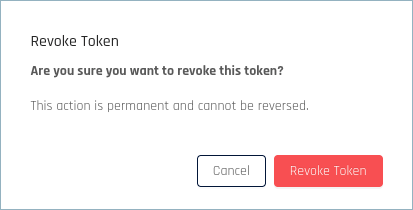
Click Revoke in the Actions column of that token.
-
In the confirmation dialog, click Revoke Token.
Advanced Mode
-
Click Access Tokens in the Control Center left navigation pane.
-
Locate the access token you want to revoke.
-
Click Revoke in the Actions column of that token.

-
In the confirmation dialog, click Revoke Access Token.