HYPR and CrowdStrike Zero Trust Assessment (ZTA) Policy Configuration
Policy Management Overview
In this guide, you will learn how to create a standard policy for CrowdStrike, specifically for the Zero Trust Assessment Score. Multiple policies can be defined for different use cases or scenarios.
Manage HYPR Adapt risk policies using standard administrative operations via the HYPR Control Center.
Take a few minutes to watch HYPR Adapt Crowdstrike policy configuration.
Create a Policy
To get started, first you must create a policy.
-
At the top rightof the Policy Management Overview, select Add New Policy.

-
Complete the Add New Risk Policy dialog fields as follows:
Field Value Policy Type Custom Policy Policy Templates Workstation Unlock Policy Name (Provide a name.) Policy Description (Provide a description.) -
Click Create when you have finished.
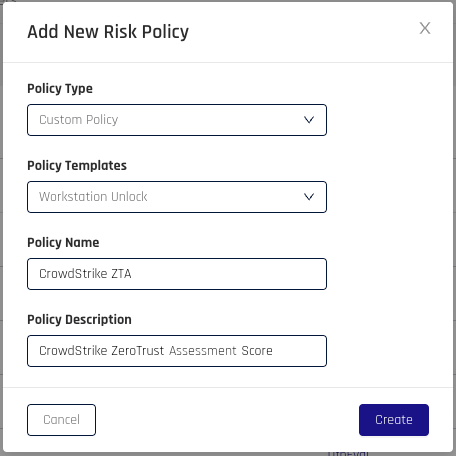
Your policy now appears in the Risk Policies list.
Form Configuration
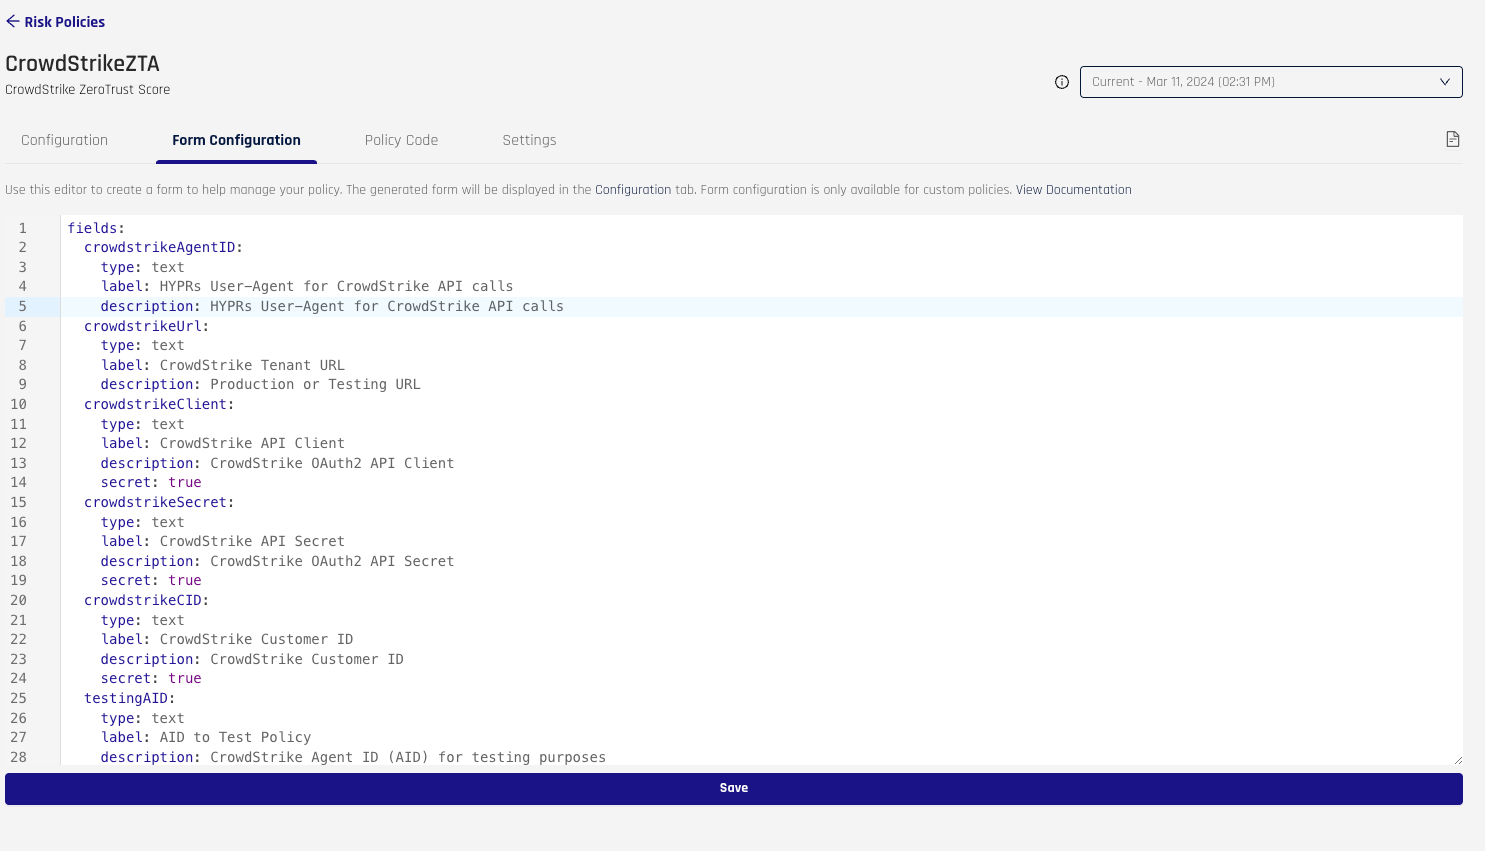
As part of creating a policy, you must define the variables that will be used for the policy. For CrowdStrike, we must create an AgentID field, URL field, Client field, Secret field, and Customer ID field. For testing purposes, you can include a field to hold a CrowdStrike Agent ID (AID). Keep in mind, the form names, such as crowdstrikeURL, will be used as variables in the policy.
Once the form is populated, click Save.
Configuration
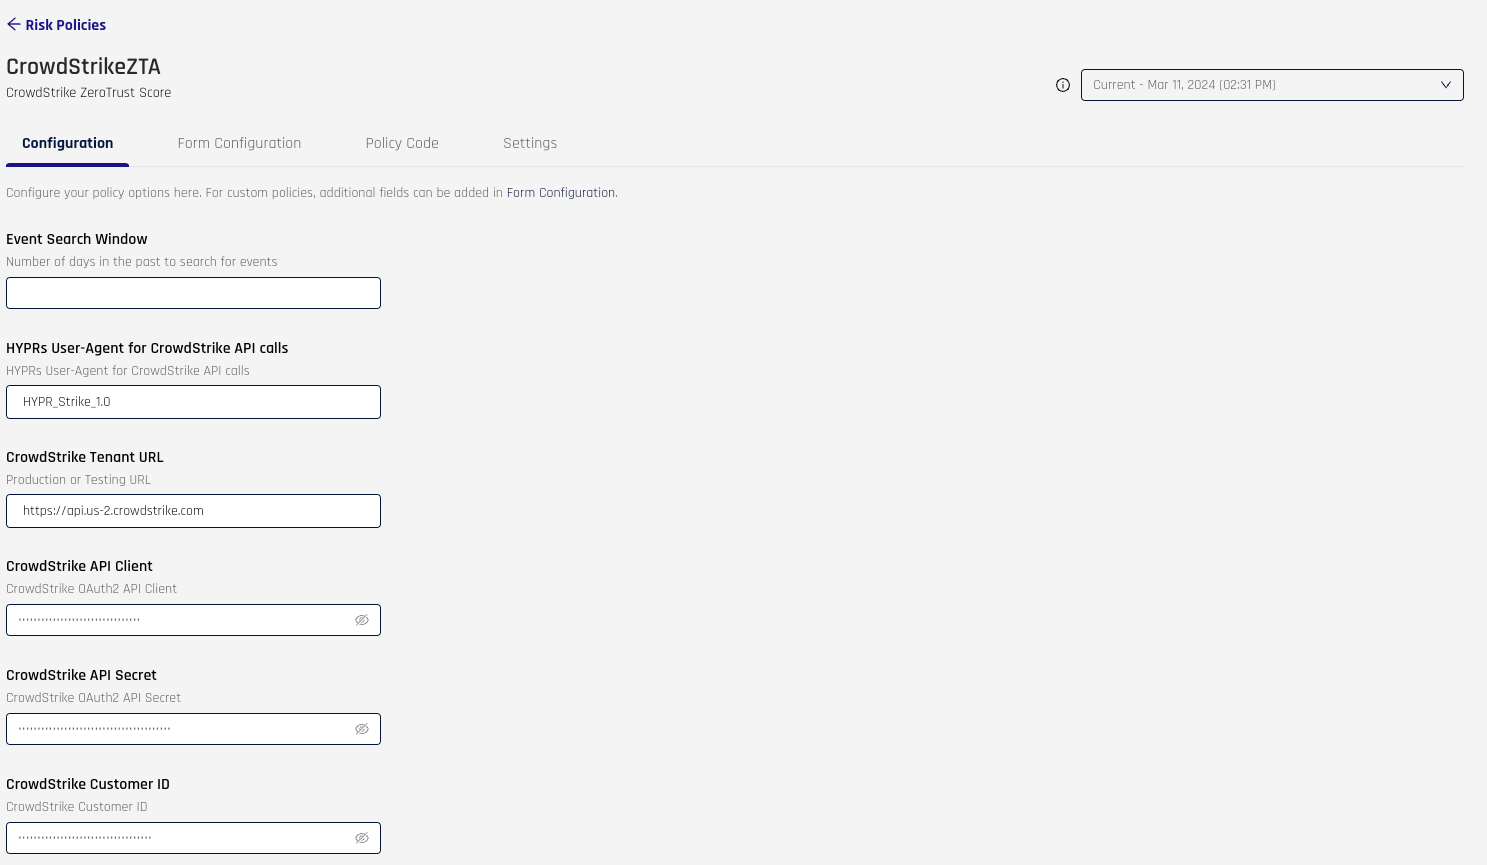
With the form configured, you can now define the values that will be used as part of the policy.
-
Event Search Window is blank.
-
For HYPRs User-Agent for CrowdStrike API calls, the only acceptable value is HYPR_Strike_1.0.
-
Enter the CrowdStrike Tenant URL.
-
Provide your OAuth2 CrowdStrike API Client and CrowdStrike API Secret.
-
Add your CrowdStrike Customer ID.
-
When you are satisfied with the values in these fields, click Save Configuration.
-
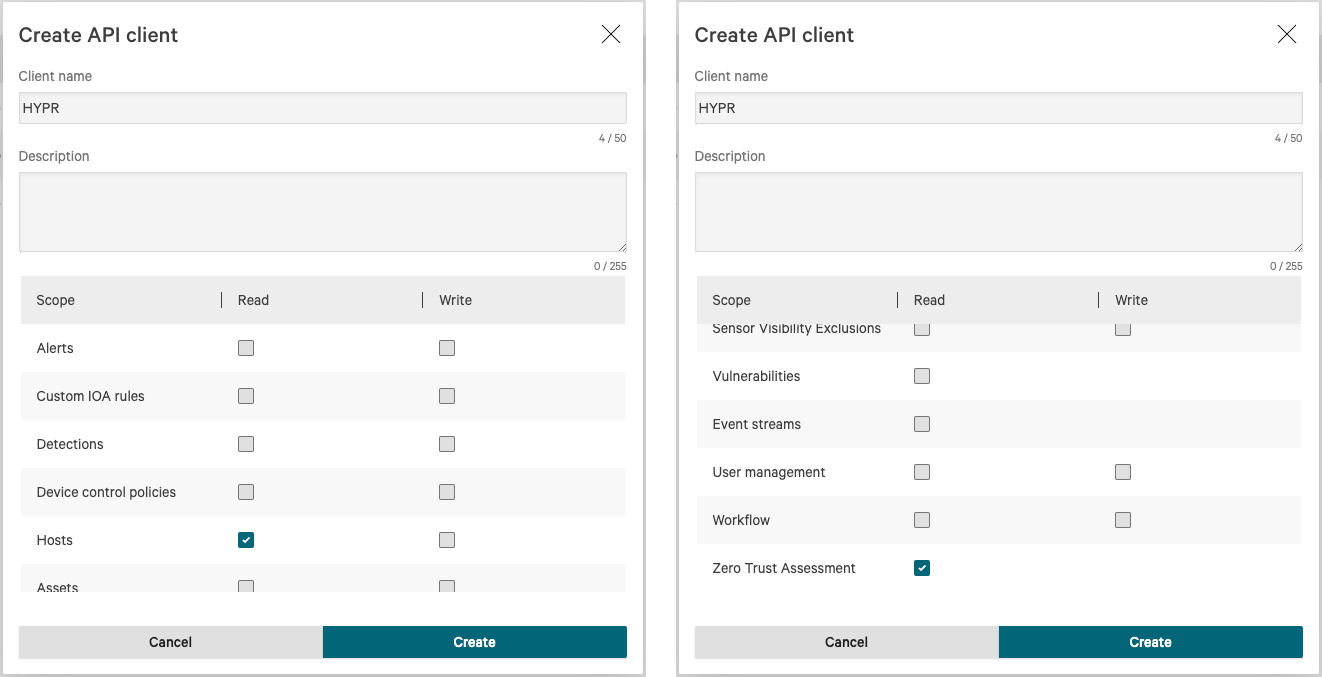
Find your OAuth2 API Client in your instance of CrowdStrike through Support & Resources -> API clients and keys.
-
On the Create API client dialog, ensure you have turned on the Read scope for Hosts and Zero Trust Assessment (you may need to scroll to find these entries).
-
Click Create when you have made these changes.
Policy Code
Within the Policy Code tab, you will be able to modify and test the policy to your desired outcome.
To test a policy:
-
Request the policy from HYPR to get started.
-
Provide a user at the top right.
-
Add a date range to receive data for the user to test. You will see the data populate the area labeled Input.
-
Click Evaluate. The results will be displayed at the bottom right, labeled Evaluation Result.
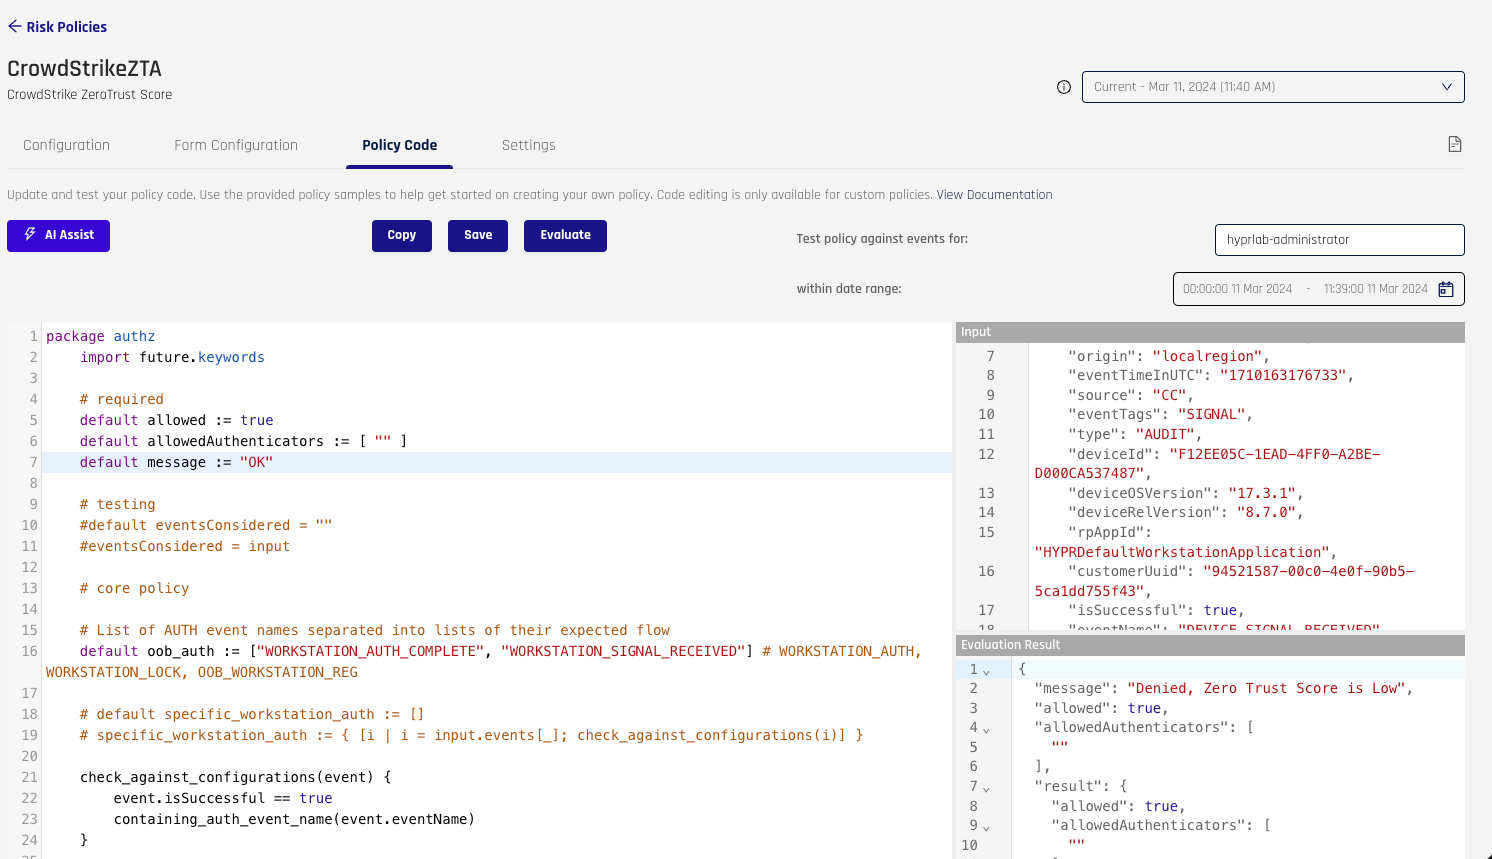
-
Once the policy meets your requirements, click Save.