HYPR and CrowdStrike IdP Policy Configuration
Policy Management Overview
Learn how to create a standard policy for CrowdStrike, specifically for the Identity Protection Risk Score. Multiple policies can be defined for different use cases or scenarios.
Manage Adapt risk policies using standard administrative operations via the HYPR Control Center.
Implementing CrowdStrike Identity Protection Score via HYPR Adapt
This guide covers integrating CrowdStrike Falcon's Identity Protection Risk Score into our access decision process. HYPR Adapt evaluates the score against predefined policies to determine whether a user is granted access, required to use phishing-resistant authentication, undergo identity verification, or denied access.
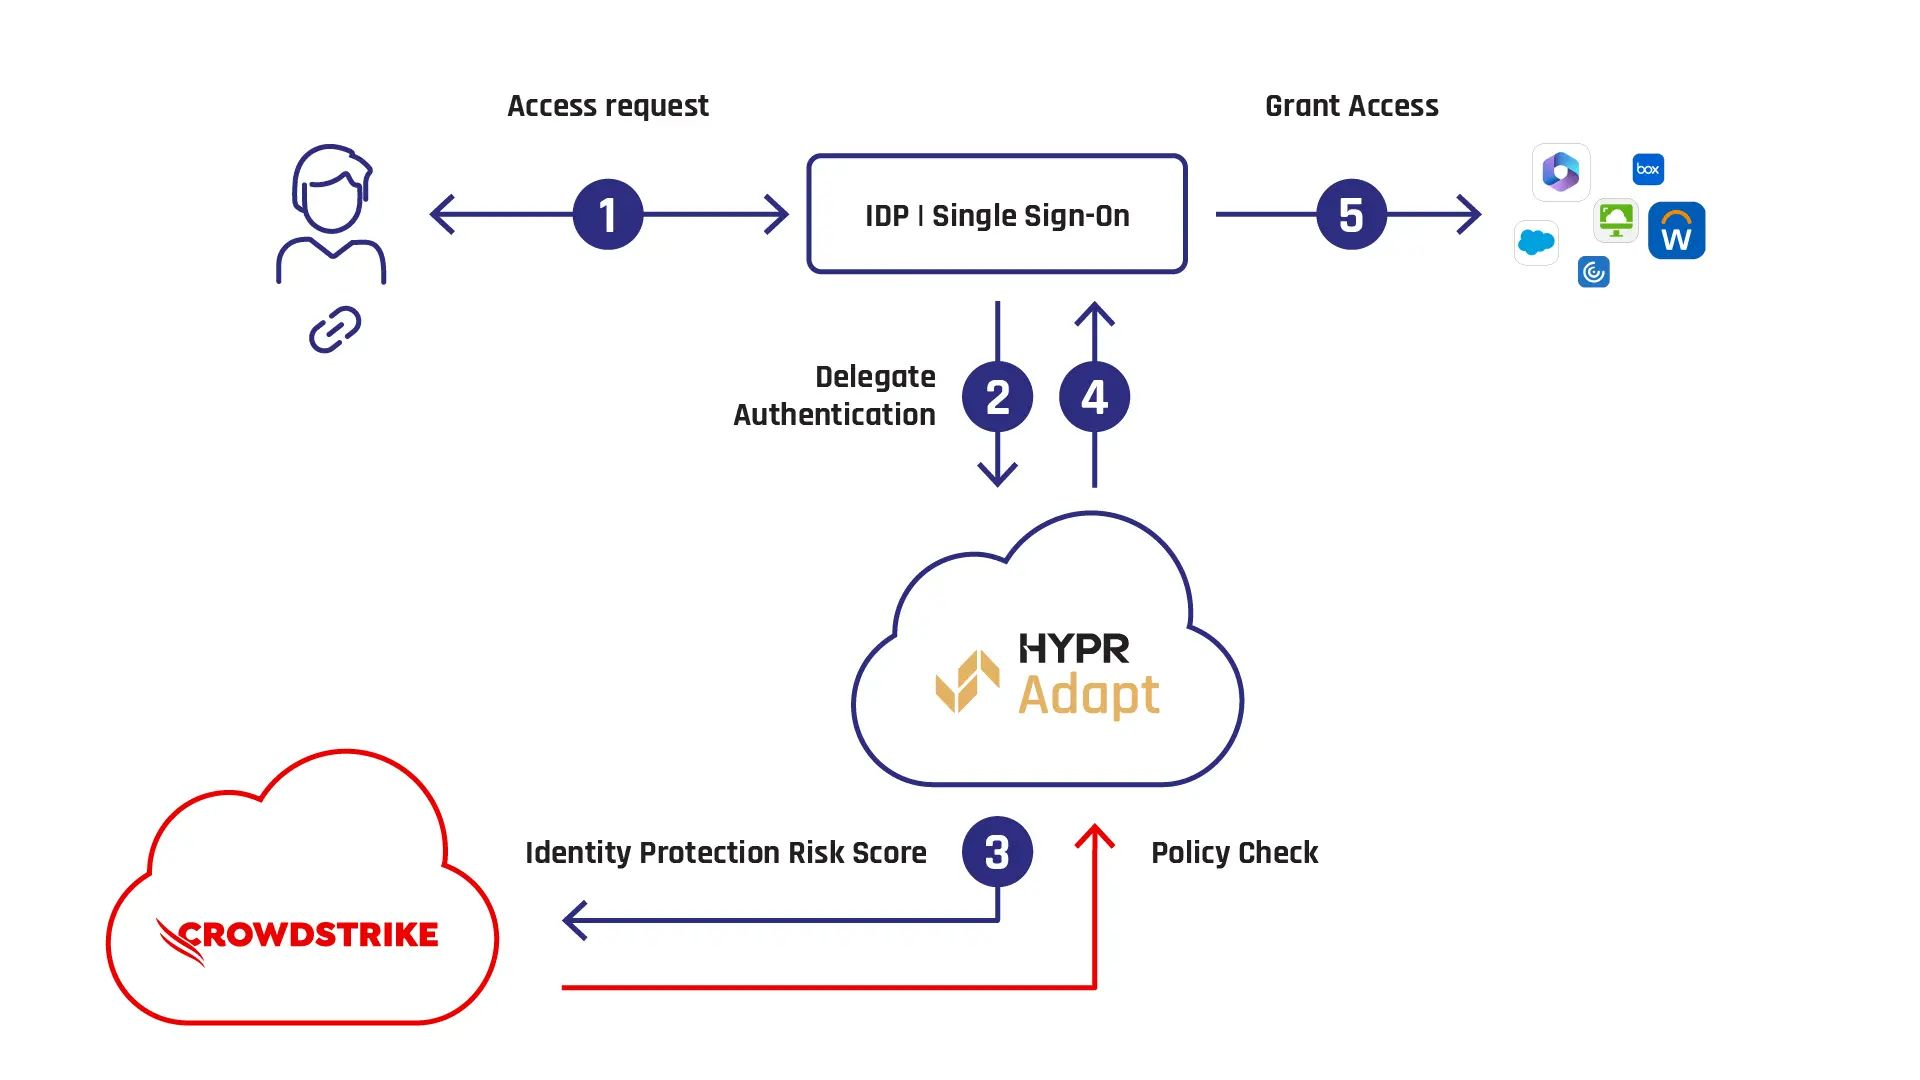
Integration Workflow
1. IdP Authentication
- The user initiates login with their Identity Provider (IdP).
2. HYPR Adapt Policy Check
- The IdP queries HYPR Adapt for authentication requirements.
3. Risk Score Retrieval
- HYPR Adapt retrieves the Identity Protection Risk Score from CrowdStrike Falcon.
4. Policy Enforcement
- Based on the risk score, HYPR Adapt applies security measures such as:
- Seamless SSO
- MFA enforcement
- Identity re-verification
- Access denial
5. Access Decision
- If policy conditions are met, the user gains access to enterprise applications.
This document provides technical guidance on implementing and configuring this integration to enhance security while ensuring a seamless authentication experience.
Configure CrowdStrike/HYPR for Webhook Integration
Before proceeding, ensure that a webhook connection is established with CrowdStrike.
This setup enables us to receive Identity Protection Risk Scores in real-time via webhook events, removing the need for inline API calls. By directly ingesting events from CrowdStrike, we enhance efficiency, minimize API overhead, and ensure timely risk-based access decisions.
Complete Configuring CrowdStrike Webhooks tutorial before continuing
Creating Identity Protection Workflow
Steps 1-3: Refer to ZTA Steps
- See ZTA steps for exact details. Avoiding duplication of images.
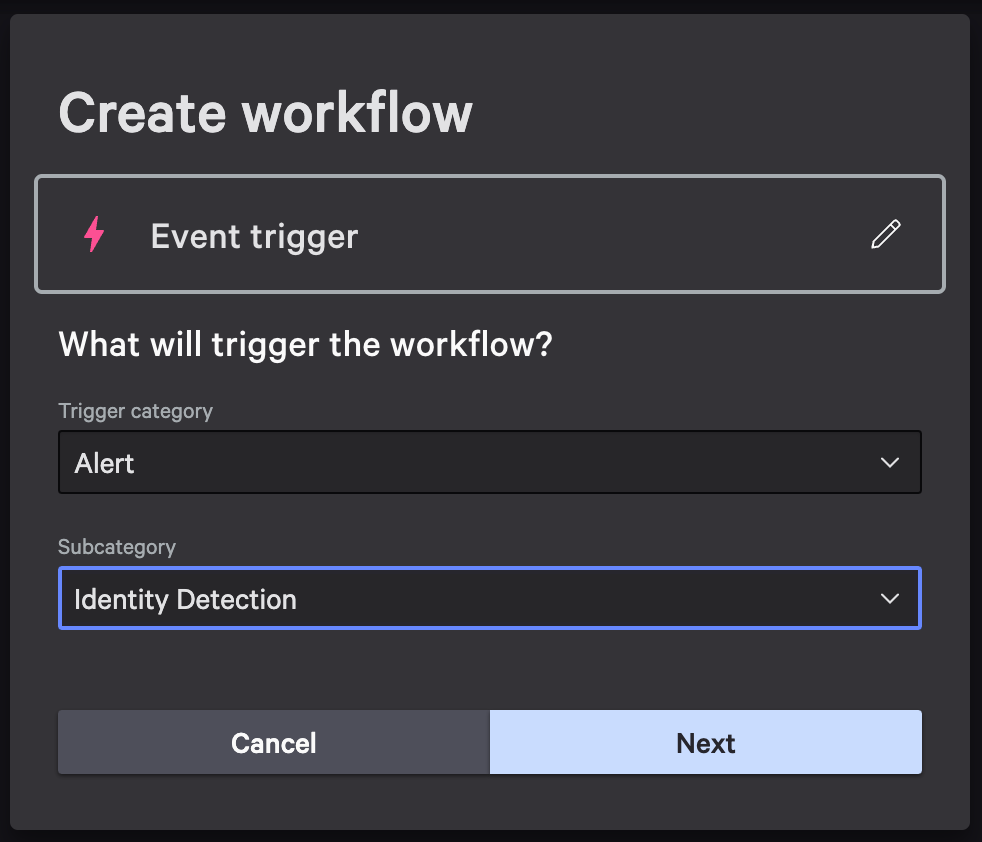
Step 4: Configure Event Trigger
- Configure the event trigger as follows, then click Next.
Step 5: Add an Action Step
- Hover over the Trigger object, and an arrow will appear.
- Click the arrow and select Action as the sequential step.
Step 6: Retrieve User Identity Context
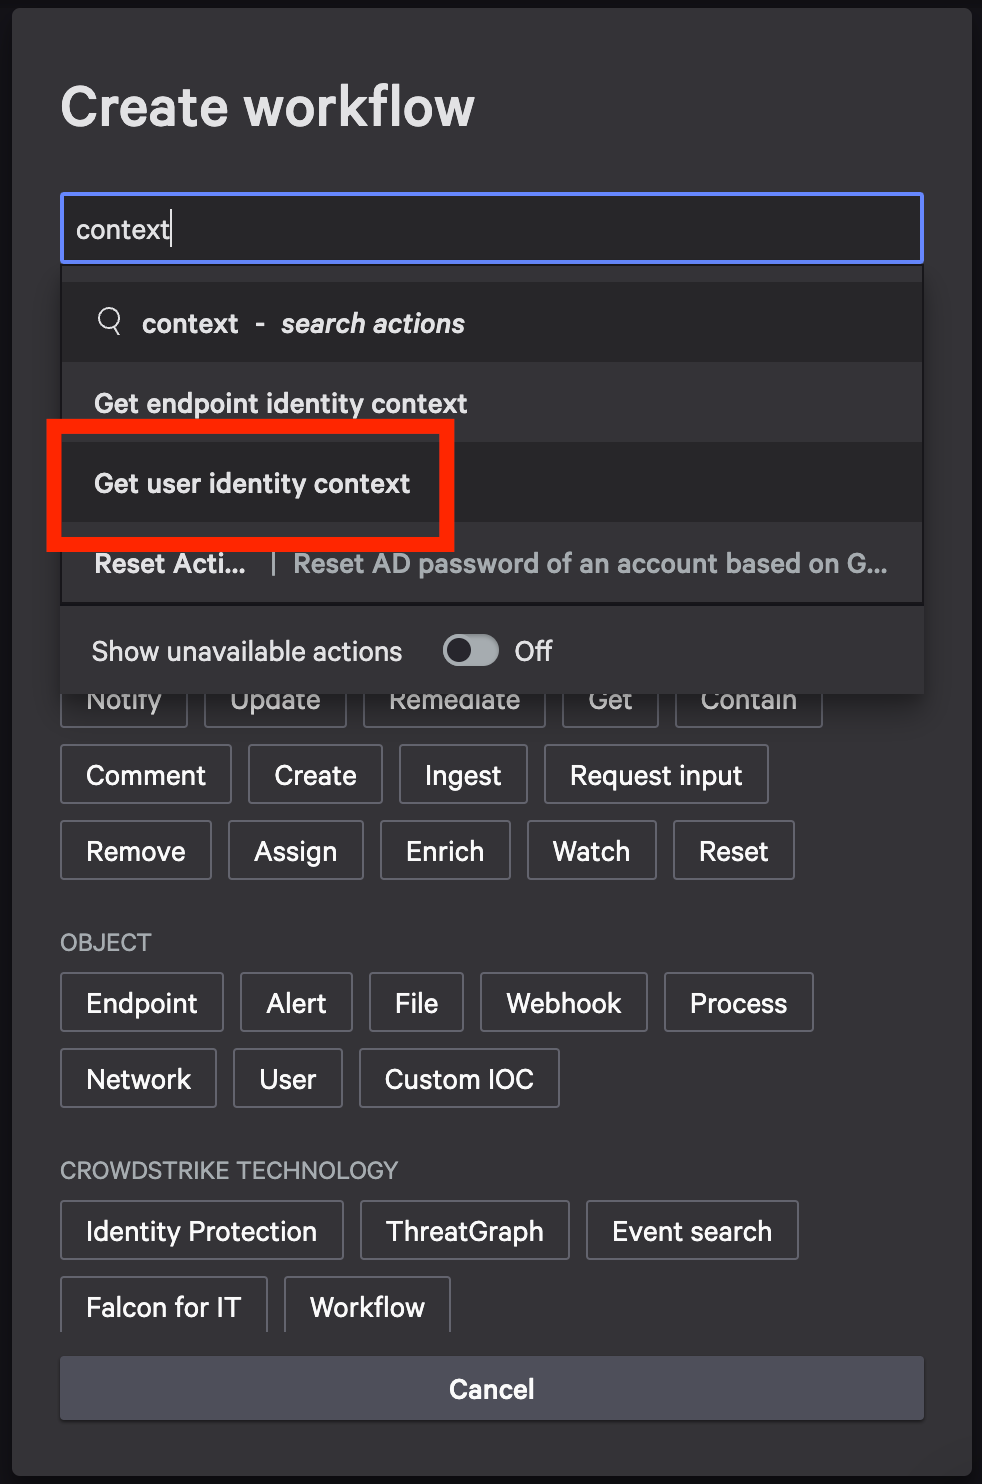
- In the new window, search context within workflow commands.
- Choose Get user identity context as the action.
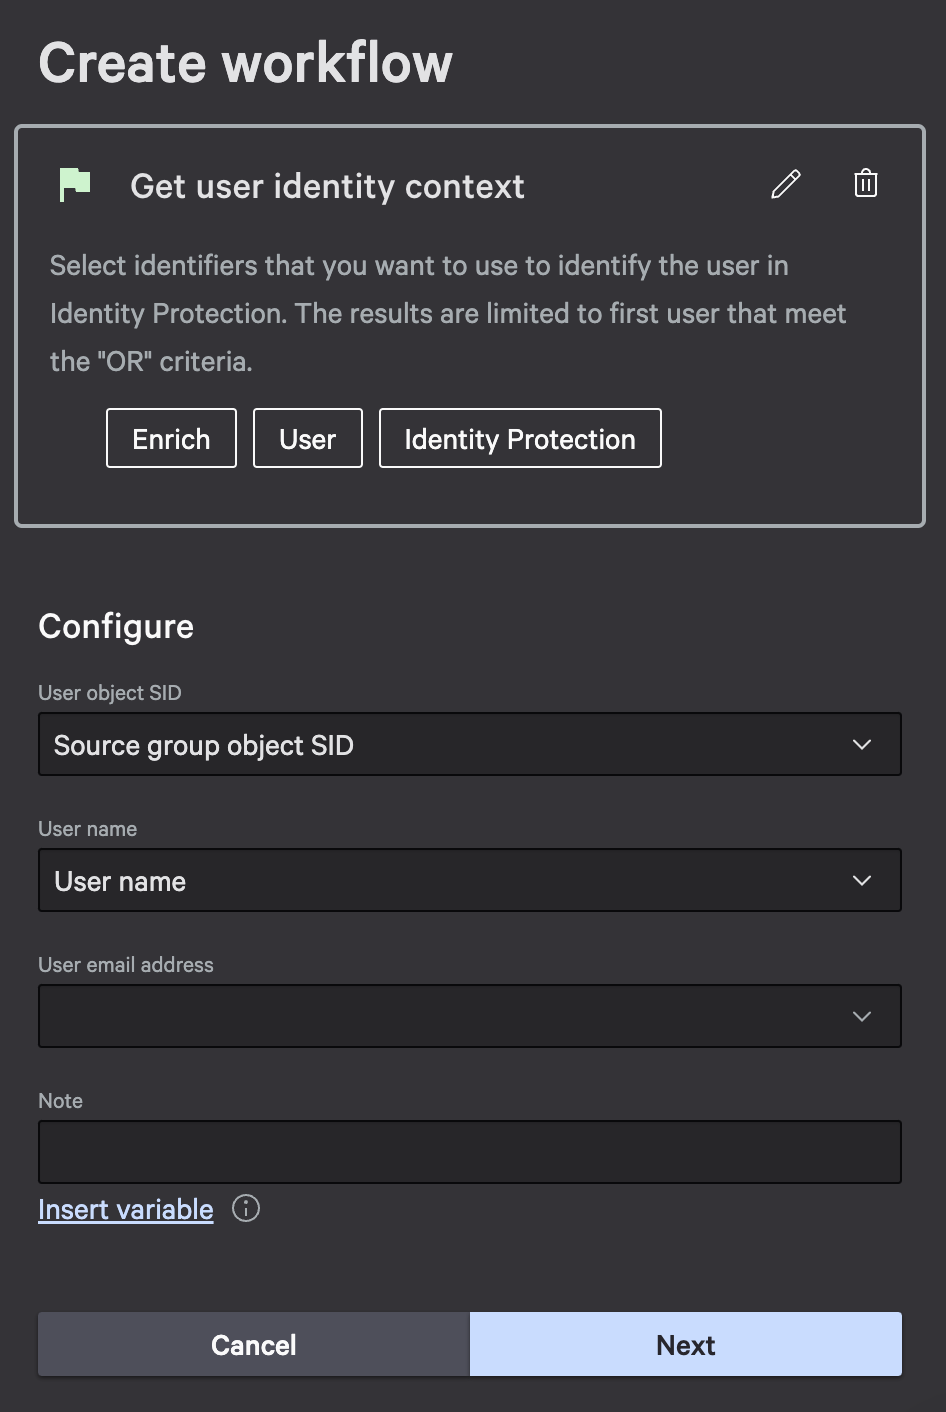
- Configure it as follows:
Step 7: Add a Condition Step
- Hover over the new context action, then select Condition as the sequential step.
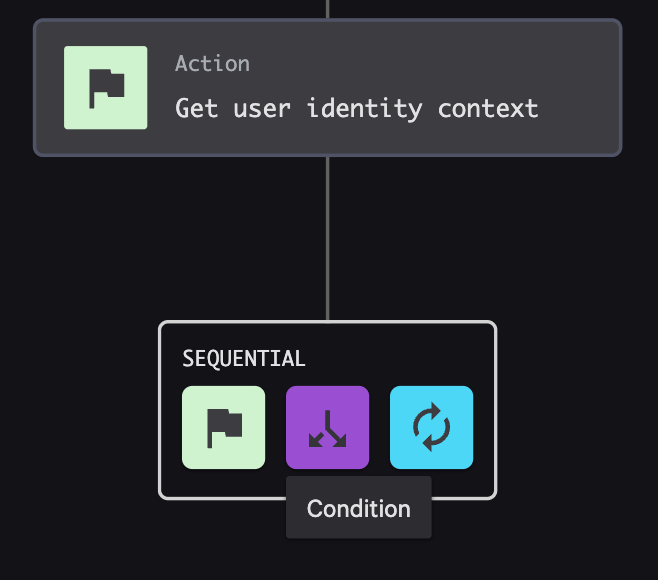
- Configure the condition as follows:
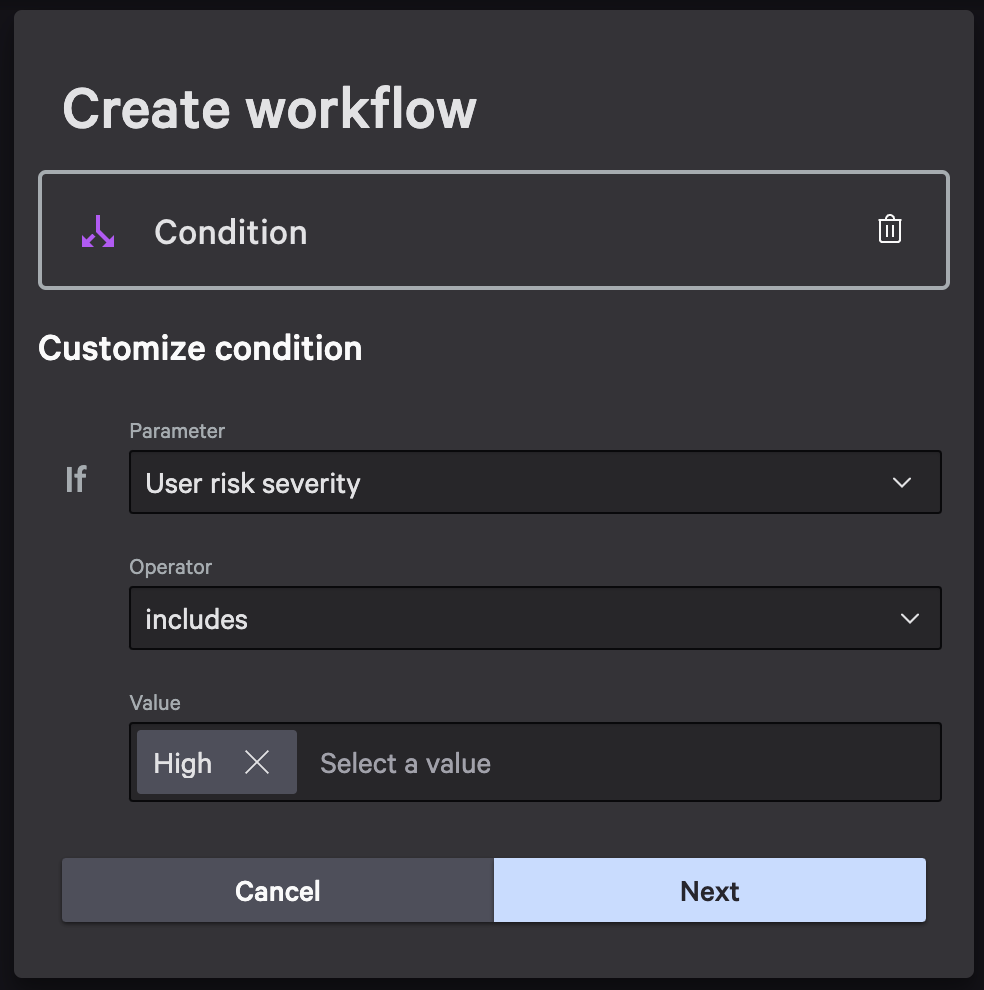
Step 8: Add Webhook for Risk Severity
- Hover over the TRUE piece of the workflow.
- Add an Action step for users having a Risk Severity of true.
- This is where we will add a webhook call (refer to Step 6 of ZTA instructions).
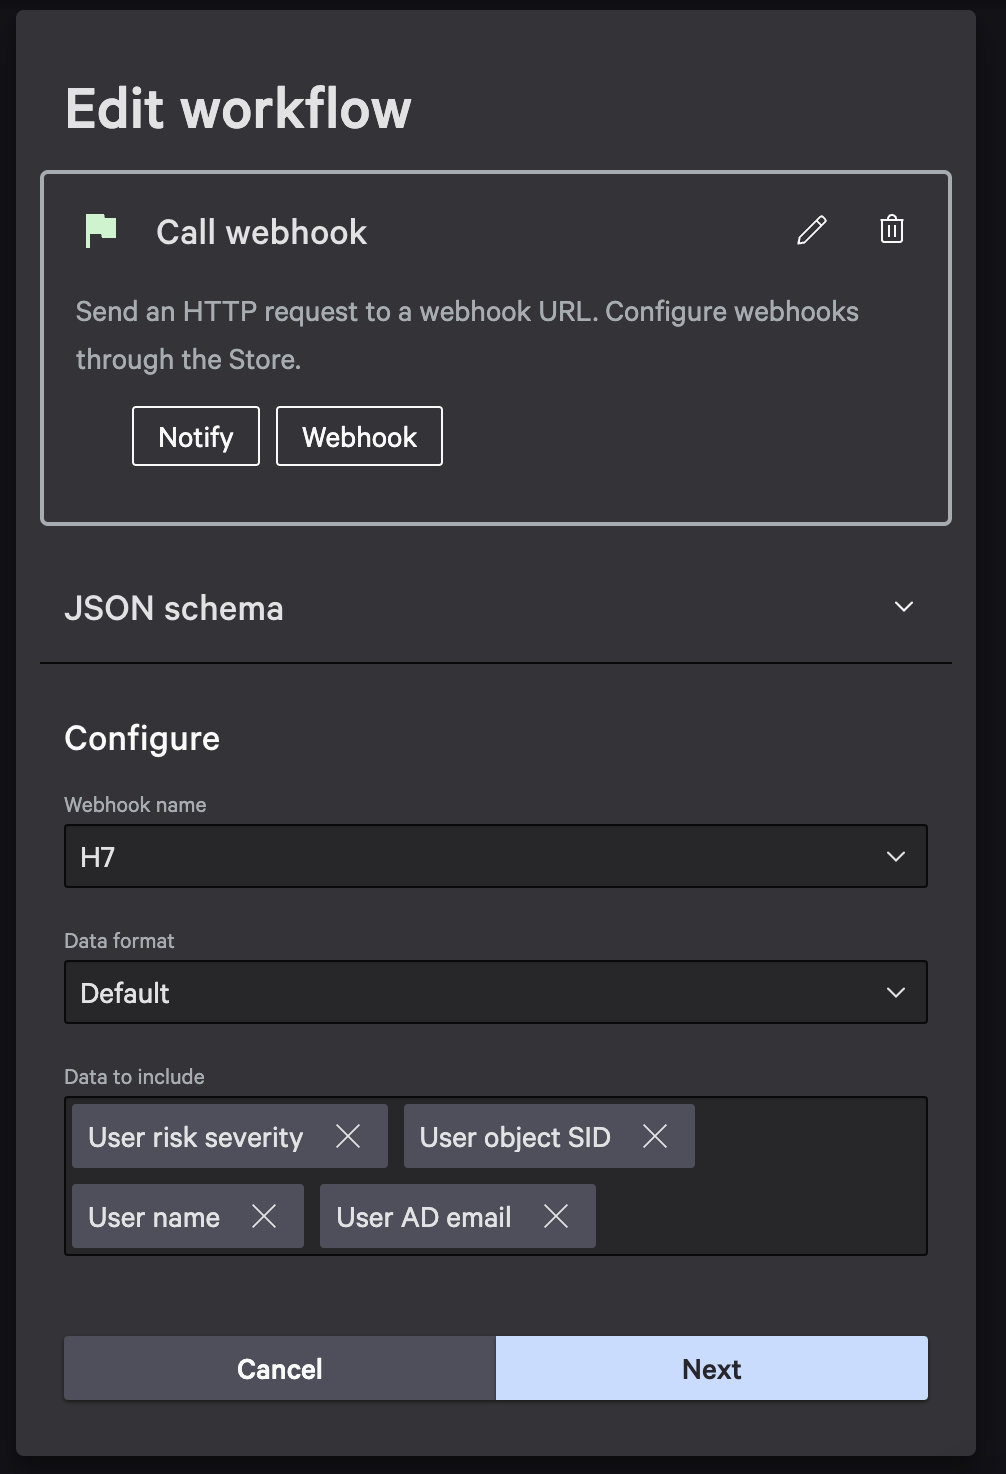
Step 9: Configure Webhook Call
- Use the same Webhook name configured at the beginning of the document.
- Data should include all required attributes, plus any additional attributes as needed.
Step 10: Finalize and Activate Workflow
- Click Next, then Finish at the top right of the page.
- In the final confirmation window, ensure Workflow Status is set to ON so the webhook begins sending data immediately.
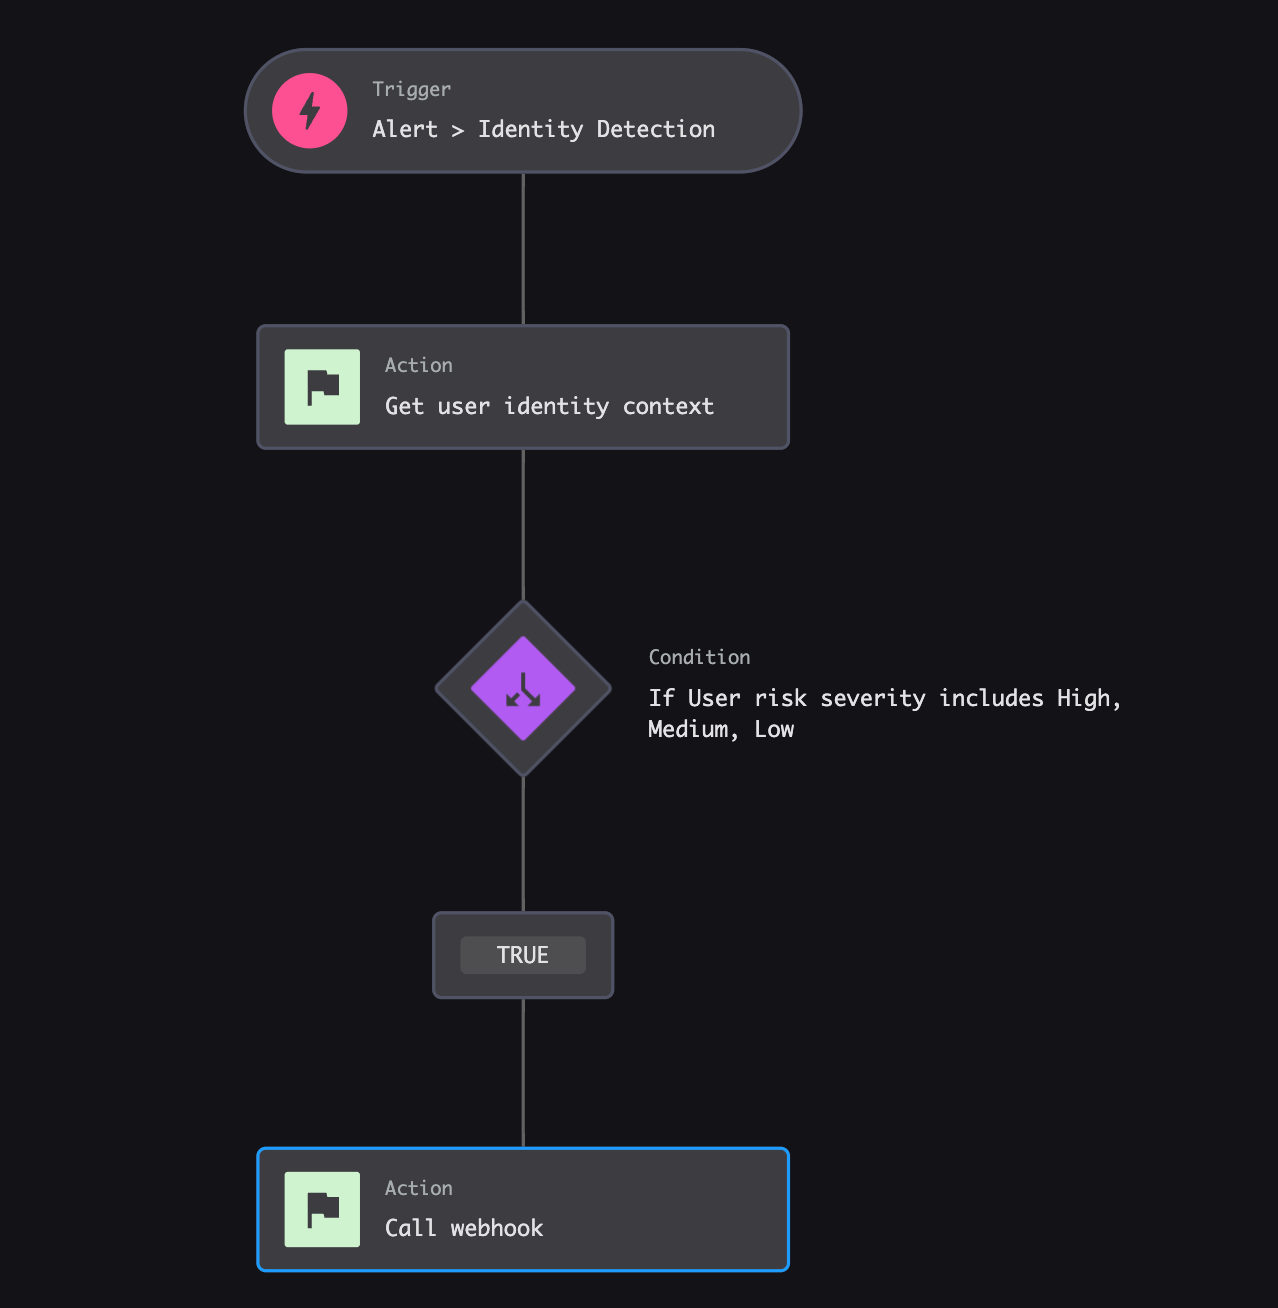
Final Expected Results for Identity Protection Workflow
Create a Policy
To get started, first you must create a policy.
-
At the top right of the Risk Policies list, select Add New Policy.

-
Complete the Add New Risk Policy dialog fields as follows:
Field Value Policy Type Custom Policy Policy Templates Workstation Unlock Policy Name (Provide a name.) Policy Description (Provide a description.) 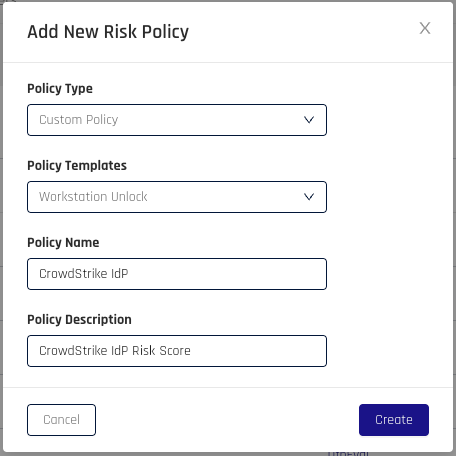
Your policy now appears in the Risk Policies list.
Form Configuration
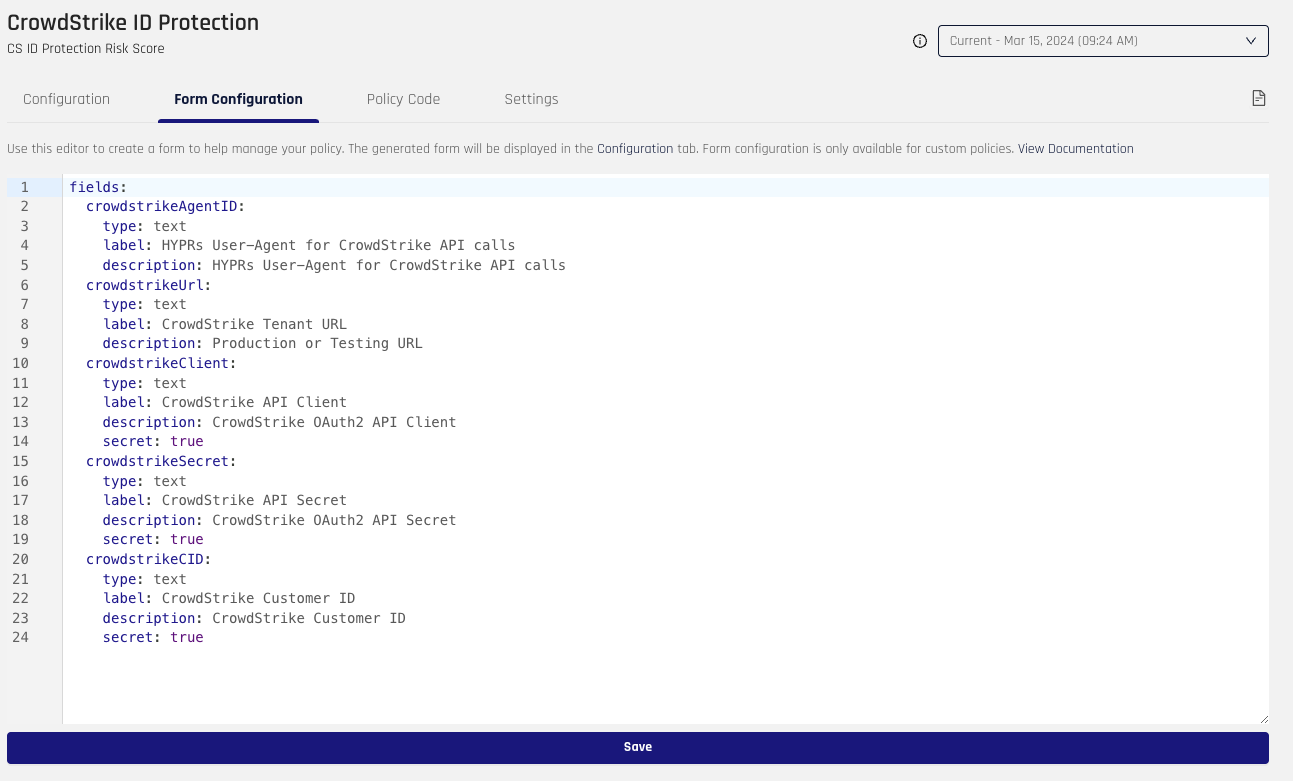
As part of creating a policy, you must define the variables that will be used for the policy. For CrowdStrike, we must create an AgentID field, URL field, Client field, Secret field, and Customer ID field. Keep in mind, the form names, such as crowdstrikeURL, will be used as variables in the policy.
Once the form is populated, click Save.
Configuration
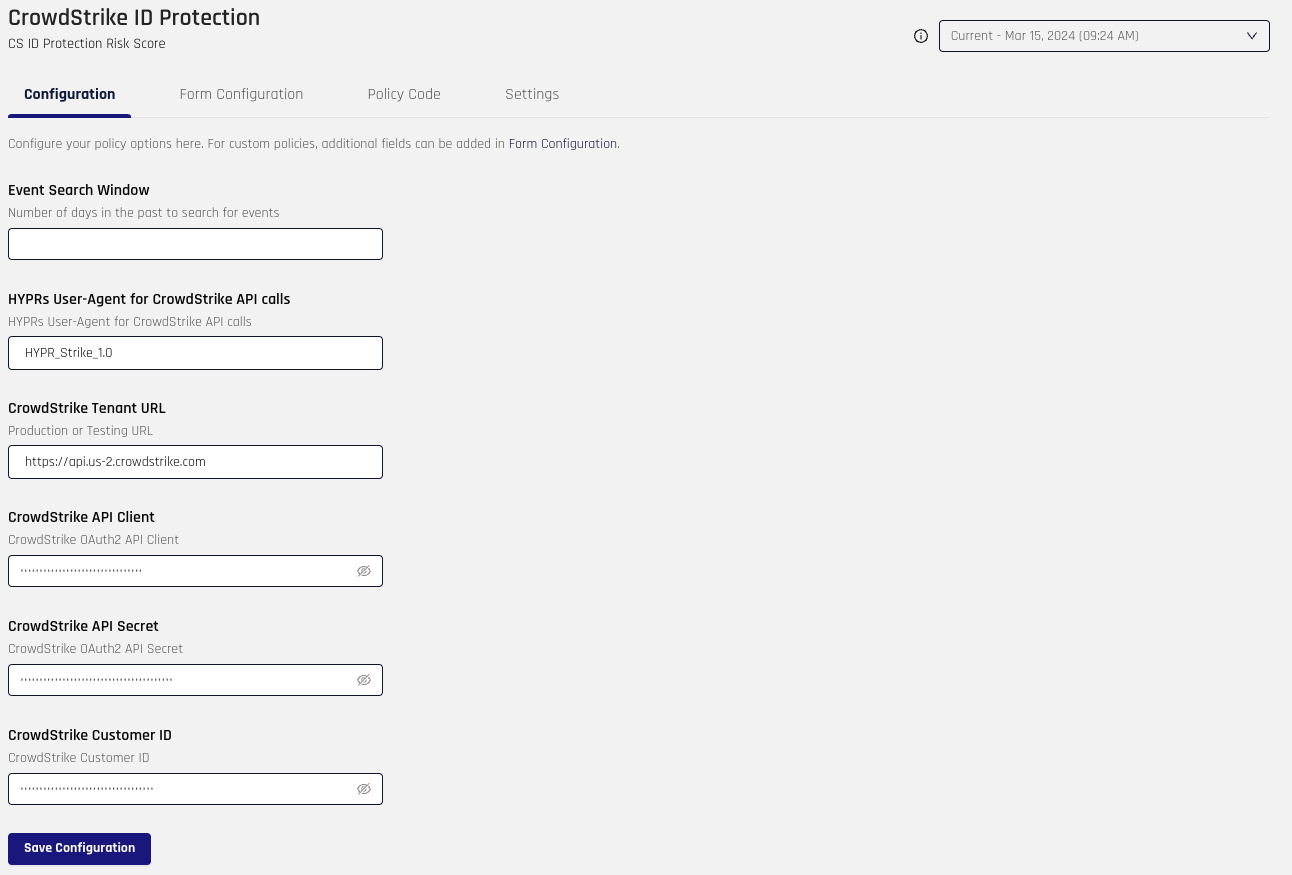
With the form configured, you can now define the values that will be used as part of the policy.
-
Event Search Window is blank.
-
For HYPR's User-Agent for CrowdStrike API calls, the only acceptable value is HYPR_Strike_1.0.
-
Enter the CrowdStrike Tenant URL.
-
Provide your OAuth2 CrowdStrike API Client and CrowdStrike API Secret.
-
Add your CrowdStrike Customer ID.
-
When you are satisfied with the values in these fields, click Save Configuration.
-
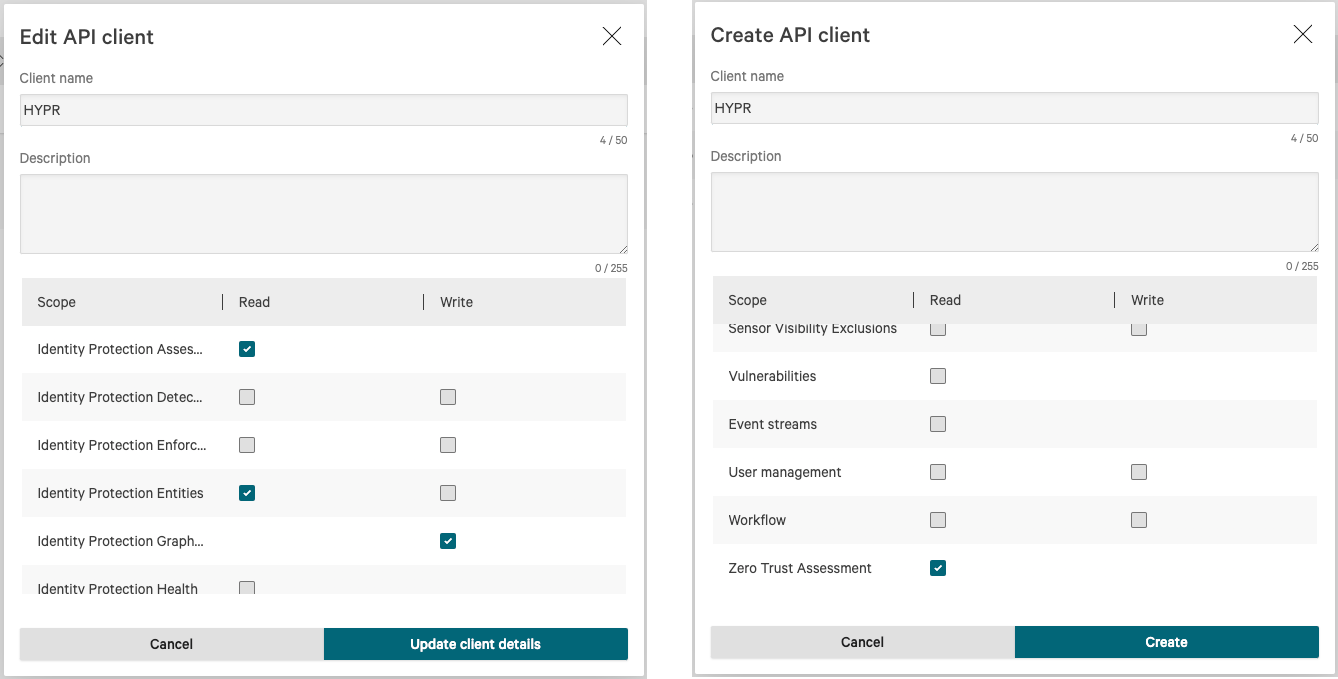
Find your OAuth2 API Client in your instance of CrowdStrike through Support & Resources -> API clients and keys.
-
On the Create API client dialog, ensure you have turned on the Read scope for Identity Protection Assessment, Identity Protection Entities, and Zero Trust Assignment.
-
Turn on the Write scope for Identity Protection GraphQL.
-
Click Update client details when you have made these changes.
Policy Code
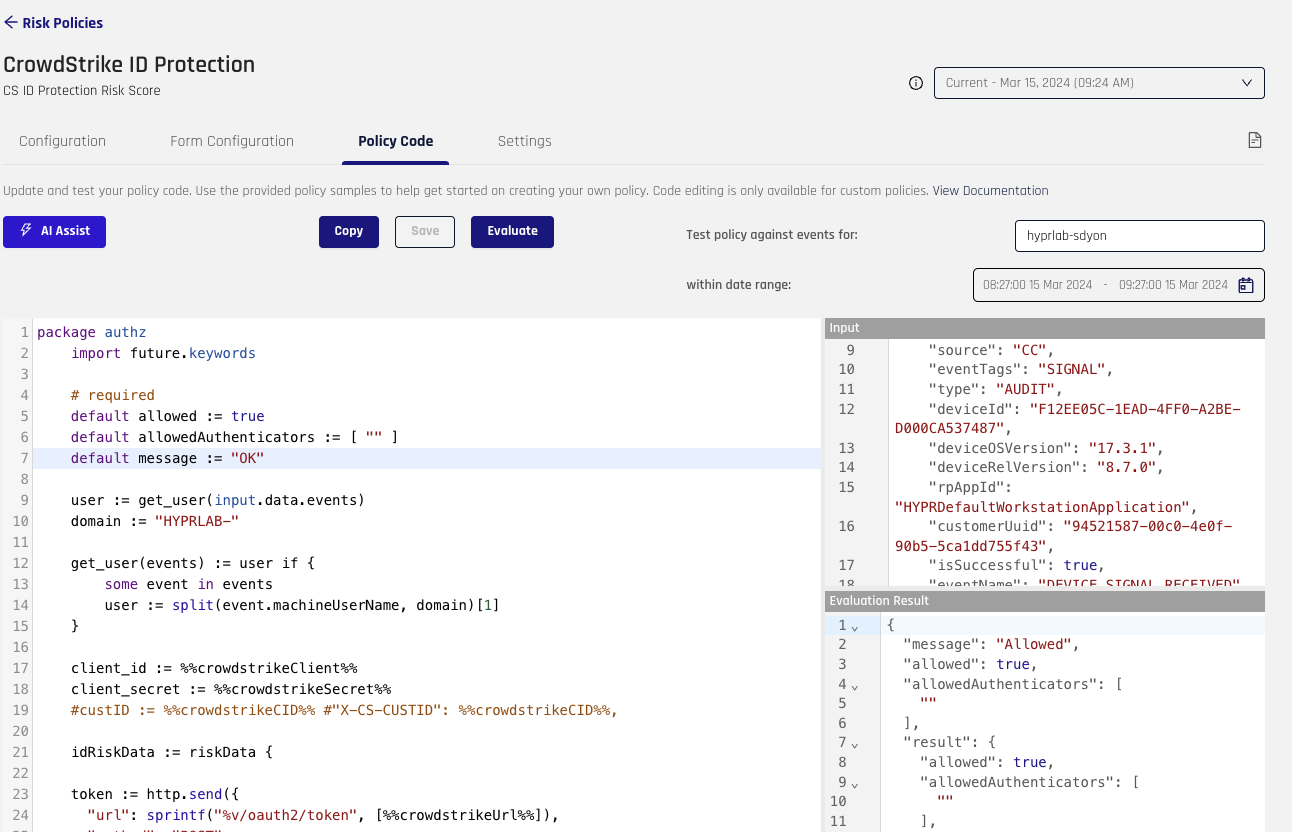
Within the Policy Code tab, you will be able to modify and test the policy to your desired outcome.
To test a policy:
-
Request the policy from HYPR to get started.
-
Provide a user at the top right.
-
Add a date range to receive data for the user to test. You will see the data populate the area labeled Input.
-
Click Evaluate. The results will be displayed at the bottom right, labeled Evaluation Result.
-
Once the policy meets your requirements click Save.