Risk Policy Management
This article is subject to change as the feature develops and we make improvements.
The calls to perform CRUD operations and to test HYPR Adapt Risk Policies, including the allowlisting of users, can be found here in the HYPR Passwordless API collection.
The main pane of the Risk Policies tab will display the + Risk Policy button to the right of the search field, and then a table listing all the Risk Policies (an empty box will show instead if you have no Risk Policies).

The information in the columns is as follows:
-
Name: The name of the Risk Policy
-
Description: The description of what the Risk Policy does
-
Date Created: The date the Risk Policy was created
-
Last Modified: The date the Risk Policy was last changed
-
Status: A badge indicating if the Risk Policy is in use
-
Active indicates the policy is assigned to an RP application
-
Inactive indicates the policy is not assigned to an RP application
-
Adding a Risk Policy
-
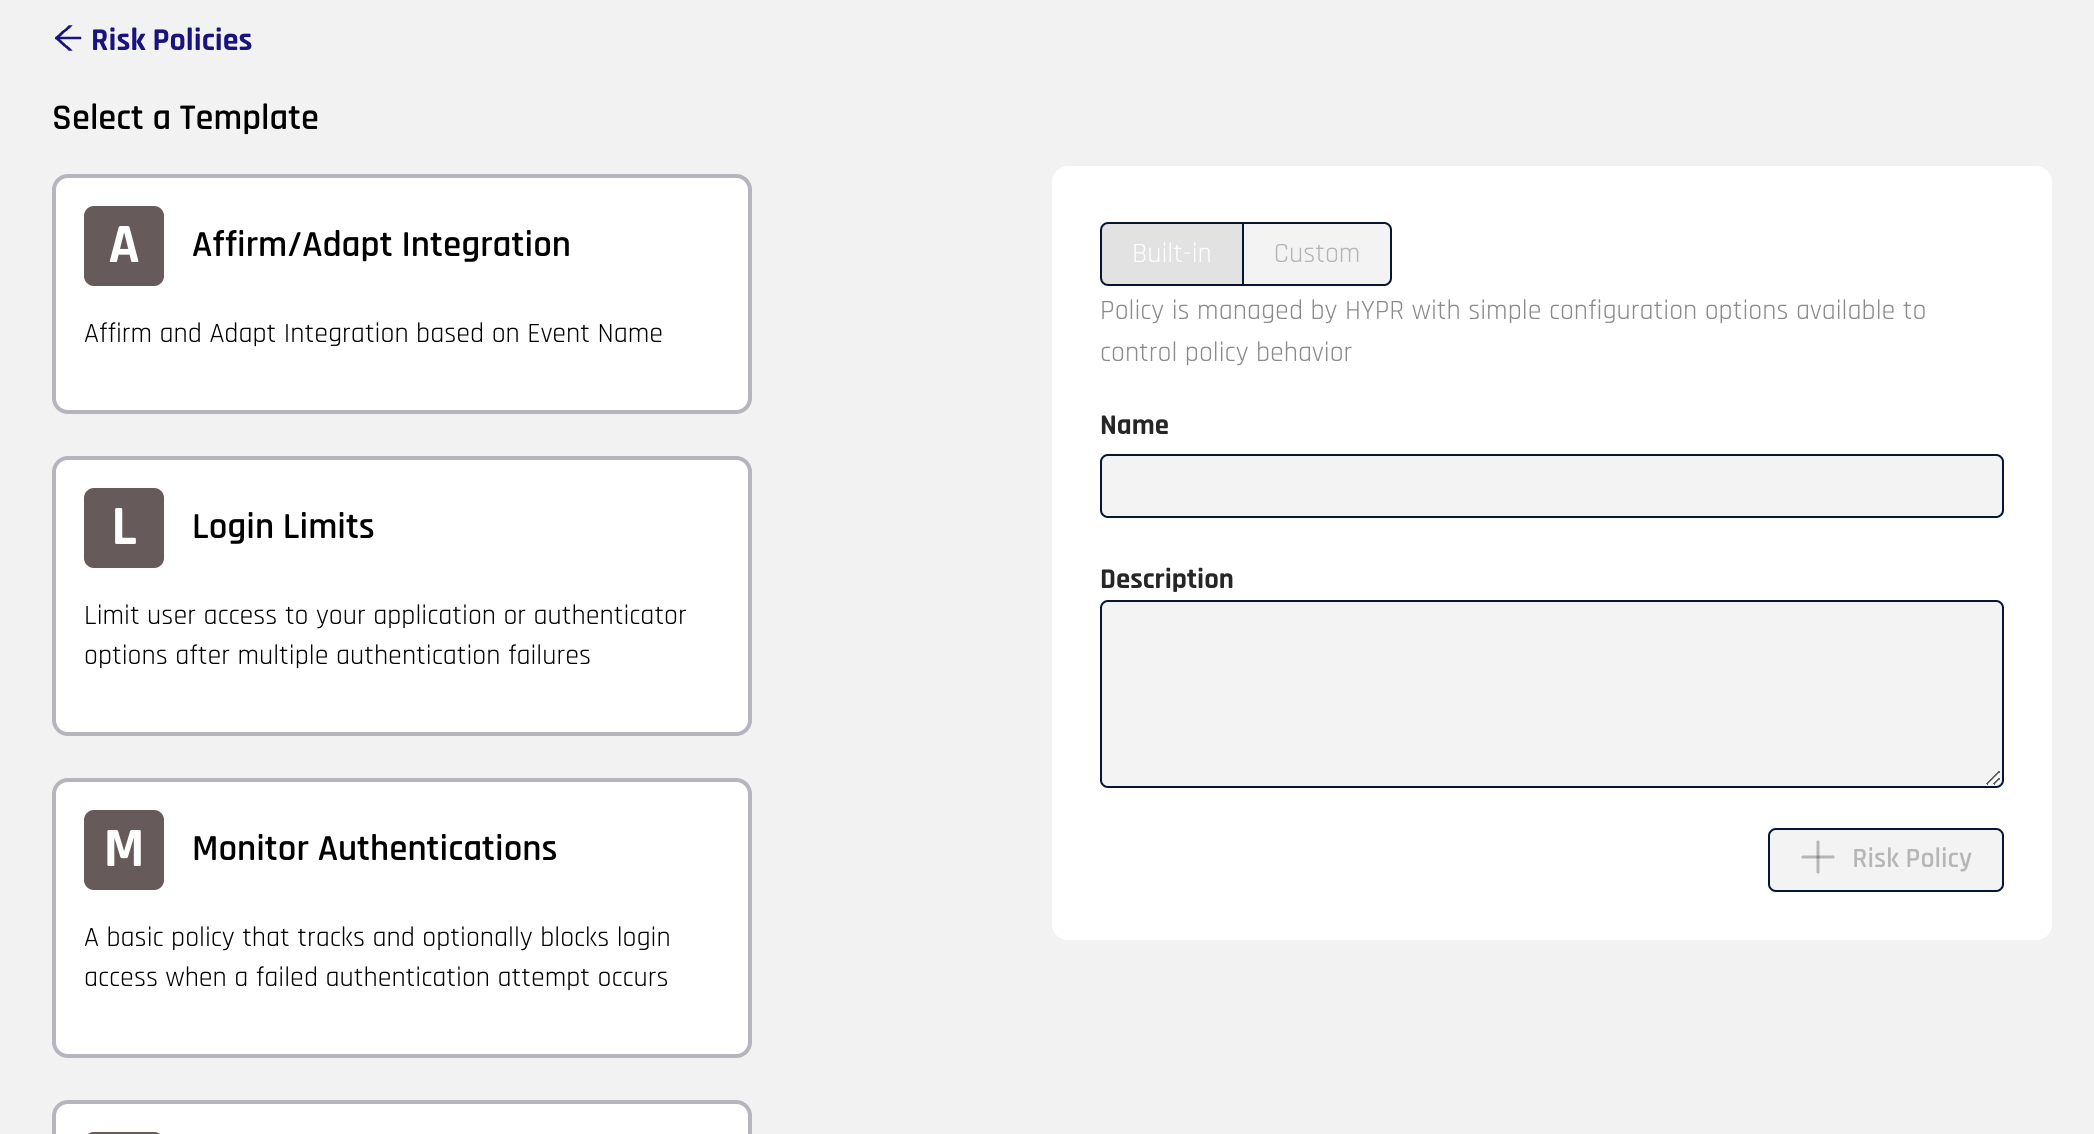
Click + Risk Policy in the upper right of the main pane. This will take you to the Risk Policy creation page.
-
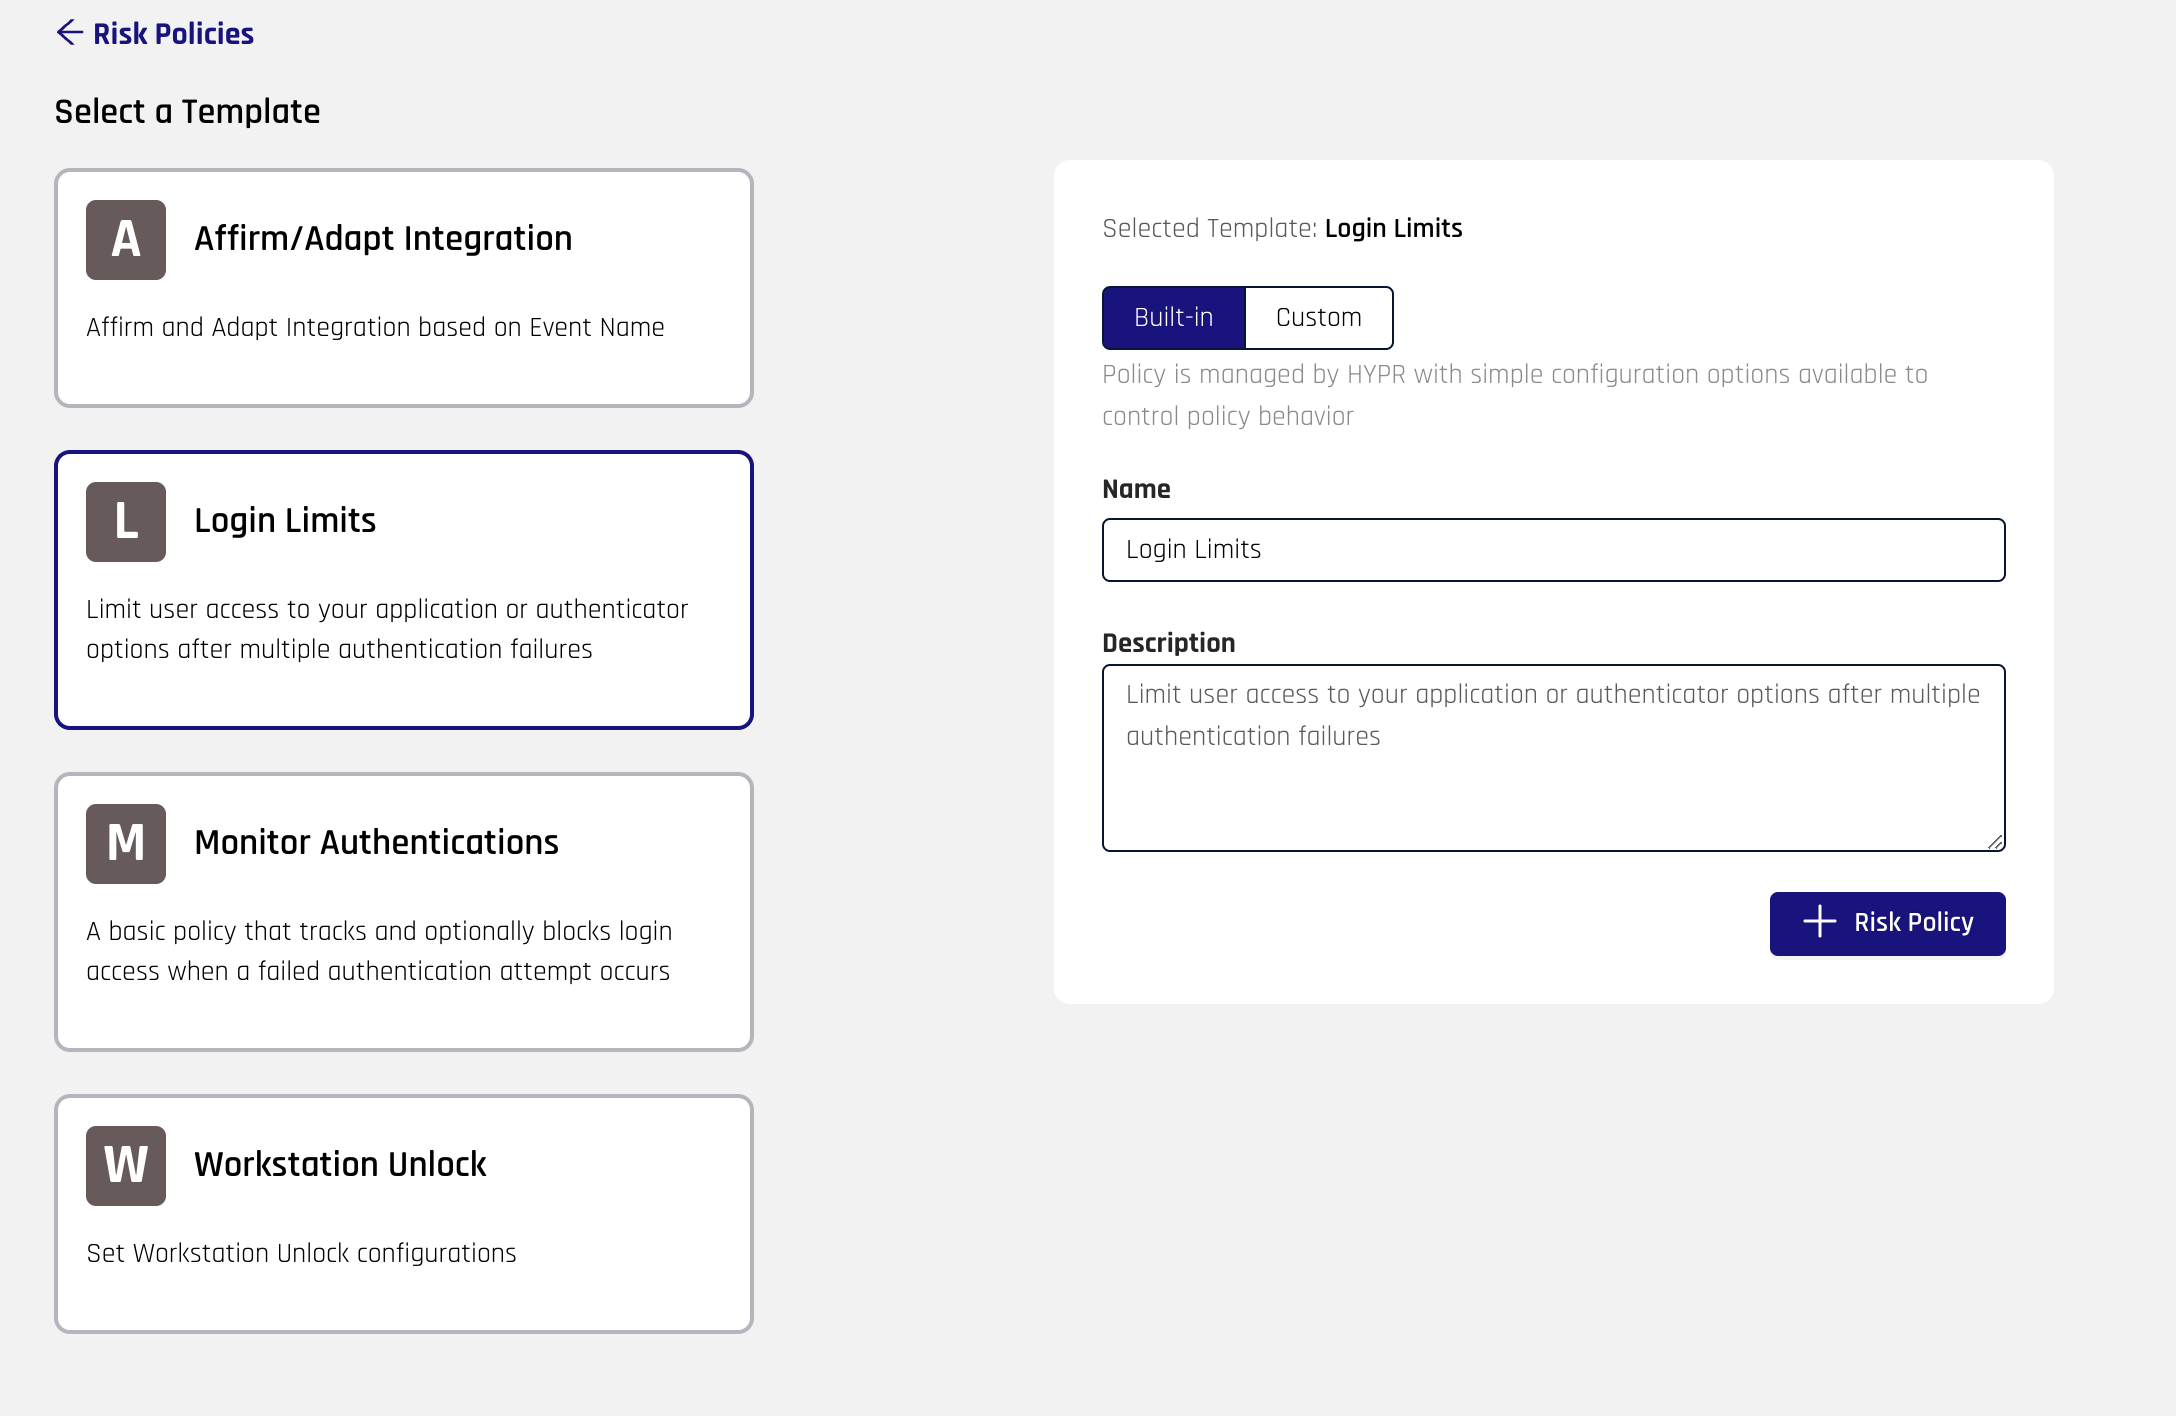
Select a Risk Policy template from the template list on the left side of the page. This will enable the creation form.
-
In the form select the Content Type:
-
Built-In: A built-in Risk Policy will work as defined from the template but may allow configuration options to be set to modify its behavior
-
Custom: A custom Risk Policy will allow you to modify the underlying code and configuration options for the Risk Policy
-
-
Set the Name and Description (optional) for your Risk Policy then click + Risk Policy.
-
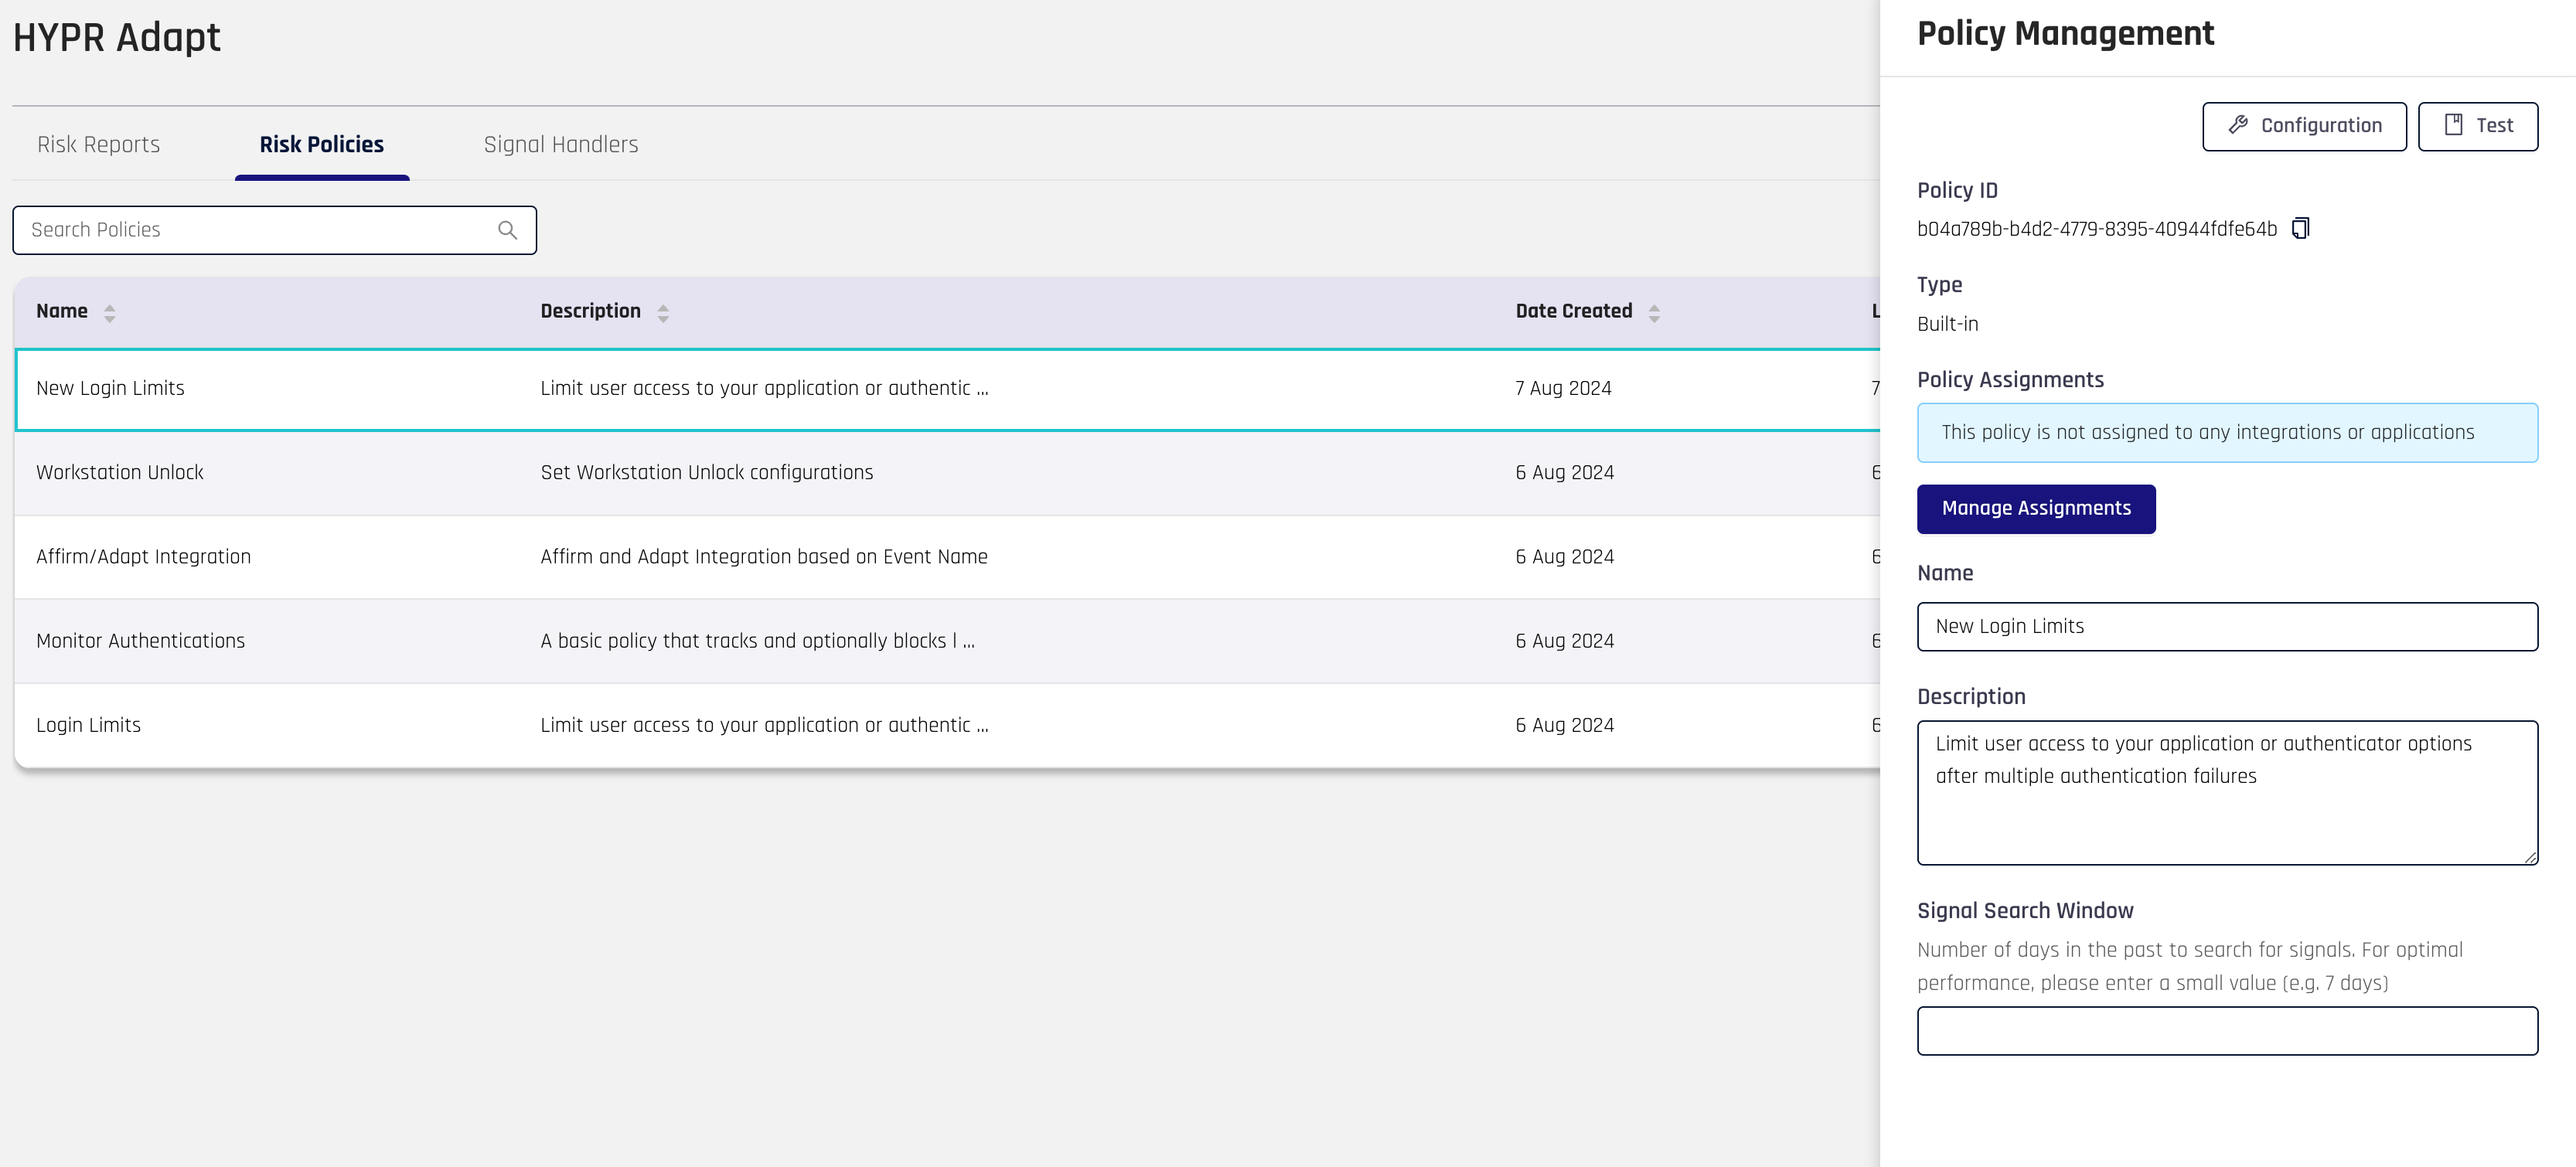
You will then be taken back to the Risk Policies tab in the main Adapt Pane with your new Risk Policy automatically selected.
Managing a Risk Policy
To view or edit a Risk Policy, select the Risk Policy from the table. This will open a drawer pane from the right side of the screen.

These editable fields will appear towards the bottom of the pane:
-
Name: Set the name for the Risk Policy
-
Description: Set the description for the Risk Policy
-
Signal Search Window: Set how many days back the Risk Policy should search for signals
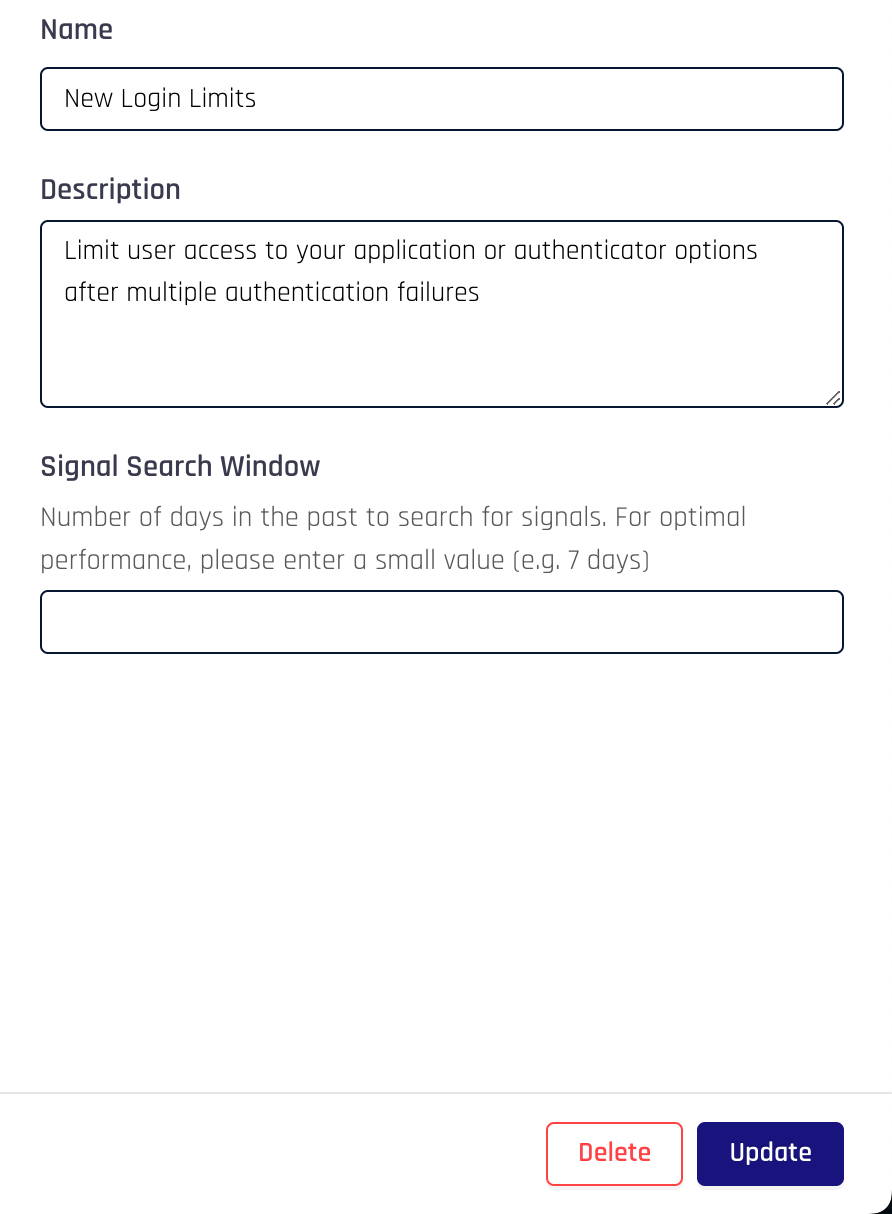
Click Update when you have finished making changes to these fields.
If you would like to delete the policy, click Delete which will bring up a pop-up box to confirm your action.
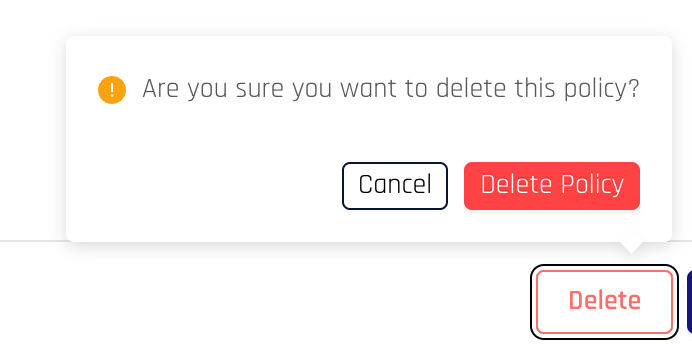
Click Delete Policy to confirm the action and the page will refresh with the policy removed.
Configuration
To view or edit a Risk Policy's configuration, click the Configuration button at the top of the drawer pane:

This will take you to the Configuration tab pane in the Risk Policies details page.
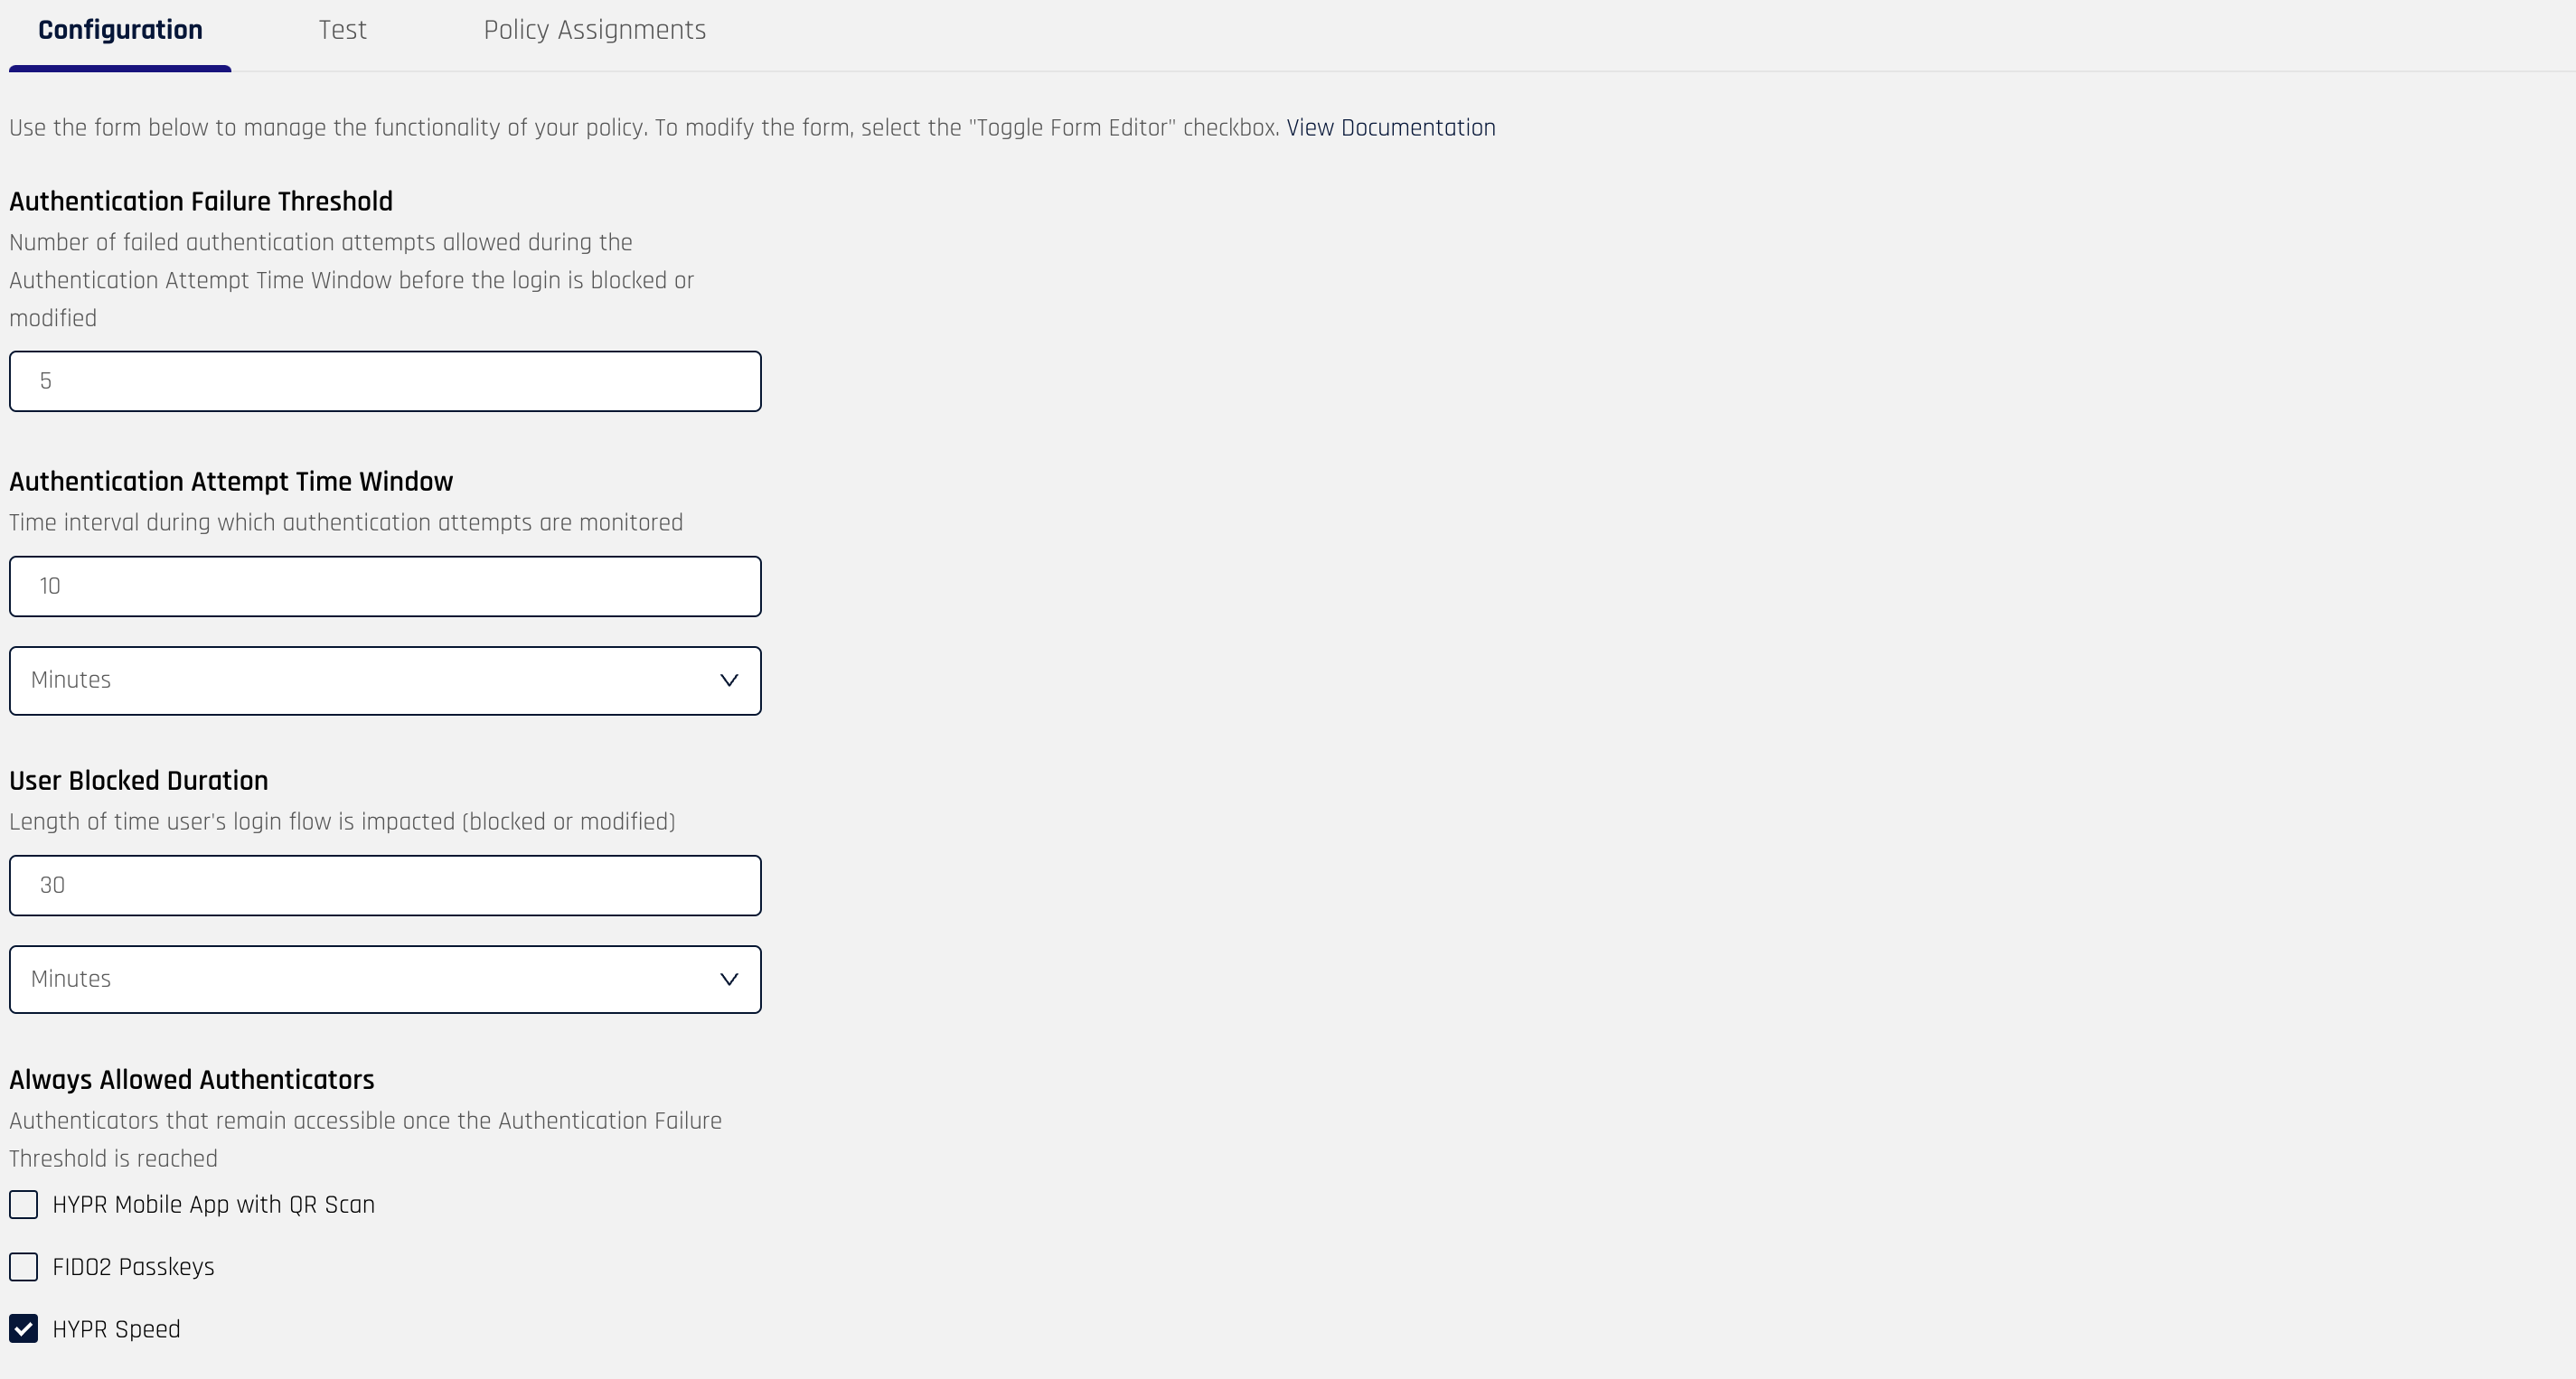
The configuration options for a risk policy will differ based on the template from which the policy was created. In addition, a custom policy may have custom configuration options set for a spceific policy. See Risk Policy Templates for the list of available built-in policy templates and their configuration options.
Click Save Configuration to save changes to your configuration.
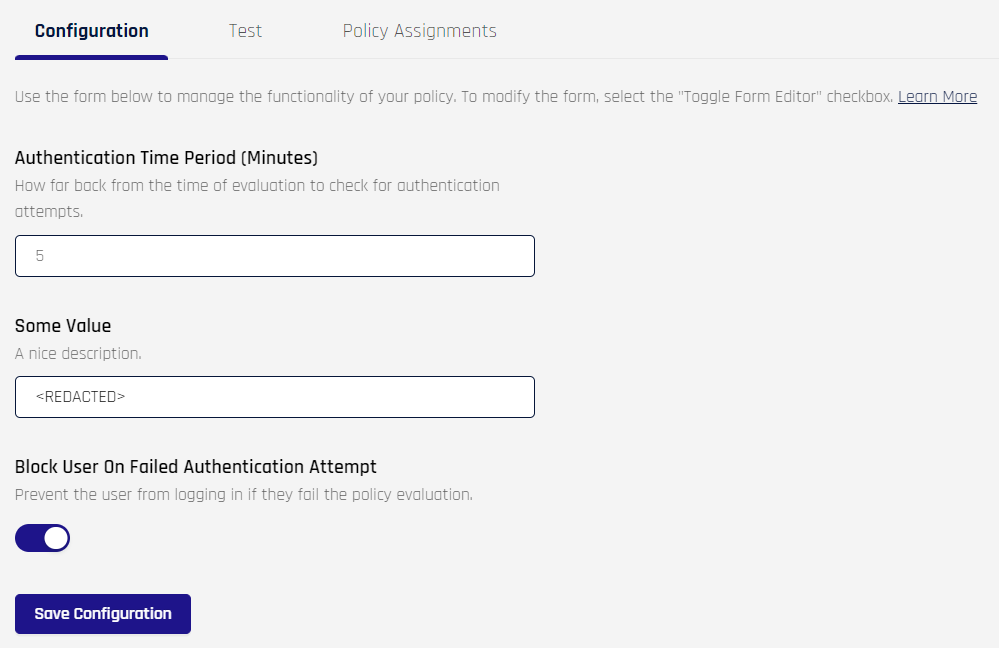
For security reasons, when clicking Save Configuration on the risk policy's Configuration tab, if a field key contains the strings, key, secret, or token, or if it starts with pass, Adapt will thereafter display <REDACTED> in the field contents, obscuring the actual value.
Actual values will still be available to the Risk Policy.
This code sample above will result in secret_field displaying a redacted value.
fields:

  time_period:
    type: number
    required: true
    label: Authentication Time Period (Minutes)
    description: How far back from the time of evaluation to check for authentication attempts.
    defaultValue: 5

  secret_field:
    type: text
    required: true
    label: Some Value
    description: A nice description.
    defaultValue: secret stuff

  block_on_failed_eval:
    type: switch
    label: Block User On Failed Authentication Attempt
    description: Prevent the user from logging in if they fail the policy evaluation.
    defaultValue: true
Form Editor
For custom Risk Policies, the configuration form can be modified to add or remove fields from the form. This can be done through the form editor. To access the form editor, click the Toggle Form Editor checkbox on the right side of the page. The editor will appear next to the form.
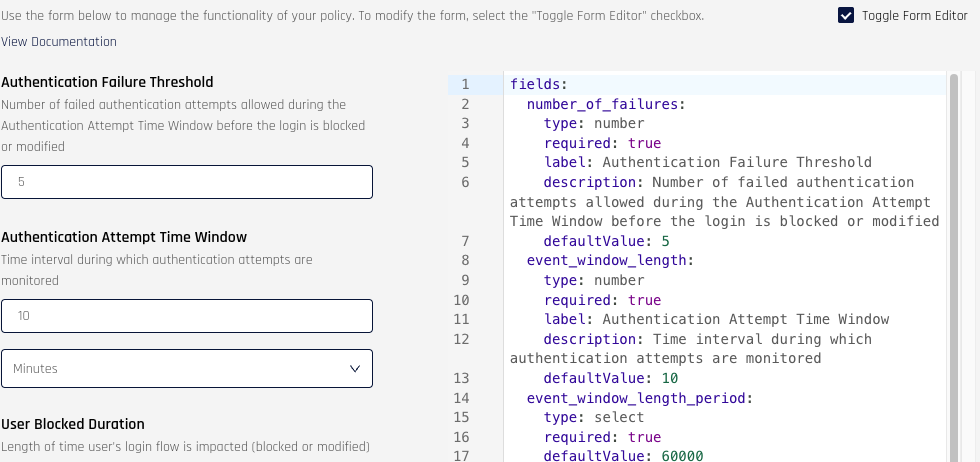
The configuration form will be disabled while the editor is active. Additionally, the values in the form fields will be set to whatever the default value is for a field set by the form configuration. This will revert to the previous value when the editor is made inactive.
The form editor accepts YAML or JSON. To add fields, you must specify a fields key at the top-level of your config. The fields property is an object that accepts a list of fields to be generated for your configuration form. Below is an example of a text field:
YAML
fields:
  custom_field:
    type: text
    label: Custom Field
    description: A custom field
JSON
{
  "fields": {
    "custom_field": {
      "type": "text",
      "label": "Custom Field",
      "description": "A custom field"
    }
  }
}
Below are the different properties that can be defined for a field:
type: The type of field to generate. Can be one of the following:textnumbercheckboxselectswitchradiodatetime
label: The title for the fielddescription: The description for the fieldrequired: Set if the field is required. Accepts eithertrueorfalsedefaultValue: Sets the default value for the fieldoptions: Sets the list of options to choose for a field. Theoptionsproperty accepts alabelandvalue. This property is only applicable forcheckbox,selectandradiotypes. Below is an example of theoptionsproperty defined for aselecttype field:event_window_length_period:
type: select
required: true
defaultValue: 60000
options:
- label: Seconds
value: 1000
- label: Minutes
value: 60000
- label: Hours
value: 3600000
- label: Days
value: 86400000
* Editing options are only available for custom Risk Policies
Test
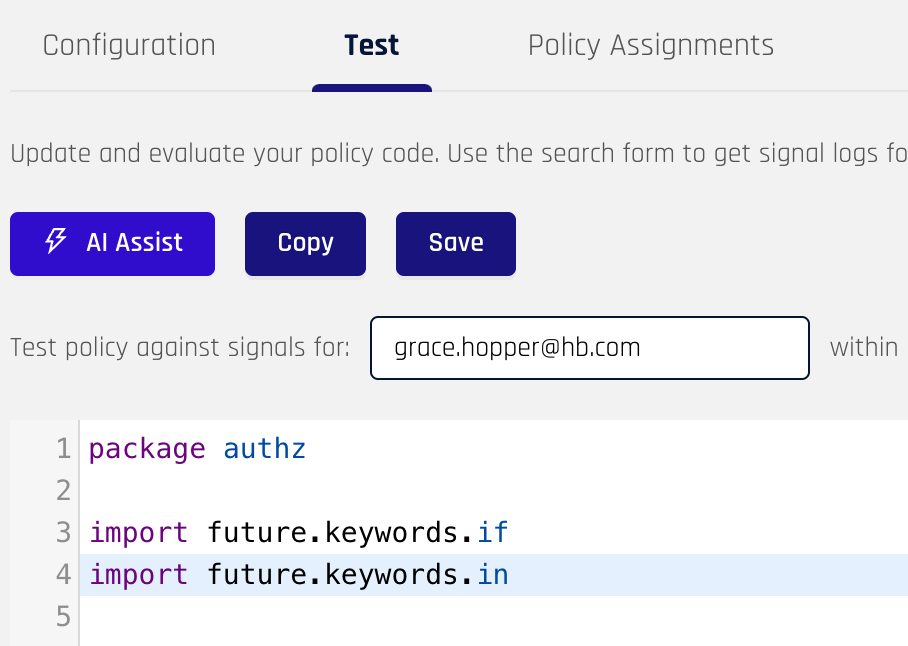
To test or edit* a Risk Policies' source code, click the Test button at the top of the drawer pane:

This will take you to the Test tab pane in the Risk Policies' details page.

Use the right-side pane to make changes to the Risk Policy source code.* Risk Policy code is written in Rego. After making changes to the code, click Save at the top of the pane.
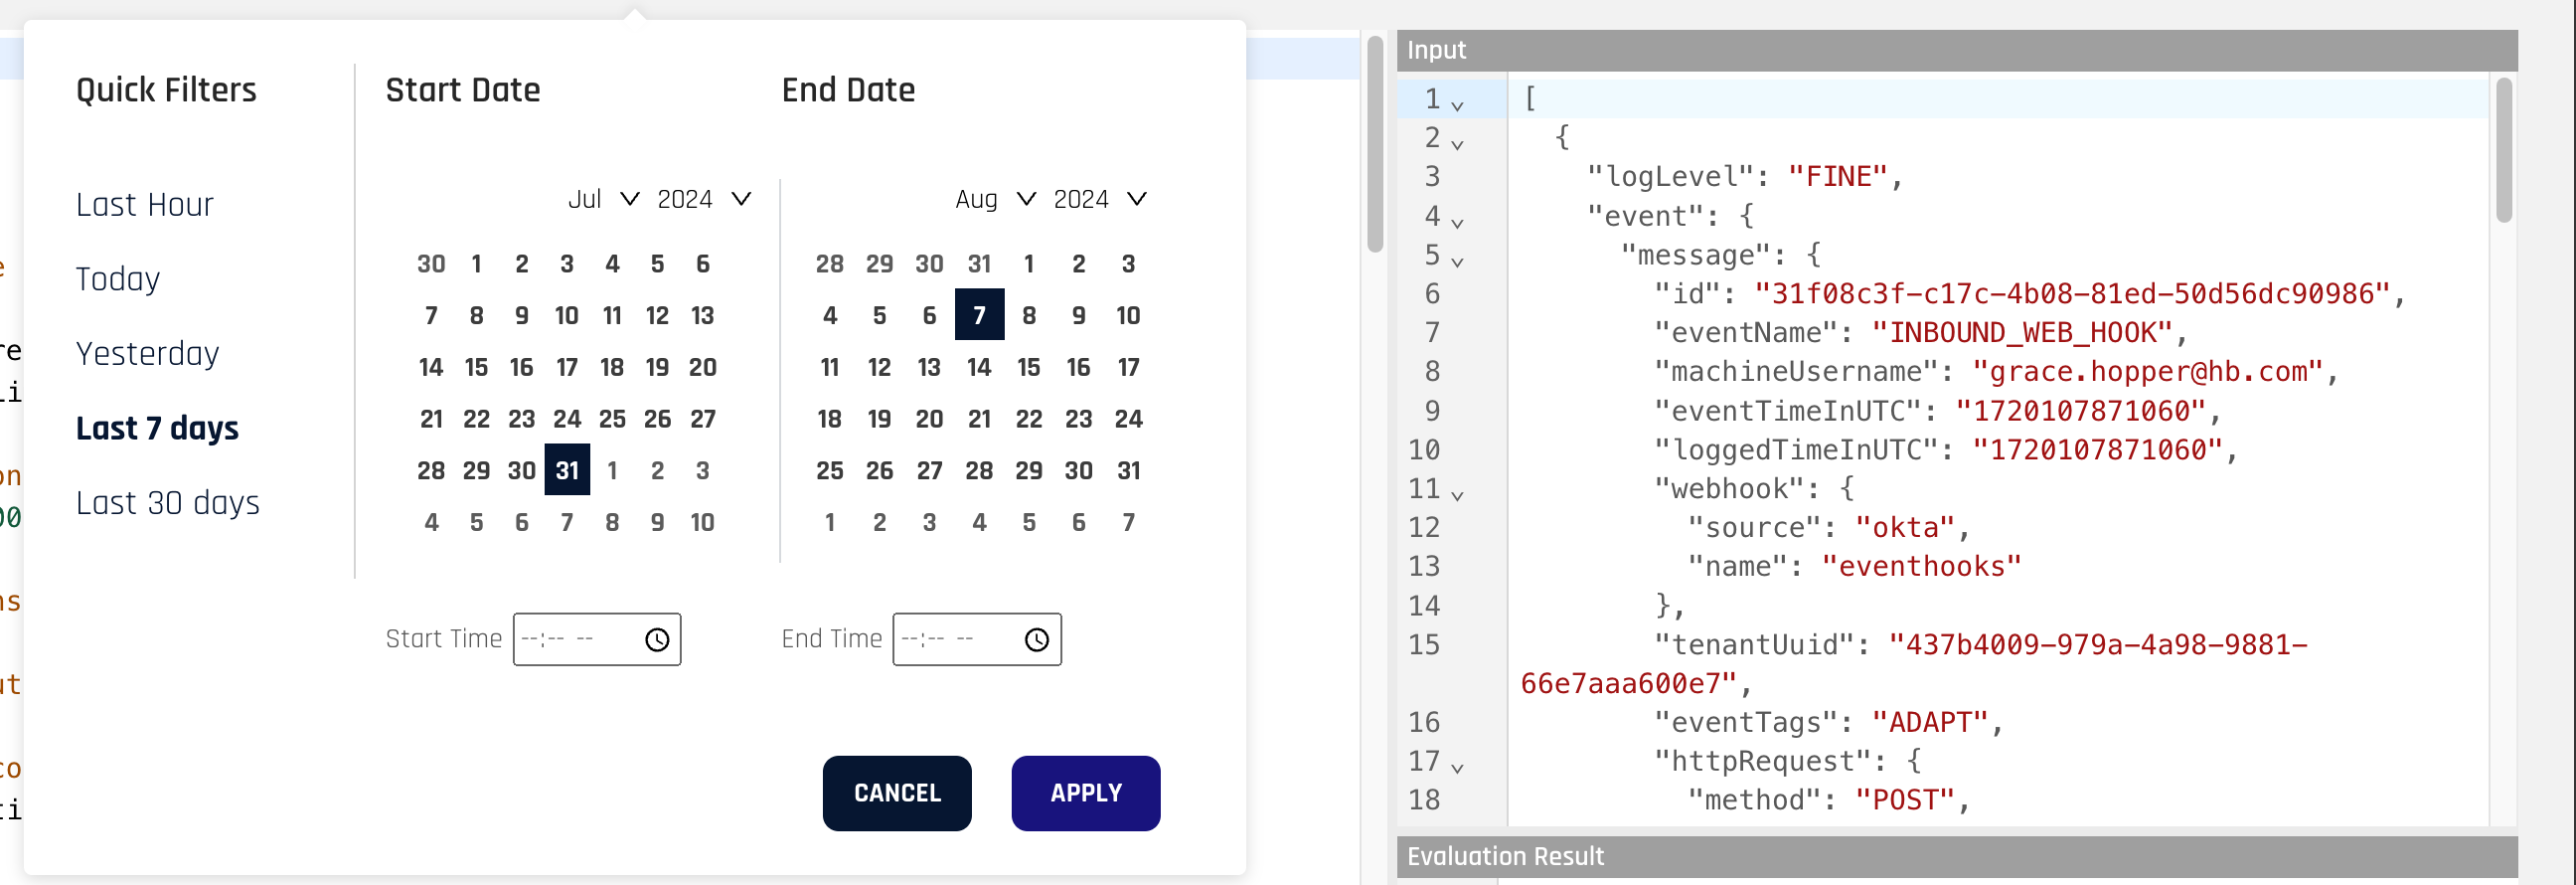
To test the Risk Policy, you will need to input test signals into the Input panel on the page. You can retrieve signals using the date range field which will fill in the input field with signals saved from Control Center within a certain time period. You can also click Evaluate which will automatically retrieve the signals before evaluating your policy if there are no signals in the Input panel.
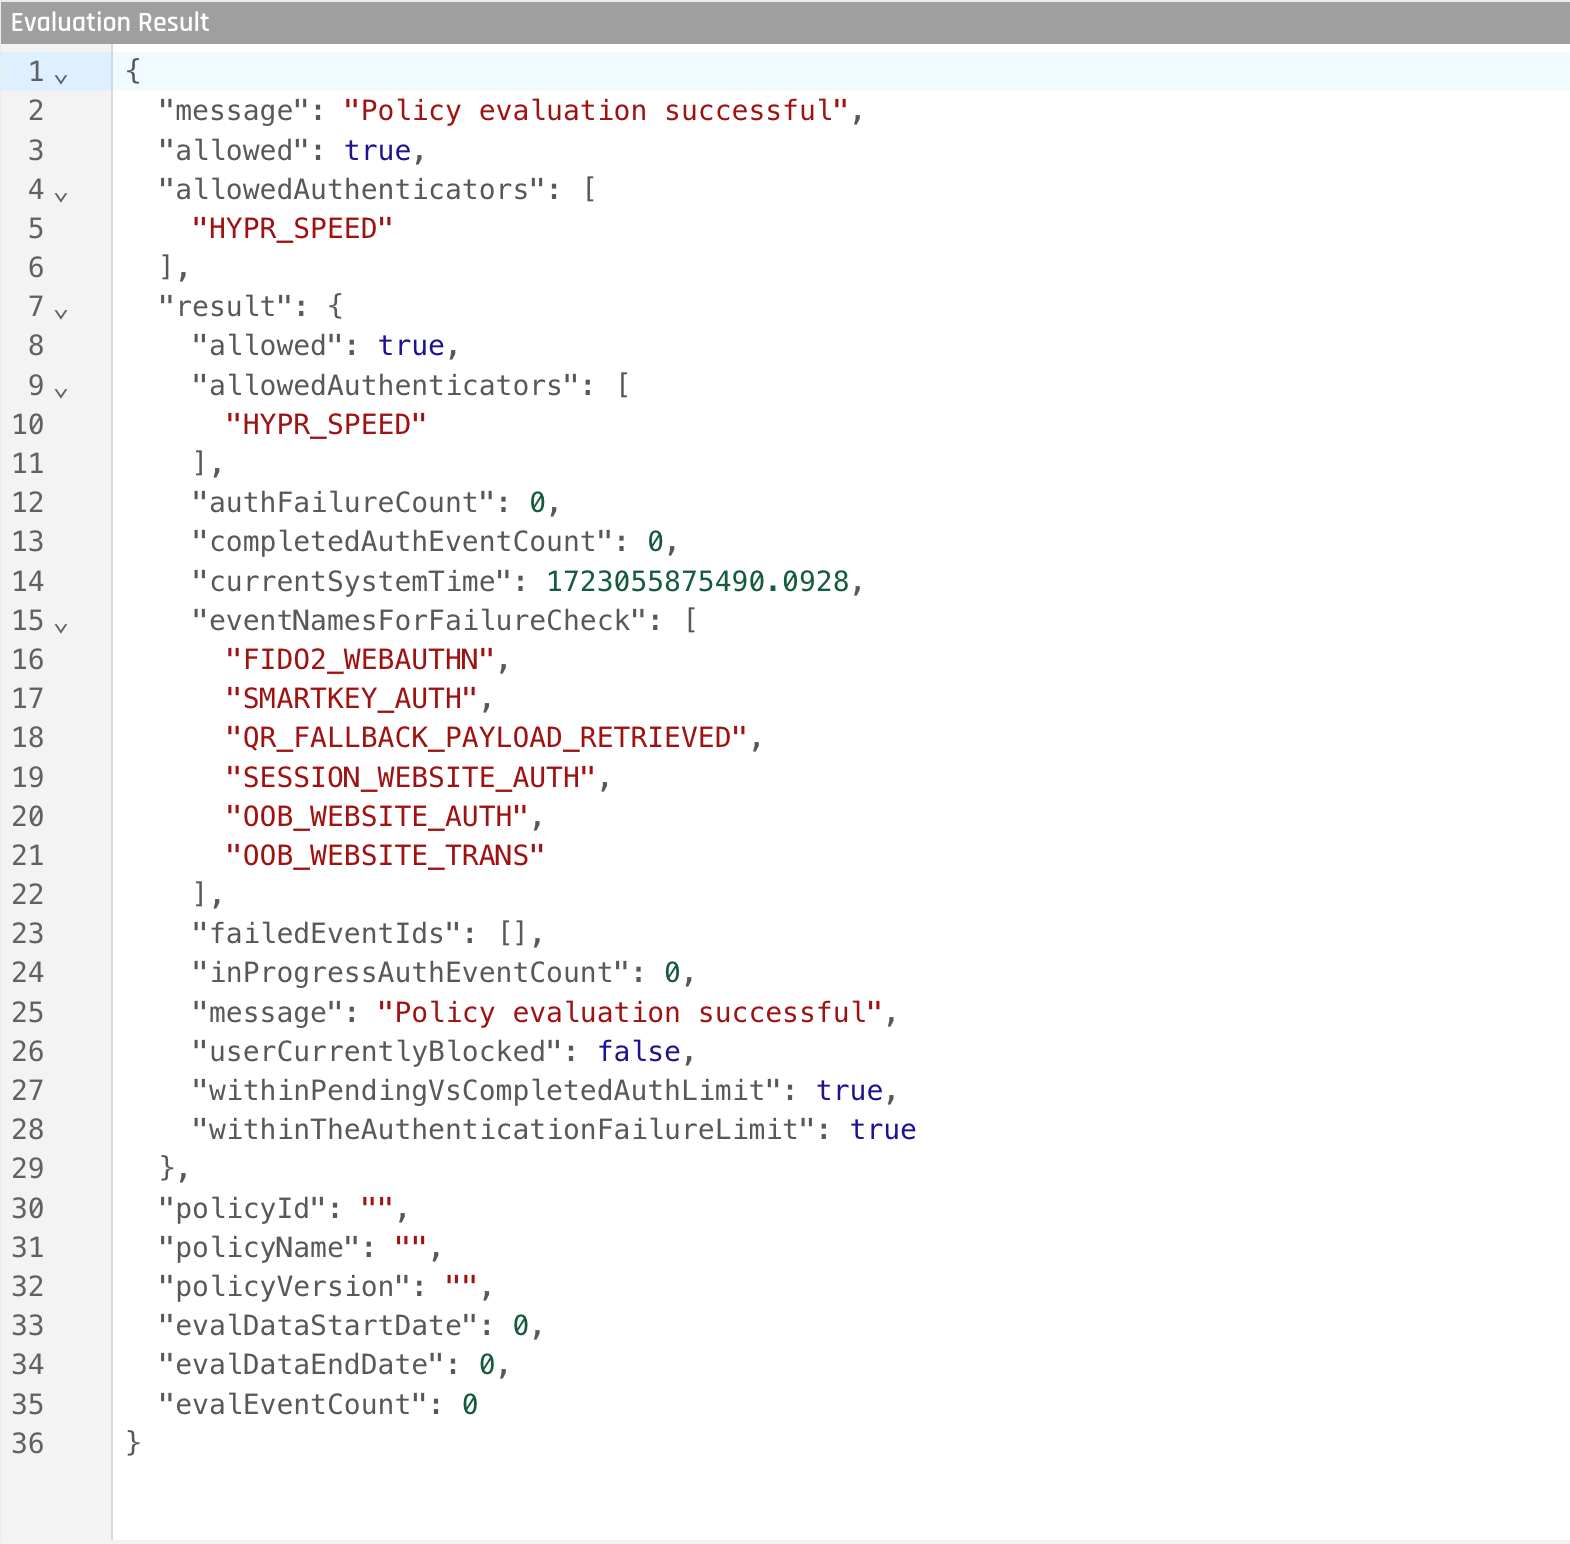
When you are ready to evaluate your policy, click Evaluate to have HYPR do a test evaluation of the Risk Policy; the result of the evaluation will appear in the Evaluation Result pane.
* Editing options are only available for custom Risk Policies
Policy Assignments
Through Policy
To view the applications a policy is assigned to, select the policy in the Risk Policies page. This will open a drawer pane from the right-side of the screen. If any applications have the policy assigned, they will appear in a table within the drawer pane under Policy Assignments.
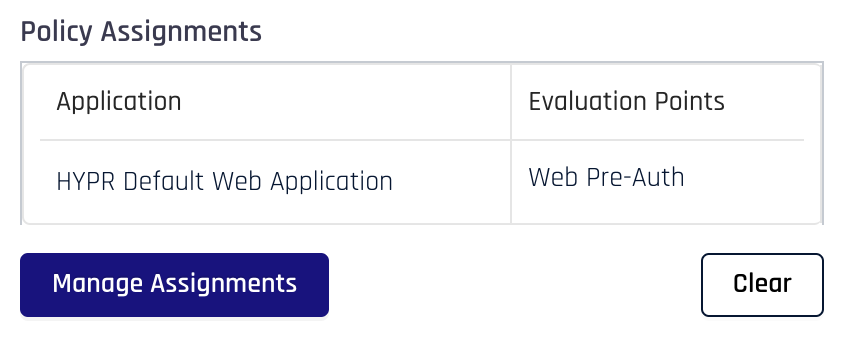
To manage policy assignments, you can click Manage Assignments. This will take you to the Policy Assignments tab pane in the Risk Policies' details page.

Additionally, if you would like to just remove all policy assignments, you can click Clear. This will bring up a pop-up box to confirm your action. Click Clear Assignments to confirm removal of the policy assignments.

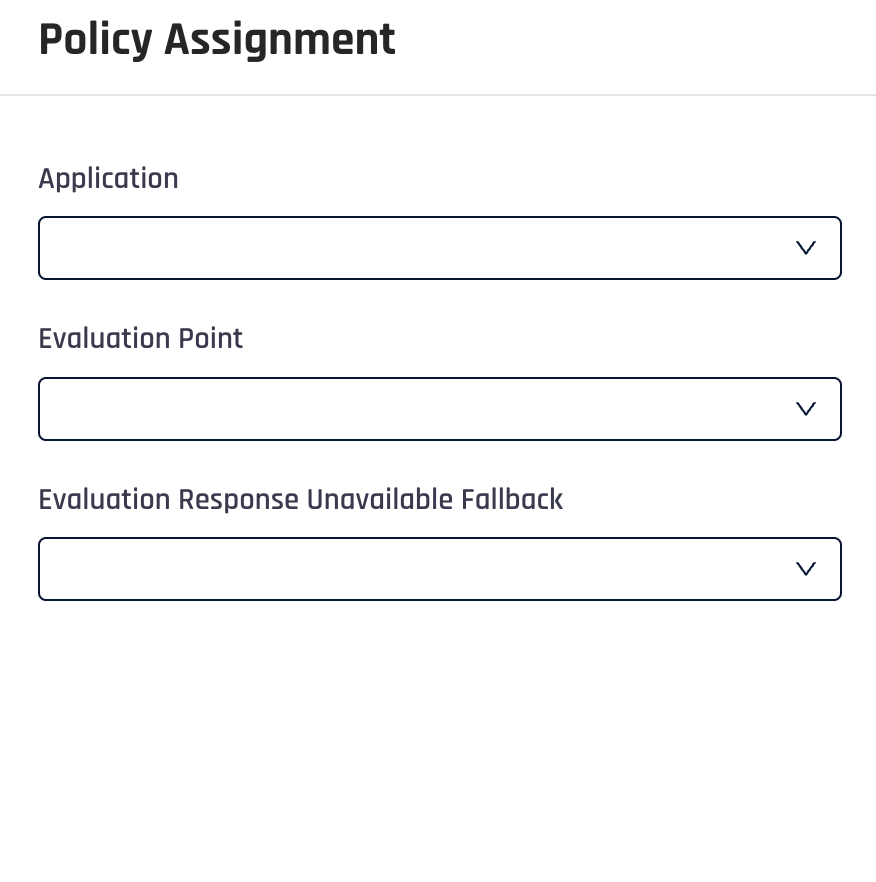
In the Policy Assignments tab pane, you can add a new policy assignment or remove existing ones. To add a new policy assignment, click + Policy Assignment. This will open a drawer pane on the right side of the screen with a form to fill in the assignment details.
-
Application: Use the drop-down menu to select the application this policy should be added to
-
Evaluation Point: Choose the point in the authentication flow where the policy will be applied; refer to the Evaluation Points section in this article
-
Evaluation Response Unavailable Fallback: Choose behavior for when Adapt is not available to verify the policy. Options include the following:
-
Standard Workflow: Proceed normally, with no change to the authentication flow
-
Block Authentication: Block the user from authenticating for the User Blocked Duration defined for the applied policy
-
To delete a policy assignment, select an assignment from the table. This will open a drawer on the right side of the screen with a button to delete the assignment.
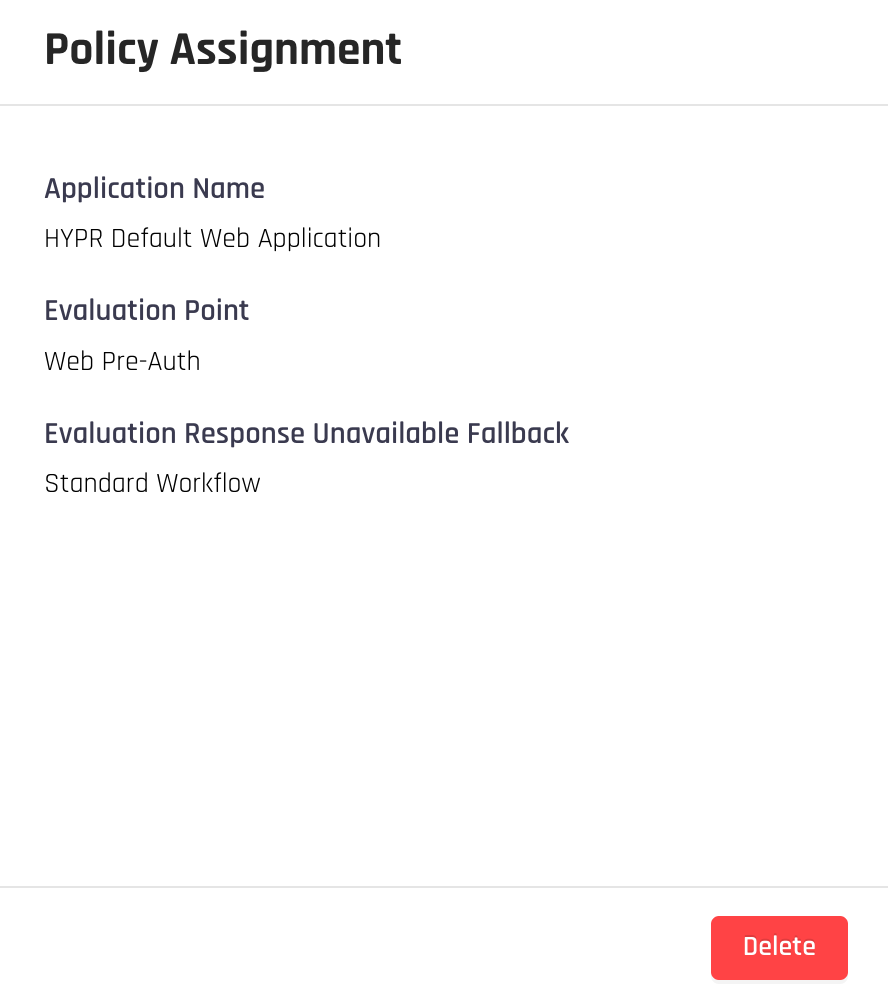
Click Delete and a pop-up box will appear to confirm your action. Click Remove Assignment to confirm removal of the assignment. The page will update with the assignment removed.

Through Application
To view the policies an application has assigned, go to the Login Settings page for the application.
-
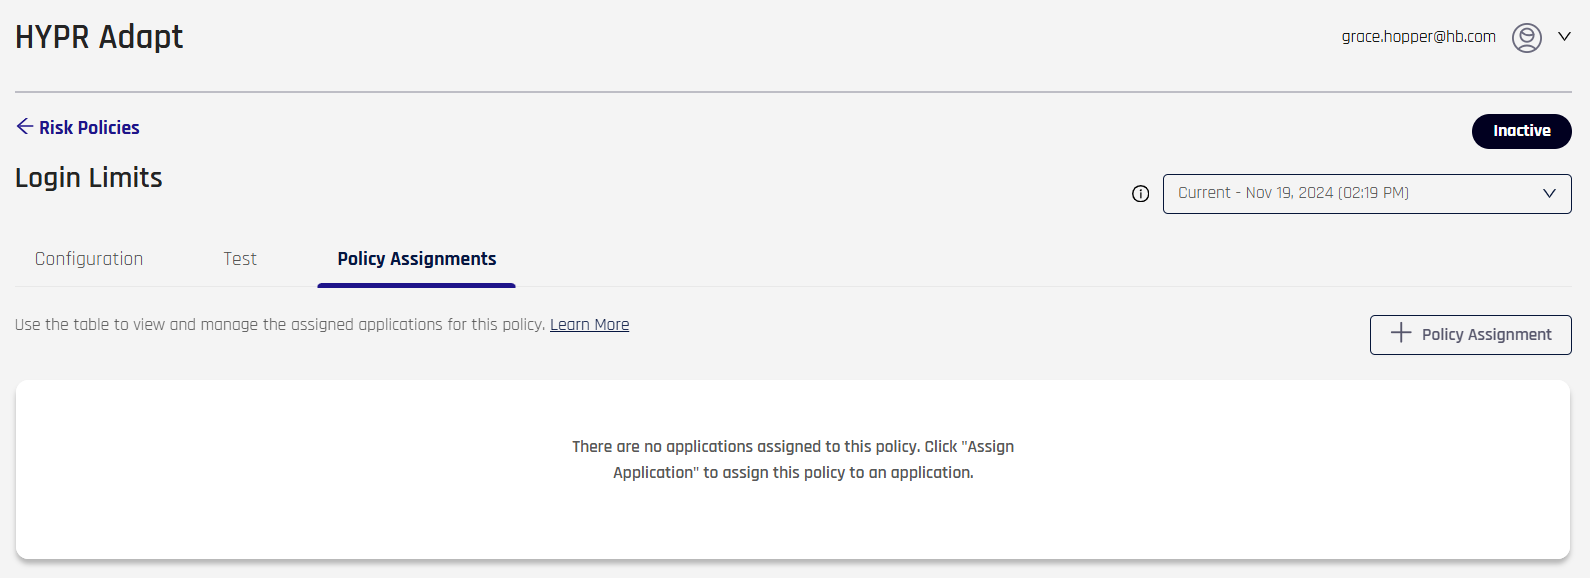
In CC Standard Mode, in HYPR Adapt, assign an application to a policy under the policy's Policy Assignments tab by clicking + Policy Assignment to open the assignment dialog
-
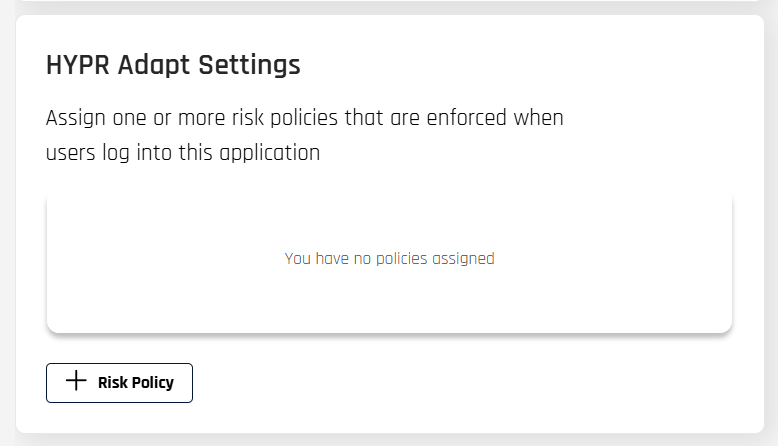
In CC Standard Mode, assign a policy to an application in Integrations > Configured Integration Name > Login Settings by clicking Assign Risk Policy to open the assignment dialog
-
In CC Advanced Mode, assign a policy to an application in Application Name > Login Settings by clicking Add Risk Policy to open the assignment dialog

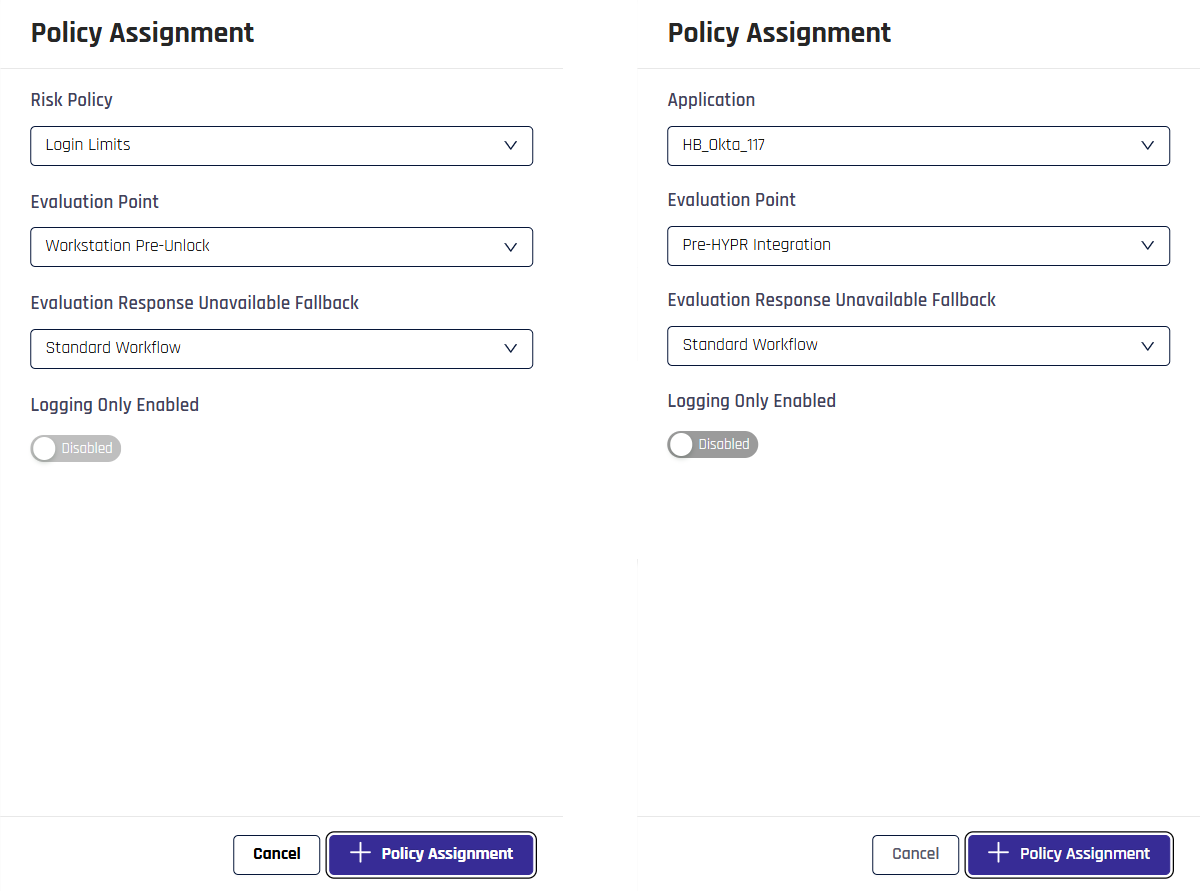
Depending on where you are in Control Center, you may be adding a policy to an Application or an Application to a policy; The initial drop-down is determined by where you start, but manages a 1:1 relationship between a policy and its assigned application.
-
Risk Policy: Use the drop-down menu to select a policy to govern this application's behavior
-
Application: Use the drop-down menu to select an application to be governed by this policy
-
Evaluation Point: Choose the point in the authentication flow where the policy will be applied; refer to the Evaluation Points section in this article
-
Evaluation Response Unavailable Fallback: Choose behavior for when Adapt is not available to verify the policy. Options include the following:
-
Standard Workflow: Proceed normally, with no change to the authentication flow
-
Block Authentication: Block the user from authenticating for the User Blocked Duration defined for the applied policy
-
-
Logging Only Enabled: When toggled on, this policy is not enforced and only generates log results
Click Save when finished. The Login Settings page now lists applied policies under HYPR Adapt Settings.

To remove an assignment click Remove at right and confirm removal in the resulting dialog to dissociate a policy from the currently selected RP Application.

Evaluation Points
Where in the authentication flow is a policy applied?
| Label | API Value | Description |
|---|---|---|
| Web Pre-Auth | PRE_WEB_AUTH | For OOB/QR flows, this is invoked before the push message is sent, to block push bombing; for FIDO2, this is invoked on assertions/options, since there is no other pre-step for FIDO2. |
| HYPR Mobile Pre-Auth | PRE_FIDO_AUTH | Evaluates after HYPR Mobile App authentication; on fido/get/auth. |
| FIDO2 Passkey Pre-Auth | PRE_FIDO2_AUTH | Evaluates before FIDO2 passkey authentication; on fido2/assertion/options. |
| Workstation Pre-Unlock | PRE_WORKSTATION_UNLOCK | At the start of the workstation unlock request; on /client/authorize/unlock. |
| Web Post-Auth | POST_WEB_AUTH | On /rp/api/oob/client/authentication/requests/{requestId} and request status == COMPLETED. |
| HYPR Mobile Post-Auth | POST_FIDO_AUTH | Evaluates after HYPR Mobile App authentication; on fido/send/auth. |
| FIDO2 Passkey Post-Auth | POST_FIDO2_AUTH | Evaluates after FIDO2 passkey authentication; on fido/send/auth. |
| Workstation Post-Unlock | POST_WORKSTATION_UNLOCK | At the start of the workstation unlock request: - on client/authorization/complete/{sessionId}- on client/verification/complete/{sessionId} |
| Pre- and Post-HYPR Integration | PRE_AUTH_INTEGRATIONS POST_AUTH_INTEGRATIONS | Track the policy check before/after an authentication request from a HYPR integration. For example, the native HYPR login calls the PRE evaluation point before it displays the authentication options; these are special in that these are not invoked by Control Center directly - only when a policy evaluation is requested on these points via API. |
Reversion
The drop-down in the upper right contains past versions of this policy. To revert to a previous version, select the desired version and clear the confirmation, then click Save. The information in all tabs will change to reflect the version-specific settings.

Signals Interval
In Control Center Advanced Mode: Workstation Settings, set the interval (in seconds) that HYPR polls for signal data. The default is 3600 seconds, or 1 hour.
Remember to scroll to the bottom of Workstation Settings and click Save when finished.